
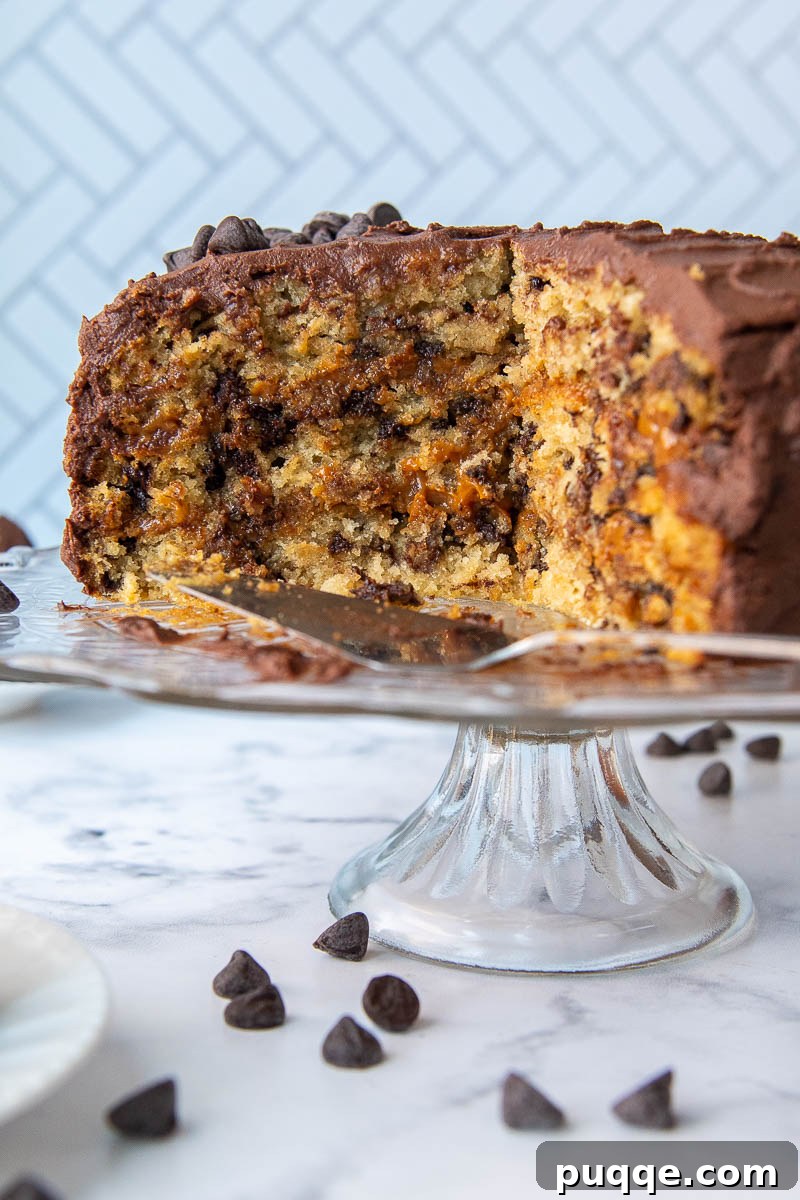
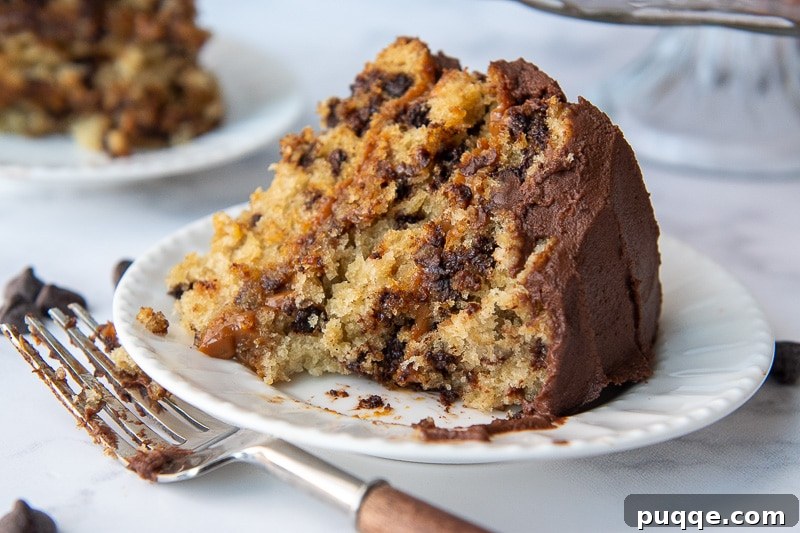
Indulge in a truly extraordinary dessert experience with this incredible Carmelita Cake recipe. Inspired by the beloved gooey oatmeal Carmelita bars, this magnificent layer cake features moist, wholesome oatmeal cake layers generously filled with a luscious dulce de leche caramel and crowned with a light, airy whipped ganache frosting. It’s a symphony of textures and flavors – rustic oats, rich caramel, and decadent chocolate – all coming together in a surprisingly simple yet show-stopping confection perfect for any occasion.
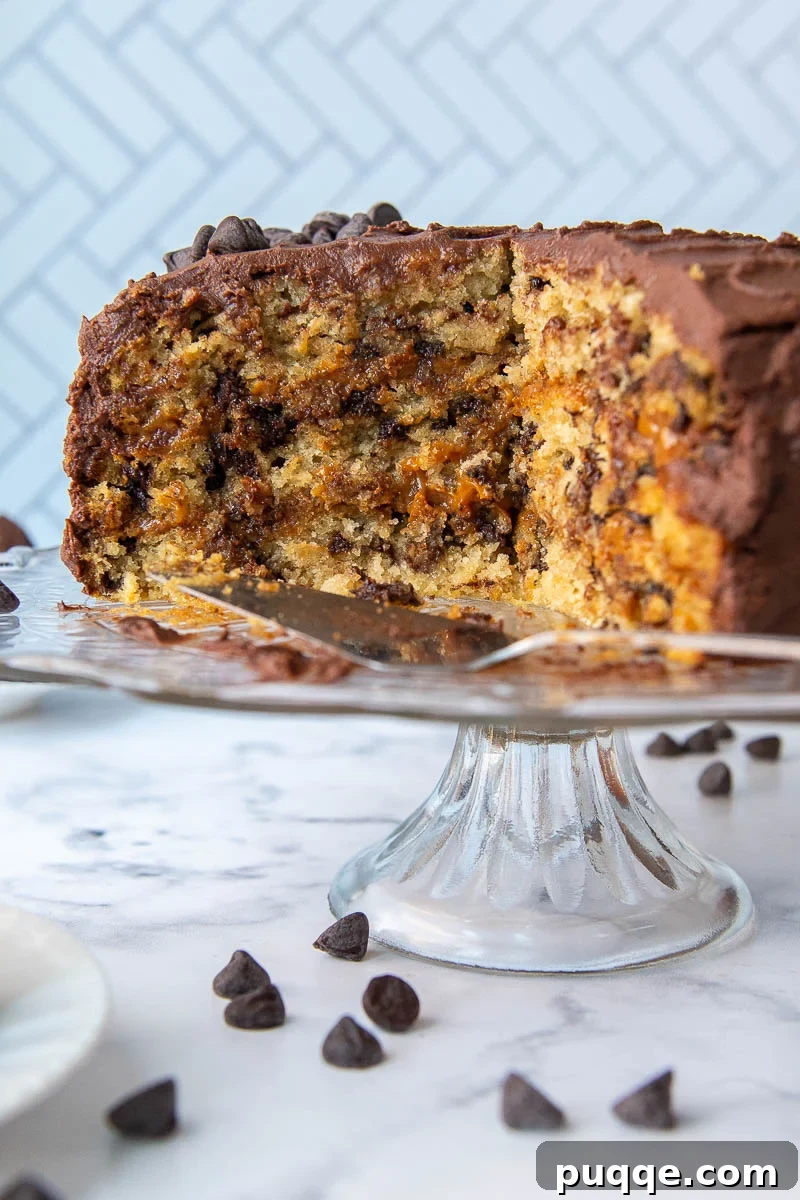
Why This Carmelita Cake Recipe is a Must-Try
There’s an undeniable magic in the combination of chewy oats, decadent caramel, and rich chocolate. If you’re a fan of the classic Carmelita bars, prepare to fall head over heels for this cake version! It captures everything you adore about those gooey, satisfying treats and elevates them into an elegant, shareable dessert. This homemade Carmelita cake has become a highly requested favorite in our family’s collection of cherished homemade cake recipes, and for good reason.
To truly encapsulate the essence of Carmelita bars in cake form, three essential components must be perfectly balanced: chocolate, oatmeal, and caramel. Our moist oatmeal layer cake delivers the rustic charm and comforting texture of whole grain oats, but with an incredibly sweet, light, and tender crumb. The secret to this delightful texture lies in softening the oats in boiling water before incorporating them into the cake batter. This crucial step ensures the oats blend homogeneously, preventing them from drying out the cake and instead contributing to its unique moistness and subtle chewiness.
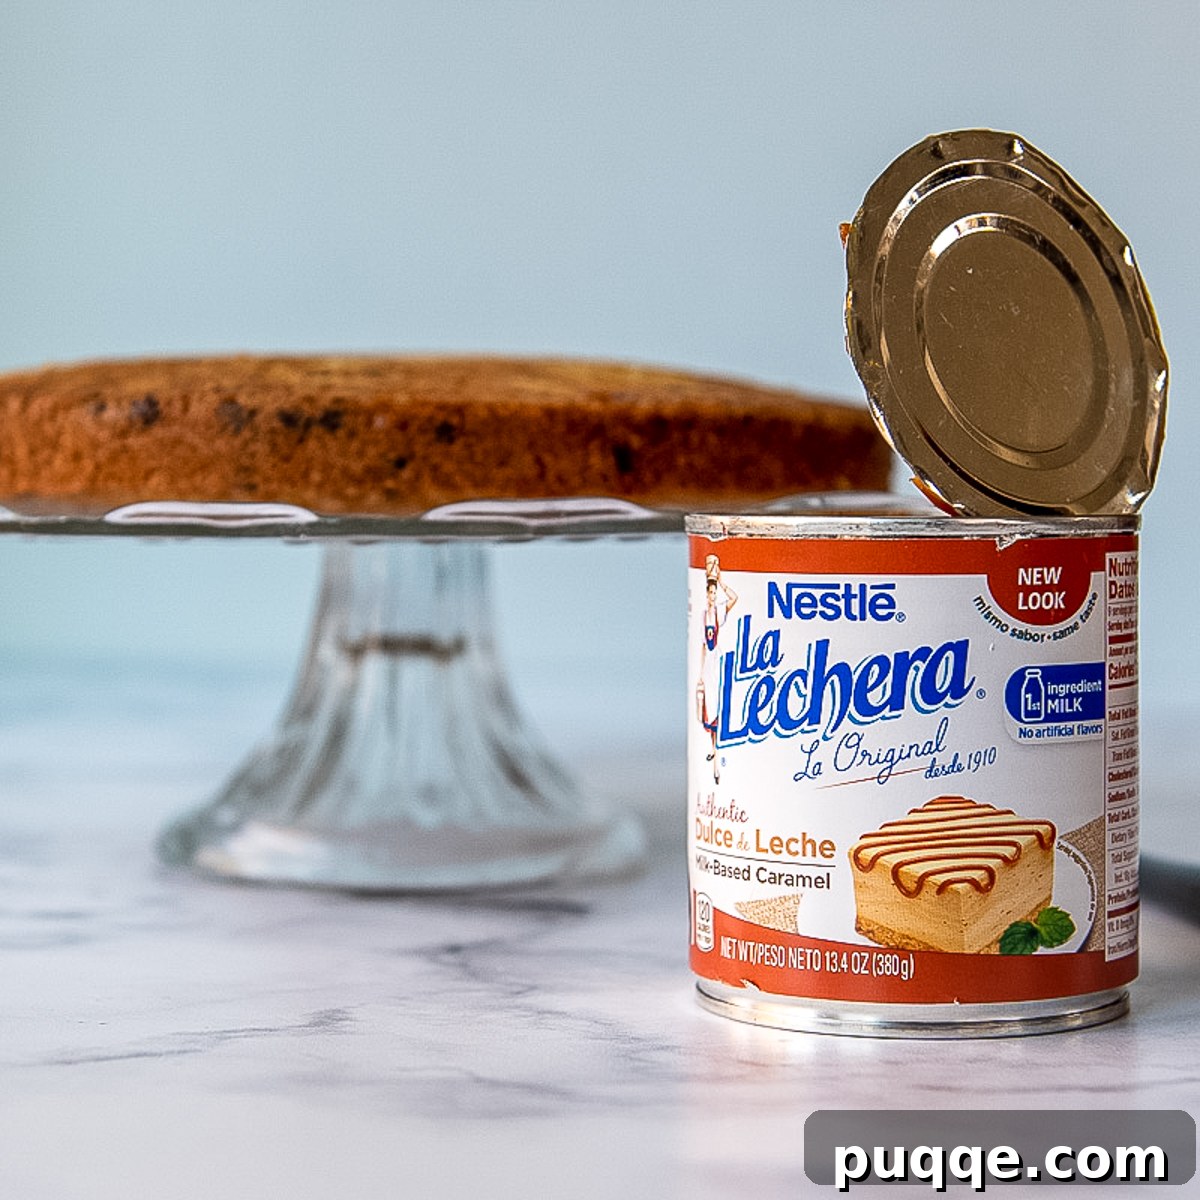
The star of the filling is undoubtedly the dulce de leche caramel. Making this luscious caramel filling is as wonderfully simple as opening a can of store-bought dulce de leche. For those unfamiliar, dulce de leche is a popular South American confection made from sweetened condensed milk that has been slowly cooked down until it transforms into a thick, caramelized, golden-brown spread. Its rich flavor and silky, thick consistency make it an ideal choice for a cake filling, as it holds its structure beautifully between the layers, preventing any unwanted sliding or collapsing. You can typically find dulce de leche in the international or ethnic foods aisle of your local grocery store. Beyond this stunning Carmelita cake, dulce de leche is incredibly versatile; I’ve also used it to create indulgent stuffed churros and in another caramel lover’s dream: homemade banoffee cake.
Step-by-Step Guide to Baking Your Carmelita Cake
Crafting this delicious Carmelita cake is an enjoyable process, and we’re here to guide you through each essential step. While the full recipe with precise ingredient amounts can be found in the recipe card below, these step-by-step photos and detailed instructions will ensure your baking journey is smooth and successful. Let’s create this together!
Creating the Moist Oatmeal Layer Cake
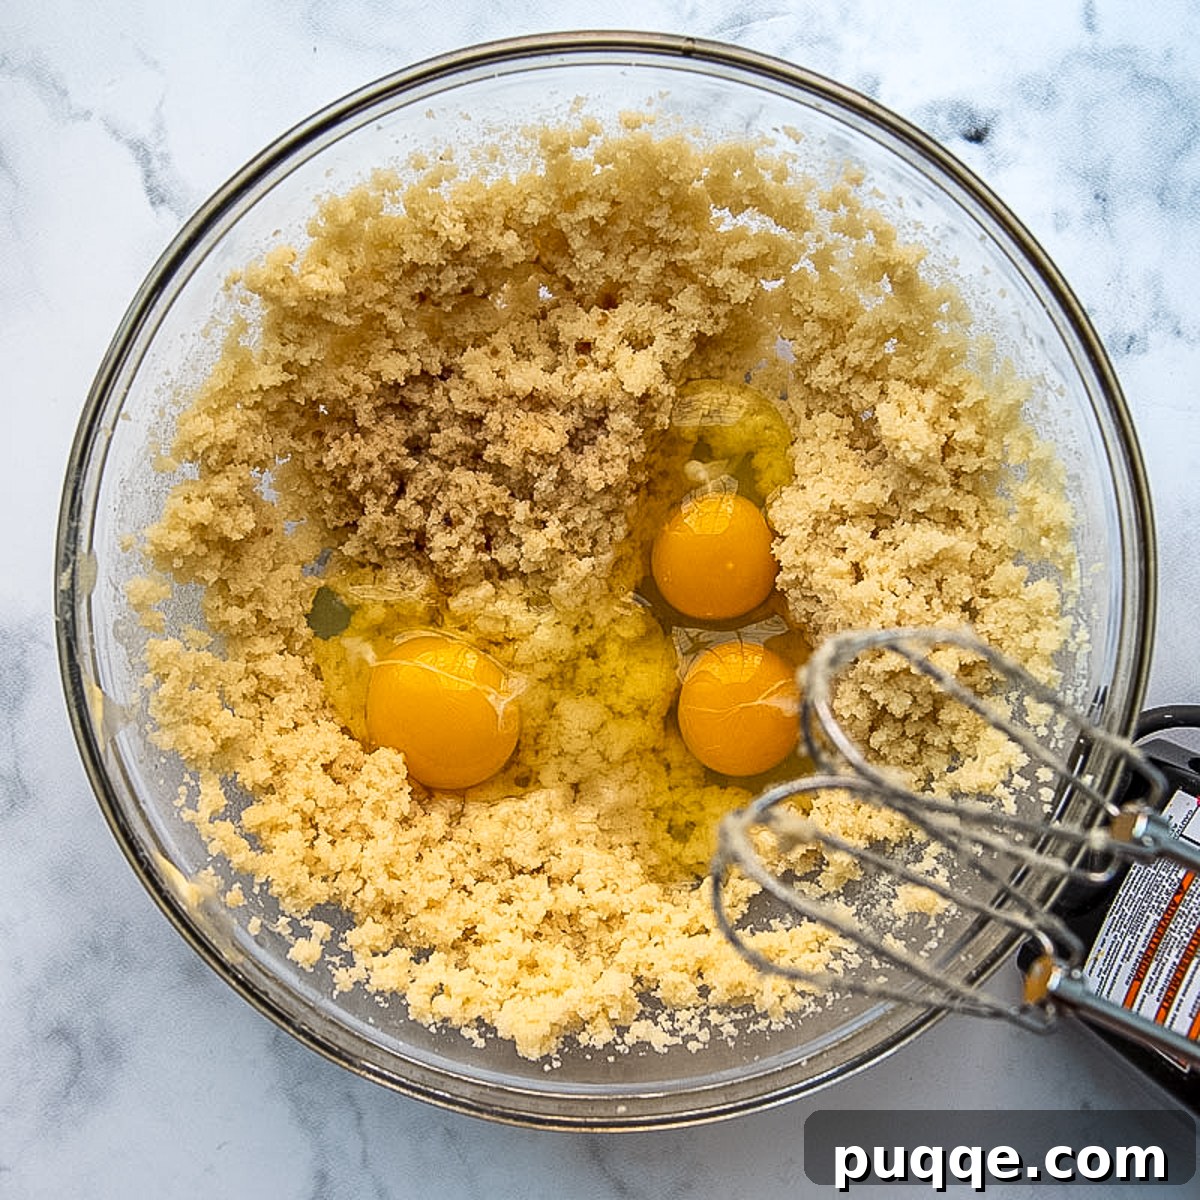
Our first step in achieving the signature moistness of this cake is to prepare the oats. Begin by mixing the rolled oats with boiling water and allowing them to cool completely to room temperature. This soaking process is crucial as it softens the oats, ensuring they integrate seamlessly into the batter and contribute to a tender crumb rather than a dry texture. While the oats are cooling, cream together the softened unsalted butter with both brown sugar and granulated sugar. Beat this mixture until it becomes light, fluffy, and noticeably pale in color, typically taking about three minutes. This creaming process incorporates air, which is vital for a light cake. Next, incorporate the large eggs, one at a time, beating well after each addition to ensure they emulsify properly. Finish by mixing in the vanilla extract, lending a warm, aromatic base to your cake batter.
Adding Dry Ingredients and Exploring Gluten-Free Options
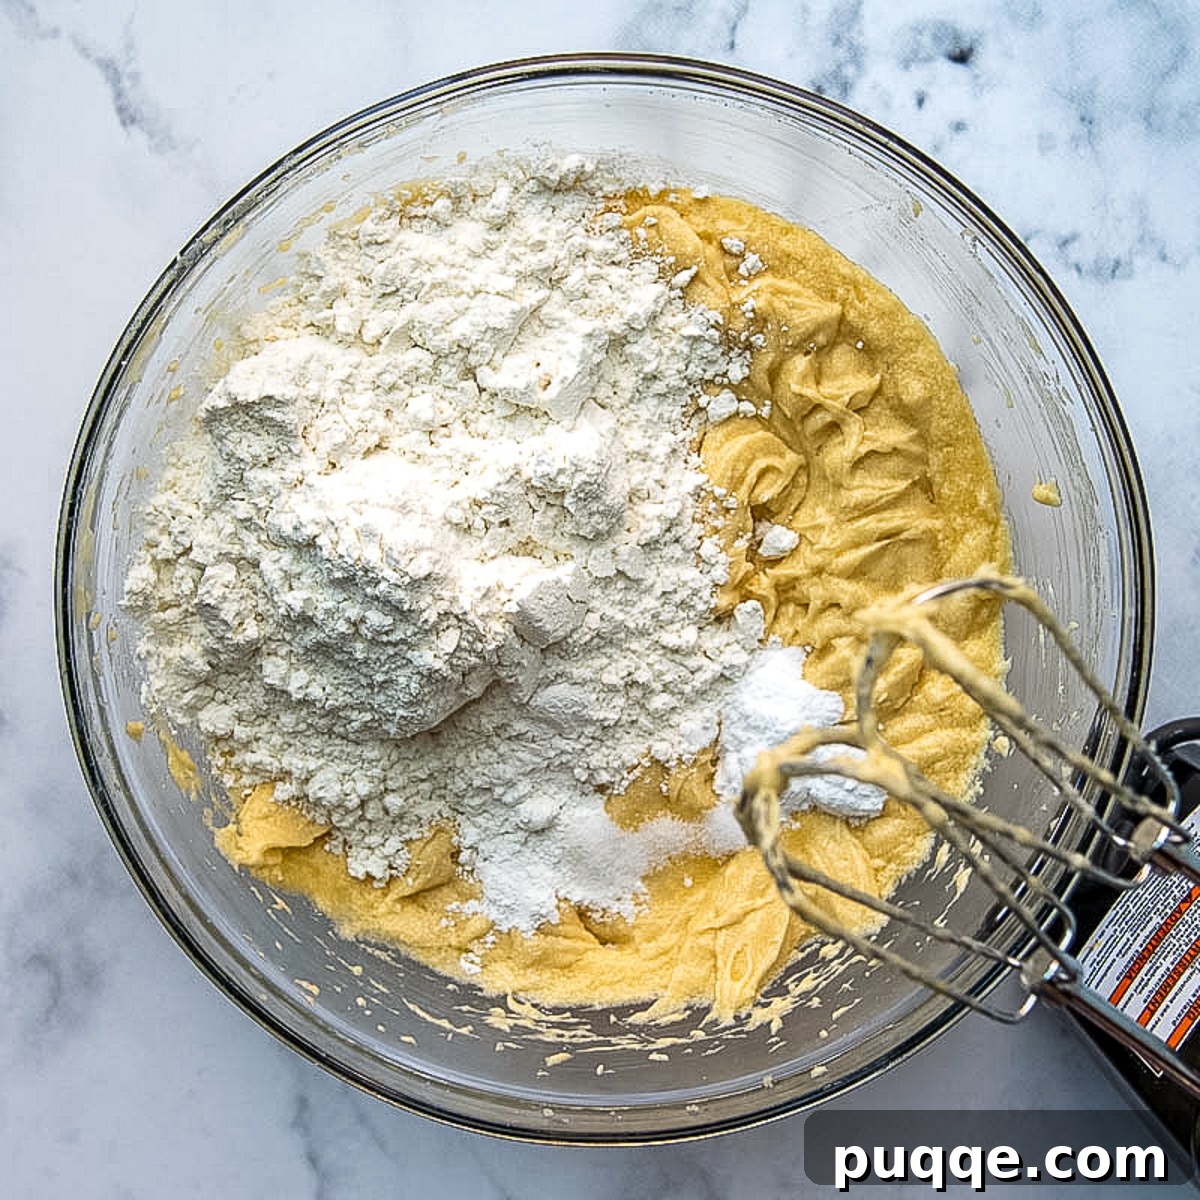
With your wet ingredients perfectly combined, it’s time to introduce the dry components that will give our cake its structure and lift. Carefully add the all-purpose flour, baking powder, baking soda, and salt to the butter and sugar mixture. Mix on low speed until the dry ingredients are just combined, being careful not to overmix, which can lead to a tough cake. For those with dietary considerations, this cake is wonderfully adaptable to a gluten-free diet. You can easily substitute regular all-purpose flour with a high-quality gluten-free all-purpose flour blend. My personal recommendation for consistent, delicious results is Cup4Cup gluten-free flour, known for its excellent performance in baking applications, yielding a texture remarkably similar to traditional flour.
Incorporating Cooled Oatmeal and Chocolate Chips
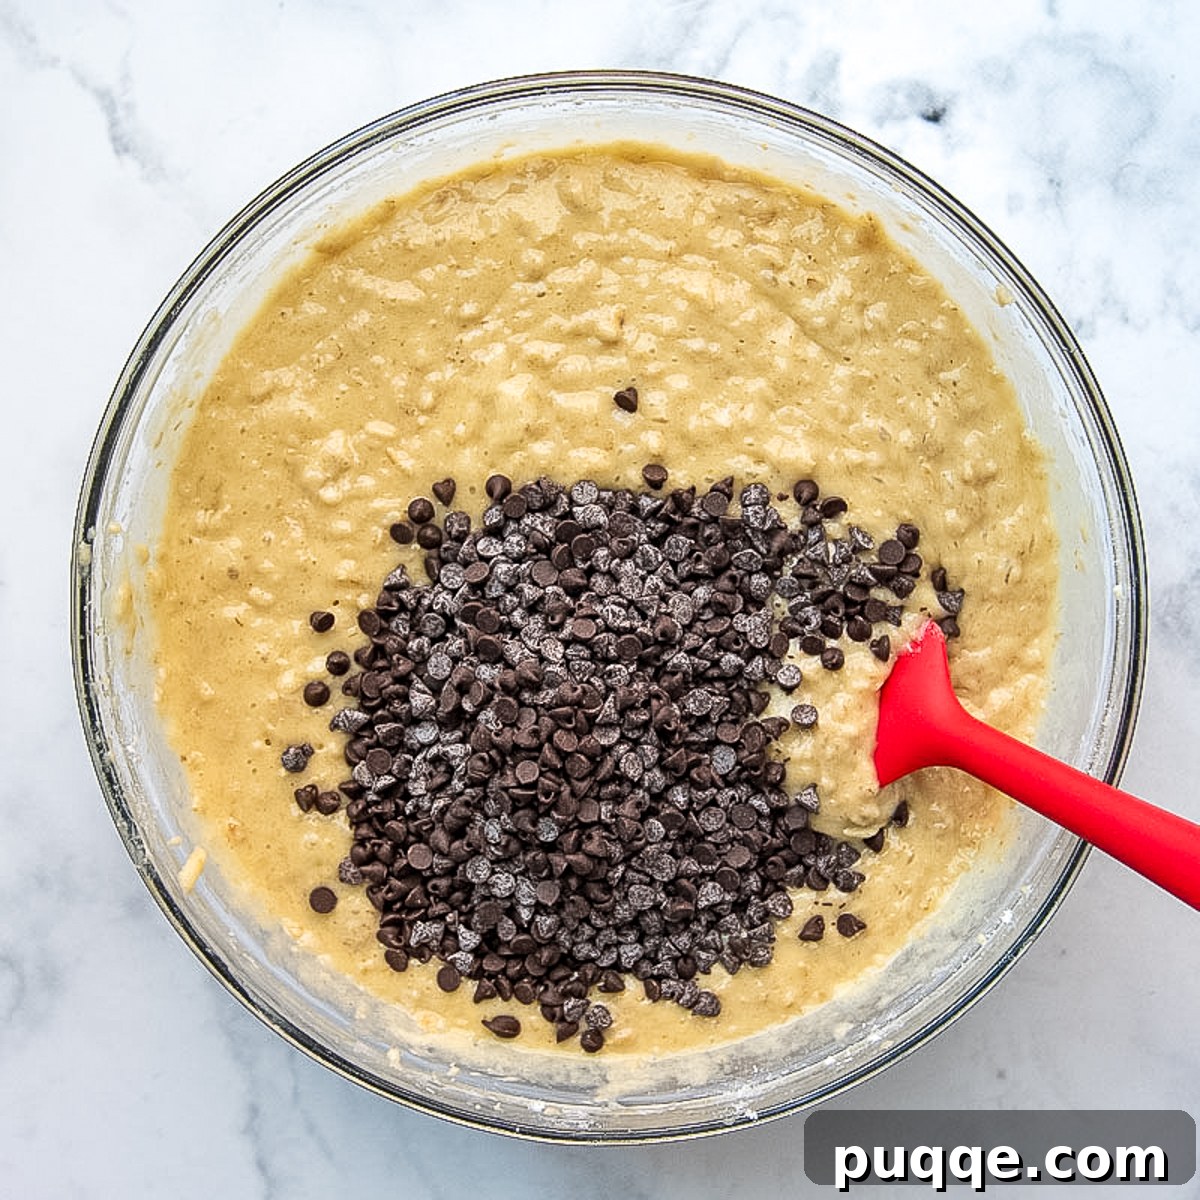
Now, the cooled, softened oatmeal is ready to be folded into the batter. Beat it in until it’s thoroughly combined, ensuring the rustic texture is evenly distributed throughout the cake mixture. For an added boost of rich chocolate flavor and delightful texture, gently stir in a cup of mini chocolate chips. Using miniature chocolate chips is a clever trick for layer cakes; their smaller size allows them to distribute evenly throughout the cake layers, preventing them from sinking to the bottom during baking. This ensures every slice of your Carmelita cake will have a perfect scattering of chocolate goodness.
Baking and Assembling with Caramel Filling
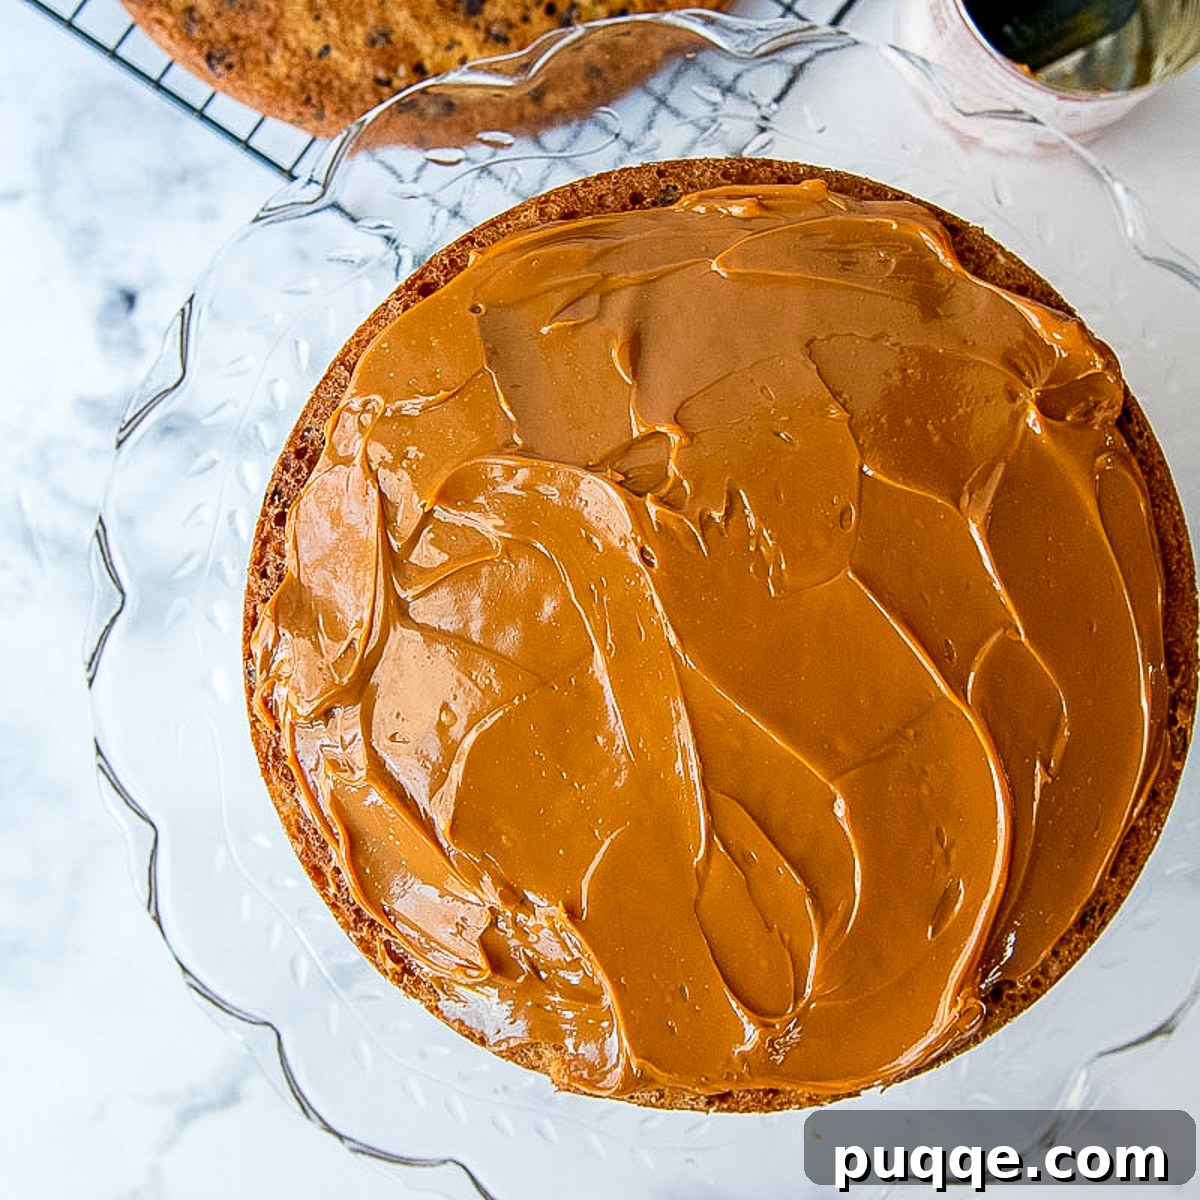
Once your cake batter is ready, divide it evenly among three prepared 9-inch cake pans. Ensure your pans are properly greased and floured (or lined with parchment paper) to prevent sticking. Bake the cakes for approximately 22-25 minutes, or until a toothpick inserted into the center comes out clean, indicating they are fully cooked. While the cakes cool on wire racks, you can begin preparing your whipped ganache frosting (detailed below). Once completely cooled, it’s time for the exciting assembly! Place the first cake layer on your chosen cake platter. Spread half of the delicious dulce de leche caramel filling evenly over its surface. Carefully top with the second cake layer, and repeat the caramel spreading. Finally, place the third cake layer on top, creating a beautiful three-tiered dessert. Now your cake is ready for its final adornment – a smooth, decadent whipped ganache frosting!
Perfecting the Whipped Ganache Frosting
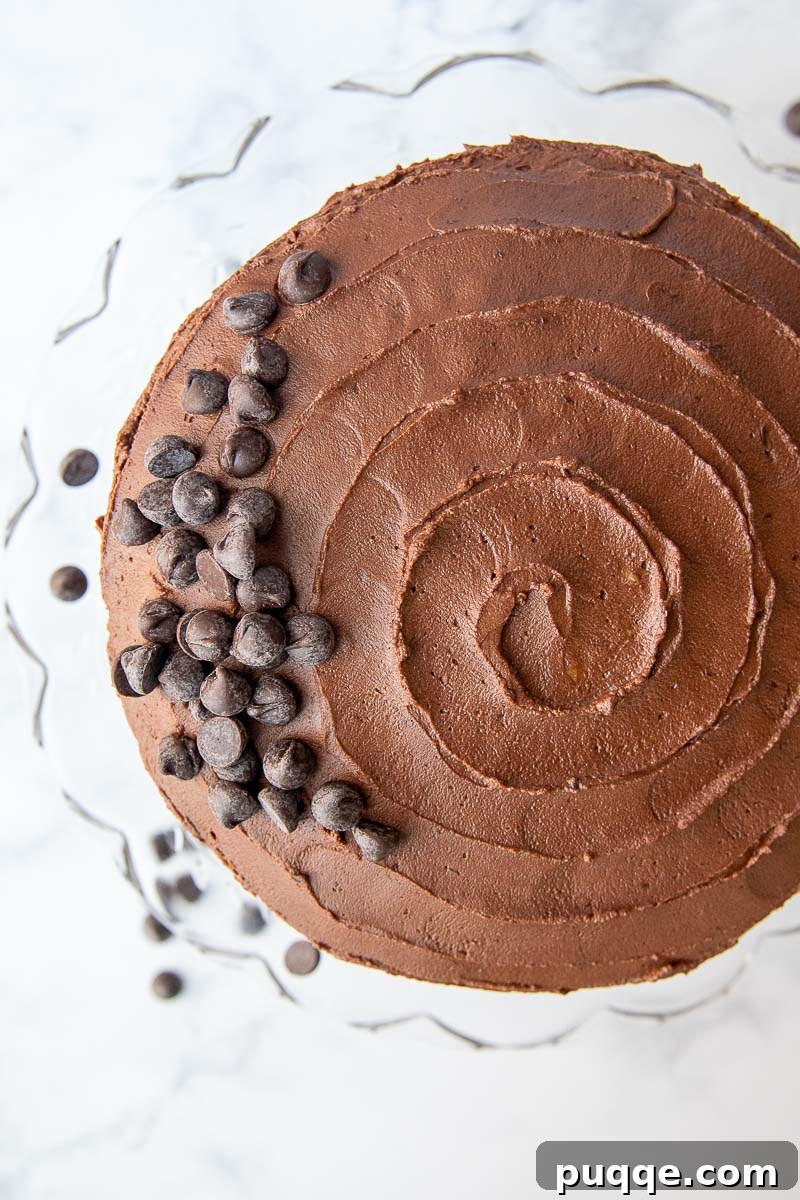
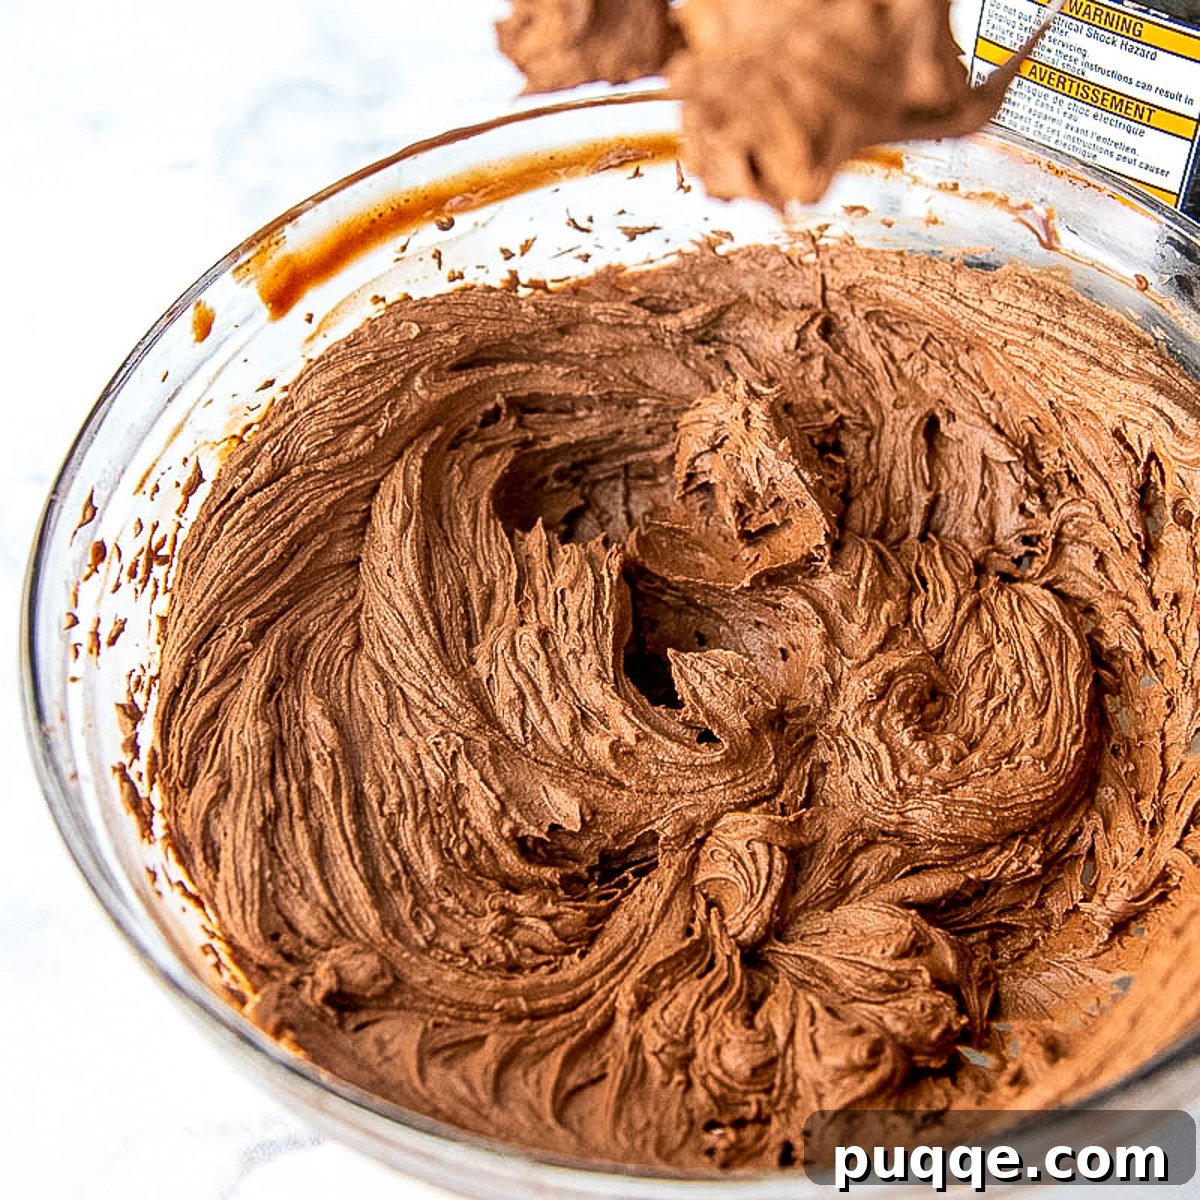
Given the inherent sweetness of the oatmeal cake layers and the rich dulce de leche caramel filling, I designed the frosting to provide a harmonious balance without being overly sweet. The answer lies in a whipped ganache. Chocolate ganache, a wonderfully simple emulsion of semisweet chocolate and hot heavy cream, naturally possesses a deep, rich, and sophisticated dark chocolate flavor. The magic happens after the ganache has cooled: whipping air into it transforms its consistency, lightening it considerably and giving it a delightfully fluffy texture, reminiscent of a luxurious chocolate buttercream but with a more intense chocolate punch and less sugar. To prepare, combine hot heavy cream and semisweet chocolate chips, letting them sit to melt before stirring until smooth. After cooling, beat this mixture until it achieves a lovely, airy, and spreadable consistency, perfect for covering your magnificent Carmelita cake. If desired, you can decorate the frosted cake with additional mini chocolate chips for an extra touch of visual appeal and chocolatey crunch.
Save this recipe to your Pinterest board!
Let’s be friends on Pinterest! I’m always sharing great recipes!
Did you make this recipe? I love hearing from you! Leave a star rating and comment below the recipe card. It helps others when searching for recipes and I appreciate feedback from our community. You will always hear back from me! -Melissa
Moist Carmelita Cake with Dulce De Leche Filling
 Melissa Erdelac
Pin
Rate
Remove Ads
Ingredients
Oatmeal Layer Cake:
- 1 ½ cups rolled oats
- 2 ¼ cups boiling water
- 1 cup granulated sugar
- 1 cup brown sugar
- ¾ cup unsalted butter, softened
- 3 large eggs, room temperature
- 1 ½ teaspoons vanilla extract
- 2 cups all-purpose flour or gluten free all-purpose flour, Cup4Cup gluten-free flour, recommended
- 1 ½ teaspoon baking soda
- ¾ teaspoon baking powder
- ½ teaspoon salt
- 1 cup mini chocolate chips
- 13.4 ounce can dulce de leche
Whipped Ganache Frosting:
- 1 cup heavy cream
- 8 ounces semisweet chocolate chips
- ⅛ teaspoon salt
Equipment
-
9 inch Cake Pans
-
Stand Mixer
-
Offset Spatula
Instructions
Oatmeal Layer Cake
-
Preheat the oven to 350ºF (175ºC). Grease three 9″ cake pans with cooking spray, line with cut-to-size wax or parchment paper on the bottom, spray the paper, and set aside.
-
Place the oats in a small bowl and pour the boiling water over them. Stir gently and set aside to cool completely to room temperature, which will take about 20-30 minutes.1 ½ cups rolled oats, 2 ¼ cups boiling water
-
In a large mixing bowl, cream the softened unsalted butter with the granulated sugar and brown sugar until the mixture is light, fluffy, and pale, typically taking about 3 minutes with an electric mixer. Beat in the large eggs, one at a time, ensuring each is fully incorporated before adding the next. Stir in the vanilla extract.1 cup granulated sugar, 1 cup brown sugar, ¾ cup unsalted butter, 3 large eggs, 1 ½ teaspoons vanilla extract
-
To the butter mixture, add the all-purpose flour (or gluten-free all-purpose flour), baking soda, baking powder, and salt. Mix on low speed until just combined, taking care not to overmix the batter.2 cups all-purpose flour or gluten free all-purpose flour, 1 ½ teaspoon baking soda, ¾ teaspoon baking powder, ½ teaspoon salt
-
Gently beat in the cooled oatmeal until it is well incorporated into the batter. Then, stir in the mini chocolate chips on low speed, ensuring they are evenly distributed throughout the cake batter. Divide the finished batter evenly between your three prepared cake pans.1 cup mini chocolate chips
-
Bake for 22-25 minutes, rotating the pans halfway through, until a wooden toothpick inserted into the center of a cake comes out clean. Remove cakes from the oven and turn them out onto wire racks to cool completely before assembling. TIP: Start preparing the whipped ganache frosting while the cakes are baking so it has ample time to cool and firm up.
Whipped Ganache Frosting:
-
In a small saucepan or microwave-safe bowl, gently heat the heavy cream until it just begins to simmer around the edges. Do not let it come to a rolling boil.1 cup heavy cream, 8 ounces semisweet chocolate chips, ⅛ teaspoon salt
-
Place the semisweet chocolate chips and salt in a small heatproof bowl. Pour the hot cream directly over the chocolate chips. Let the mixture sit undisturbed for 5 minutes to allow the chocolate to melt. After 5 minutes, stir gently with a whisk or spatula until the mixture is completely smooth and uniform.
-
Refrigerate the ganache for 45 minutes to 1 hour, stirring occasionally every 15 minutes, until it is cool to the touch and has a slightly firm, pudding-like consistency. It should not be hard, but thickened.
-
Once sufficiently cooled, pour the thickened chocolate ganache into a clean mixing bowl. Beat on high speed for approximately 2 minutes, or until the ganache transforms into a light, airy, and spreadable frosting consistency. Be careful not to overbeat, or it may become grainy.
-
To assemble the cake, place one cooled oatmeal cake layer on your desired cake platter or serving stand. Evenly spread half of the dulce de leche caramel filling over the top surface. Carefully place the second cake layer on top and repeat with the remaining caramel filling. Finally, position the third cake layer on top. Using an offset spatula, cover the top and sides of the entire cake generously with the prepared whipped ganache frosting. Serve the cake at room temperature for the best flavor and texture. Any leftovers should be refrigerated to maintain freshness and quality.
Notes
Storing and Freezing Your Carmelita Cake
For an optimal tasting experience, it is highly recommended to serve the Carmelita cake at room temperature. The cake’s components, particularly the oatmeal layers and caramel filling, shine brightest when not chilled too much. The whipped ganache frosting, while stable at room temperature for up to 2 days, benefits from refrigeration for longer storage.
This delicious cake freezes exceptionally well, allowing you to enjoy slices for up to 3 months. To store leftover slices, simply wrap each piece securely in plastic wrap, then place them together in a gallon-sized freezer-safe ziploc bag. Thaw individual slices in the refrigerator overnight or at room temperature for a quicker treat.
If you wish to freeze the entire cake, first place the assembled and frosted cake in the freezer uncovered for about an hour, or until the frosting is firm enough to touch. Once hardened, wrap the entire cake securely with several layers of plastic wrap, followed by a layer of aluminum foil for extra protection against freezer burn. When you’re ready to enjoy it, remove the plastic wrap and foil, and allow the cake to thaw completely at room temperature, which may take several hours.
Enjoy your exquisite homemade Carmelita Cake!