
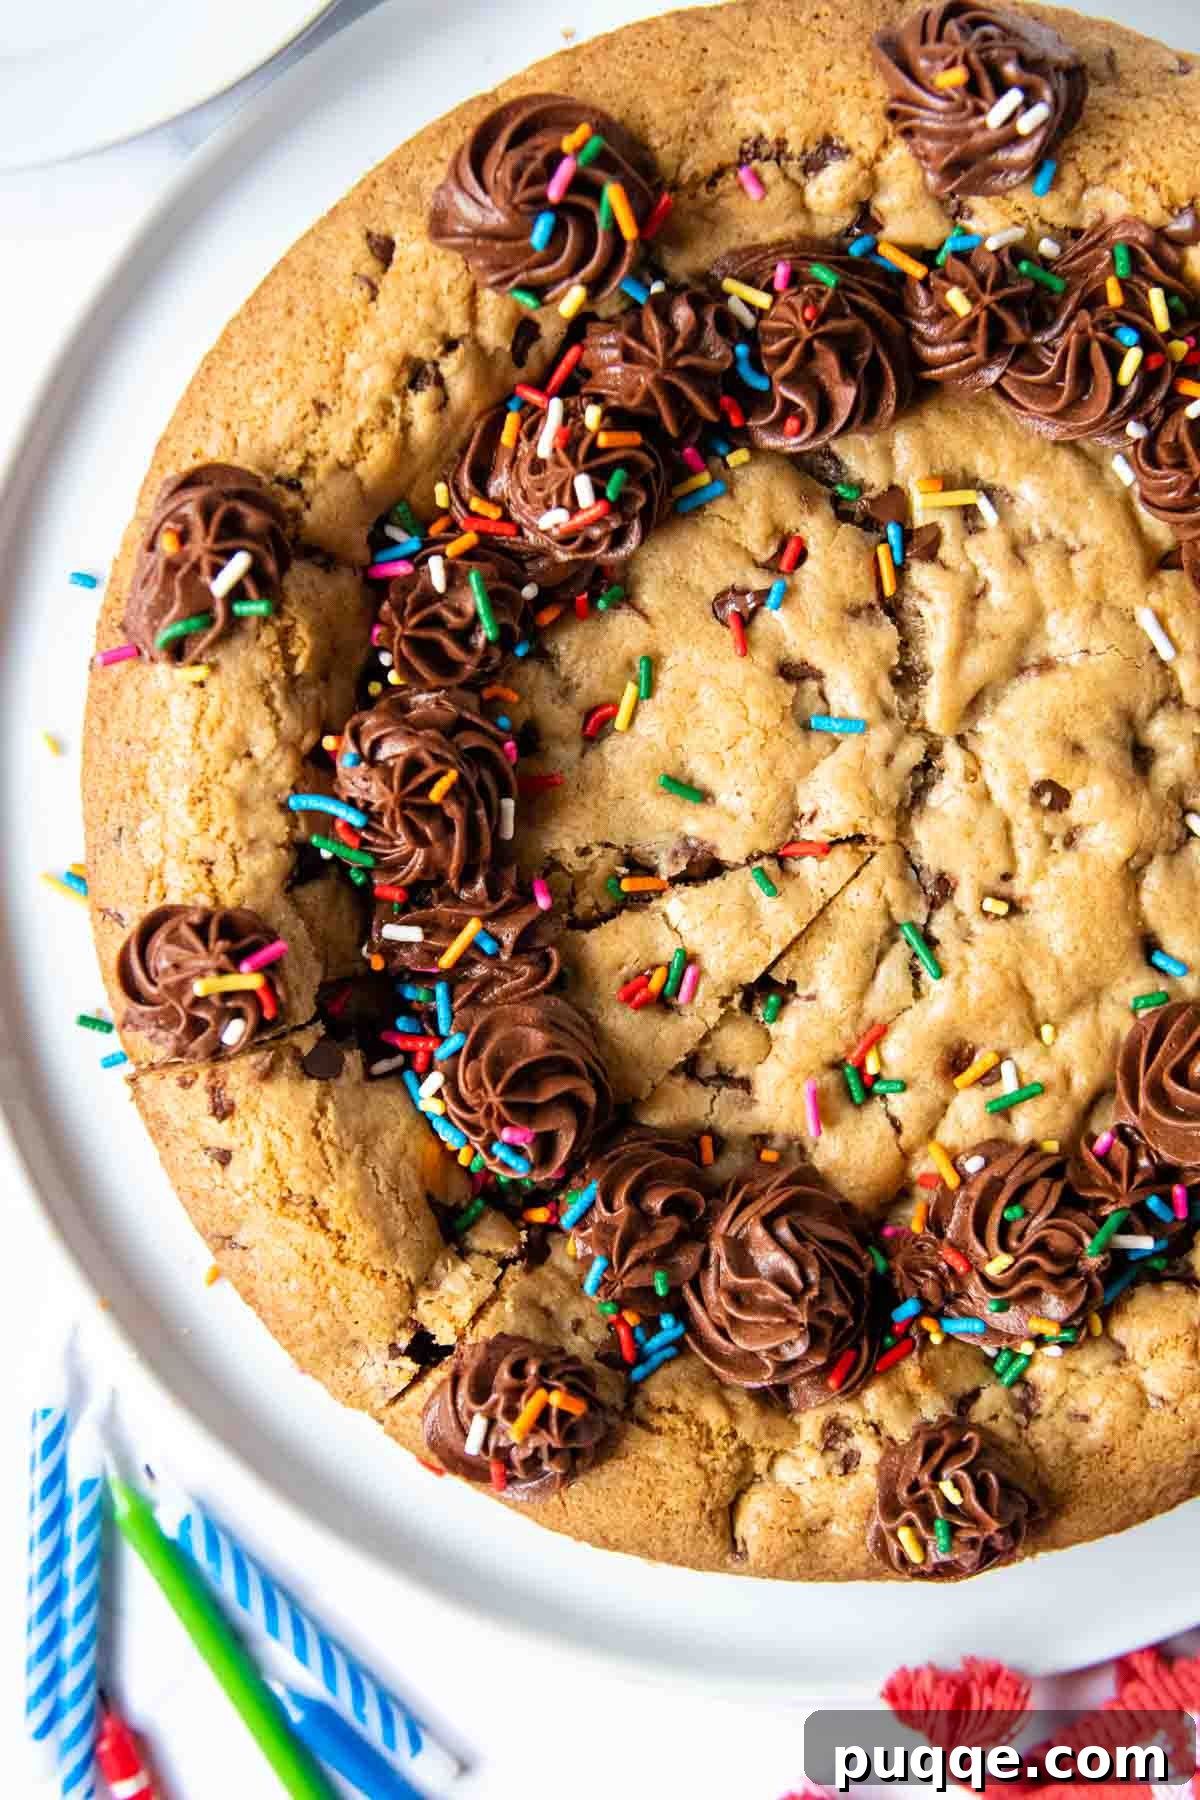
Imagine the joy of a truly decadent, giant chocolate chip cookie – now imagine it’s also entirely gluten-free! This impressive dessert is not just a treat; it’s the ultimate way to celebrate any special moment, from birthdays to holiday gatherings, or simply a weekend indulgence. Our big, soft, and remarkably chewy chocolate chip cookie cake is designed to be the undisputed star of any party, astonishing everyone when they discover its deceptively gluten-free secret.
For those navigating gluten sensitivities or simply choosing a gluten-free lifestyle, finding a dessert that doesn’t compromise on taste or texture can be a real challenge. This recipe changes the game, proving that gluten-free baking can be every bit as delicious and satisfying as traditional treats. Get ready to bake a show-stopping dessert that will earn rave reviews and requests for seconds!
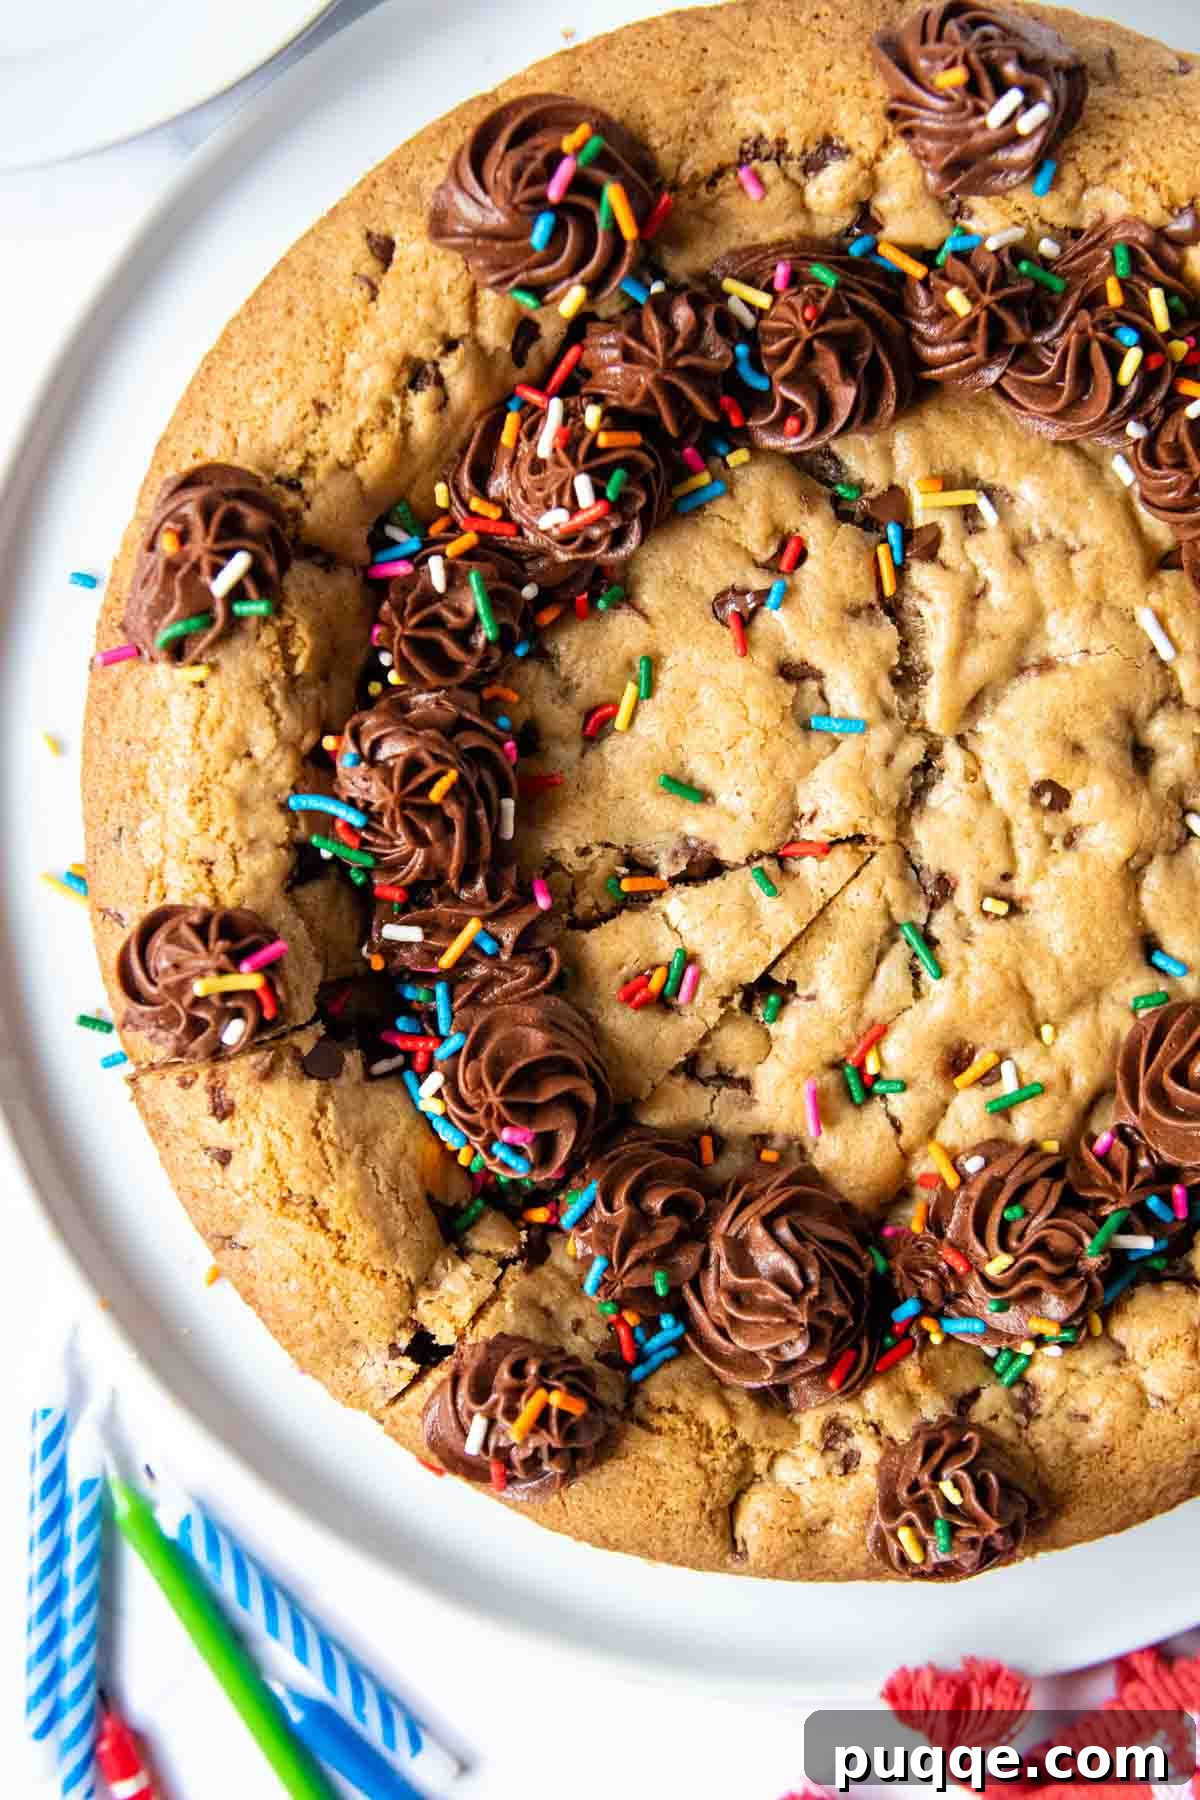
Gluten-Free Cookie Cake: A Childhood Classic, Reimagined (Pizookie Style!)
Take a delightful journey back in time to the 1980s, when the bustling food courts of shopping malls held an irresistible allure: the giant chocolate chip cookie cake. This iconic dessert was more than just a sweet treat; it was an experience, permeating your senses with the enticing aroma of fresh-baked cookies, vibrant sugary decorations, and celebratory buttercream messages. These colossal cookies often marked birthdays, graduations, or simply a fun family outing, becoming synonymous with joy and indulgence.
Unfortunately, for those of us with gluten sensitivities, the charm of easily grabbing a cookie cake, much like a gourmet gluten-free Crumbl cookie, has always been out of reach. But what if you could recreate that magic in your own kitchen? This homemade gluten-free cookie cake recipe makes that dream a delicious reality, allowing you to whip up this impressive dessert effortlessly in under 30 minutes of active preparation time!
This easy-to-follow recipe is the culmination of years of expert baking tips and tricks, drawing inspiration from my comprehensive gluten-free cookbook and building upon the foundational success of my beloved gluten-free chocolate chip cookie recipe. The result is a supersized, soft, and chewy giant cookie cake that’s truly perfect for any celebration – be it a lively party, a memorable birthday, or just an excuse to treat yourself and your loved ones to something truly special.
If you’re celebrating a truly grand occasion, consider pairing this sensational “pizookie” (pizza cookie) with other festive favorites. Imagine serving it alongside a refreshing gluten-free ice cream cake or a timeless, old-school gluten-free yellow cake with rich chocolate frosting. The combination promises an unforgettable dessert spread that caters to all tastes and dietary needs.
Why This Gluten-Free Cookie Cake Recipe is a Must-Try
Many gluten-free baked goods suffer from a reputation for being dry, crumbly, or lacking in the satisfying chewiness that makes a traditional cookie so irresistible. This recipe defies those stereotypes. Through careful selection of ingredients and precise techniques, we’ve engineered a gluten-free cookie cake that rivals – and often surpasses – its gluten-containing counterparts in texture and flavor. It’s crafted to remain soft and moist, offering that perfect balance of crisp edges and a gooey center. Plus, the ease and speed of preparation mean you can have a show-stopping dessert ready in no time, making it ideal for impromptu celebrations or busy schedules.
Essential Ingredients for a Perfect Gluten-Free Cookie Cake
The secret to an exceptional gluten-free chocolate chip cookie cake lies in understanding the role each ingredient plays. While all components are vital, the choice of gluten-free flour blend is particularly crucial for achieving that desired soft, chewy texture without dryness.
- Unsalted Butter (Softened, Room Temperature): This isn’t just a suggestion; it’s a golden rule for superior cookie texture. Softened butter, rather than melted, is essential for proper creaming. When butter and sugar are creamed together, air is incorporated, which creates pockets of tenderness in the cookie. This process also coats the gluten-free starches, ensuring the finished cake is wonderfully soft and chewy, never greasy, dry, or crumbly.
- Brown Sugar (Packed Light): Brown sugar is a powerhouse in cookie baking. Its high molasses content is responsible for the delightful hint of caramel flavor that is synonymous with classic chocolate chip cookies. More importantly for gluten-free baking, molasses acts as a humectant, significantly increasing moisture content and keeping the cookie cake soft and moist. This is a key defense against the typical dryness found in many gluten-free desserts.
- Eggs (One Whole Egg + One Yolk): This specific egg combination is a deliberate choice for optimal texture. The whole egg provides essential binding, holding the cookie cake together. The extra egg yolk, however, is the secret weapon for chewiness. Yolks are rich in fat and emulsifiers, contributing to a richer flavor and a delightfully dense, chewy texture that prevents the cookie cake from becoming too cake-like or crumbly.
- Gluten-Free All-Purpose Flour Blend: This is arguably the most critical ingredient. My preferred brand, Cup4Cup, is highly recommended because it contains cornstarch within its blend. Cornstarch is a fine powder that acts as a tenderizer, contributing significantly to the cookie cake’s soft crumb. If your chosen gluten-free flour blend does not list cornstarch as an ingredient, I strongly advise adding 2 teaspoons of cornstarch to your dry ingredients to achieve a similar soft and tender result. Look for blends designed for “cup-for-cup” or “all-purpose” use for best results.
- Baking Soda: In this recipe, we exclusively use baking soda, as opposed to baking powder. Baking soda reacts with the acidic brown sugar, creating carbon dioxide bubbles that give the cookie cake a slight lift while promoting those desirable chewy edges. This helps achieve a texture similar to a perfectly baked brownie – crisp on the outside, soft and gooey within.
- Chocolate Chips (Mixed Sizes): For the ultimate chocolate experience in every bite, I recommend using a mixture of regular-sized semi-sweet chocolate chips and miniature chocolate chips. This thoughtful combination ensures that the melted, gooey chocolate is evenly dispersed throughout the entire cookie cake. You’ll get delightful pockets of large melted chocolate and subtle streaks of smaller chips, guaranteeing a rich, chocolatey indulgence in every single slice.
How to Bake the Best Gluten-Free Cookie Cake: A Step-by-Step Guide
Crafting this irresistible gluten-free cookie cake is simpler than you might think! Follow these detailed instructions to ensure a perfect, soft, and chewy result every time. (Below you’ll find step-by-step photos and modified instructions. For the complete recipe, along with precise ingredient amounts, please scroll down to the dedicated recipe card.)
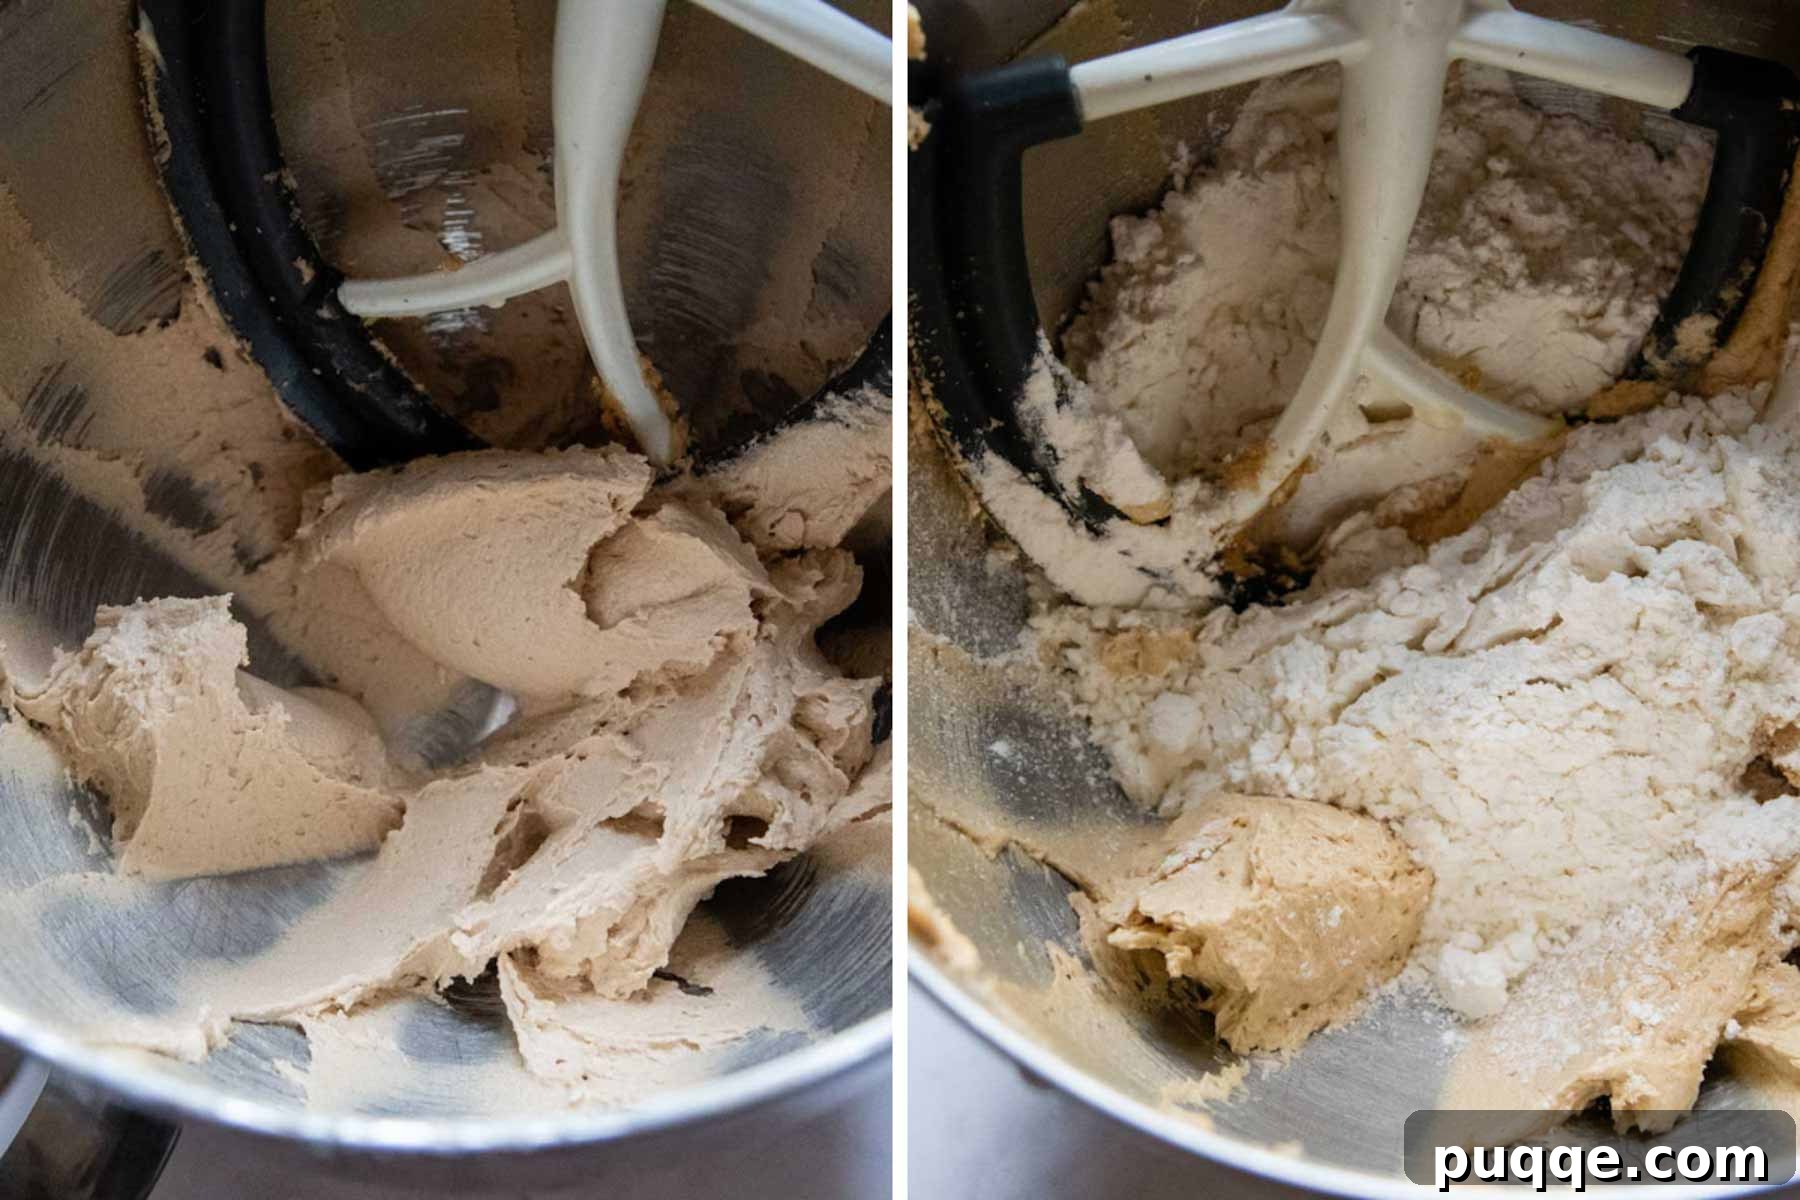
- Prepare Your Baking Pan: Begin by preheating your oven to 350ºF (175ºC). Lightly grease a 9-inch round cake pan with nonstick cooking spray. For the absolute best results and effortless removal, line the bottom of the pan with a cut-to-size circle of parchment paper. This simple step prevents sticking and makes transferring your finished cookie cake a breeze.
- Cream Butter and Sugar: In a large mixing bowl, or the bowl of a stand mixer fitted with the paddle attachment, combine the softened unsalted butter and packed light brown sugar. Beat them together on medium speed until the mixture is light, fluffy, and noticeably paler in color. This creaming process should take approximately 3 minutes. Don’t rush this step, as it incorporates air crucial for a tender cookie.
- Incorporate Wet Ingredients: Add the large egg, extra egg yolk, and vanilla extract to the creamed butter and sugar mixture. Continue beating on medium speed until all ingredients are thoroughly combined and the mixture is smooth. Scrape down the sides of the bowl as needed to ensure everything is fully incorporated.
- Add Dry Ingredients and Chocolate: Gradually mix in the gluten-free all-purpose flour blend, baking soda, and salt on low speed. Mix just until no dry flour streaks remain. Overmixing gluten-free flour can sometimes lead to a tougher texture, so stop as soon as it’s combined. Finally, fold in both the regular and miniature chocolate chips on low speed until they are evenly distributed throughout the dough.
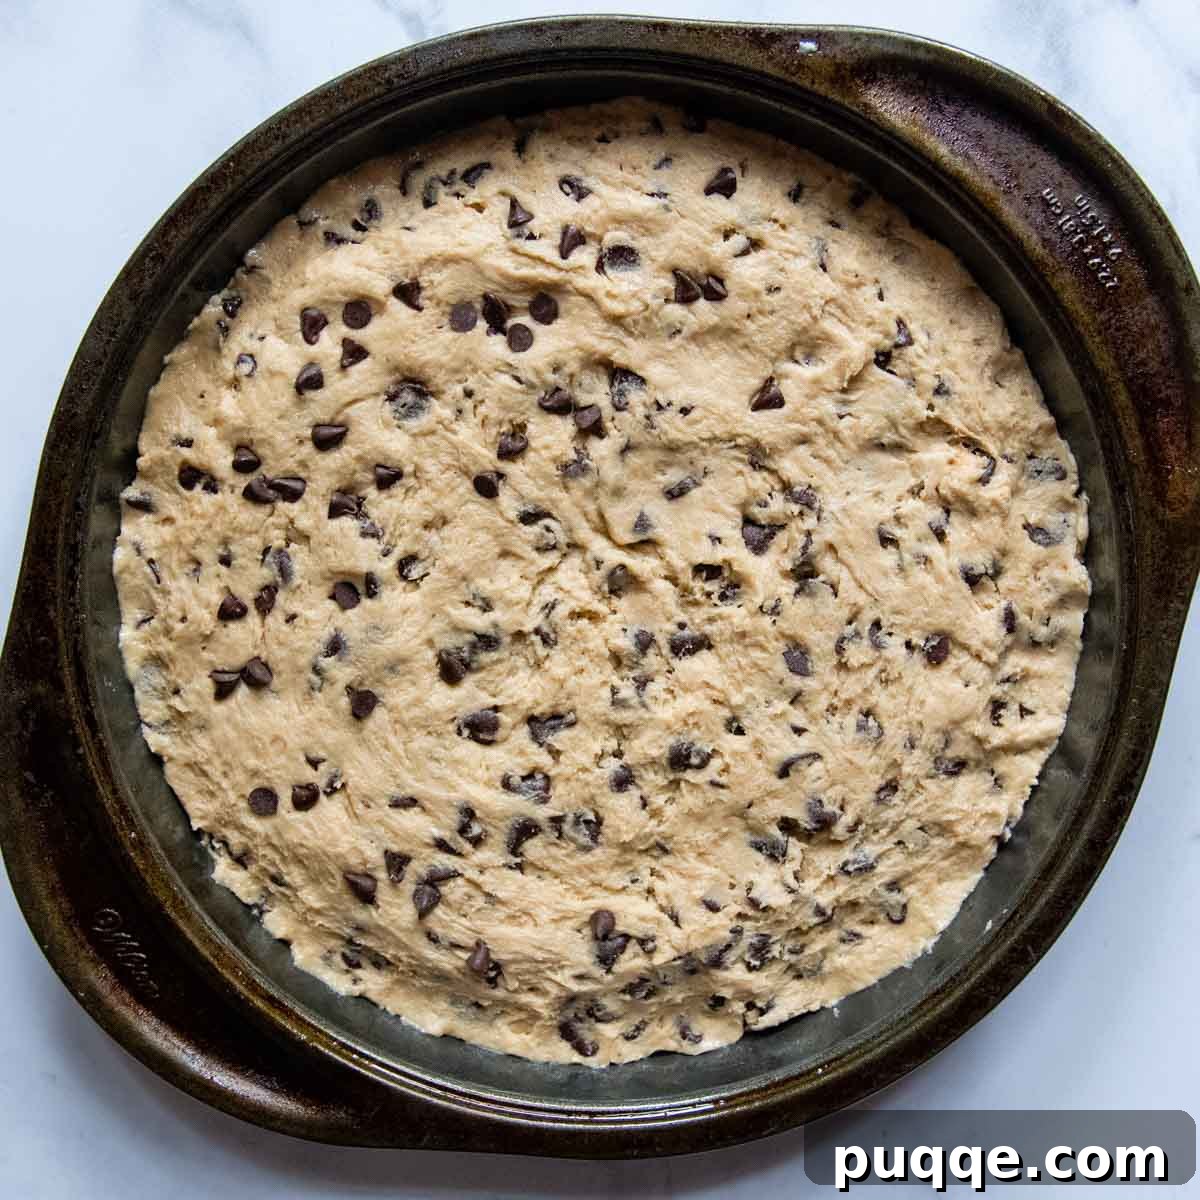
- Bake to Perfection: Transfer the cookie dough into your prepared 9-inch cake pan. Using an offset spatula or the back of a spoon, spread the dough evenly across the bottom of the pan. Bake for approximately 25 to 27 minutes. The cookie cake is done when the edges are firmly set and golden brown, and a toothpick inserted into the center comes out with moist crumbs, but no wet dough. Avoid overbaking, as this can lead to a dry cookie cake. Once baked, remove the pan from the oven and allow the cookie cake to cool completely on a wire rack before attempting to remove it or decorate. This cooling process allows the cookie to set and firm up.
Decorating Your Gluten-Free Cookie Cake: Unleash Your Creativity
Once your magnificent gluten-free cookie cake has cooled completely, it’s time for the fun part: decorating! A homemade buttercream frosting adds a personal touch and a burst of flavor that elevates this dessert from great to extraordinary. The chocolate buttercream frosting included in this recipe provides enough for a decorative edge and a special message, but feel free to get creative.
To achieve a professional, festive look perfect for a birthday cake or any celebration, prepare your frosting and transfer it to a piping bag. For elegant rosette edges, use an open star tip. For writing personalized messages like “Happy Birthday” or “Congratulations,” switch to a fine writing tip. If you’re new to cake decorating, an affordable cake decorating kit often contains a variety of tips and bags, providing everything you need to get started.
While the included chocolate buttercream is fantastic, if you prefer a different flavor profile, you can opt for my fluffy vanilla buttercream. Keep in mind that for this recipe’s size, you’ll only need to half that vanilla buttercream recipe to have plenty for decorating.
Serving Suggestions and Variations
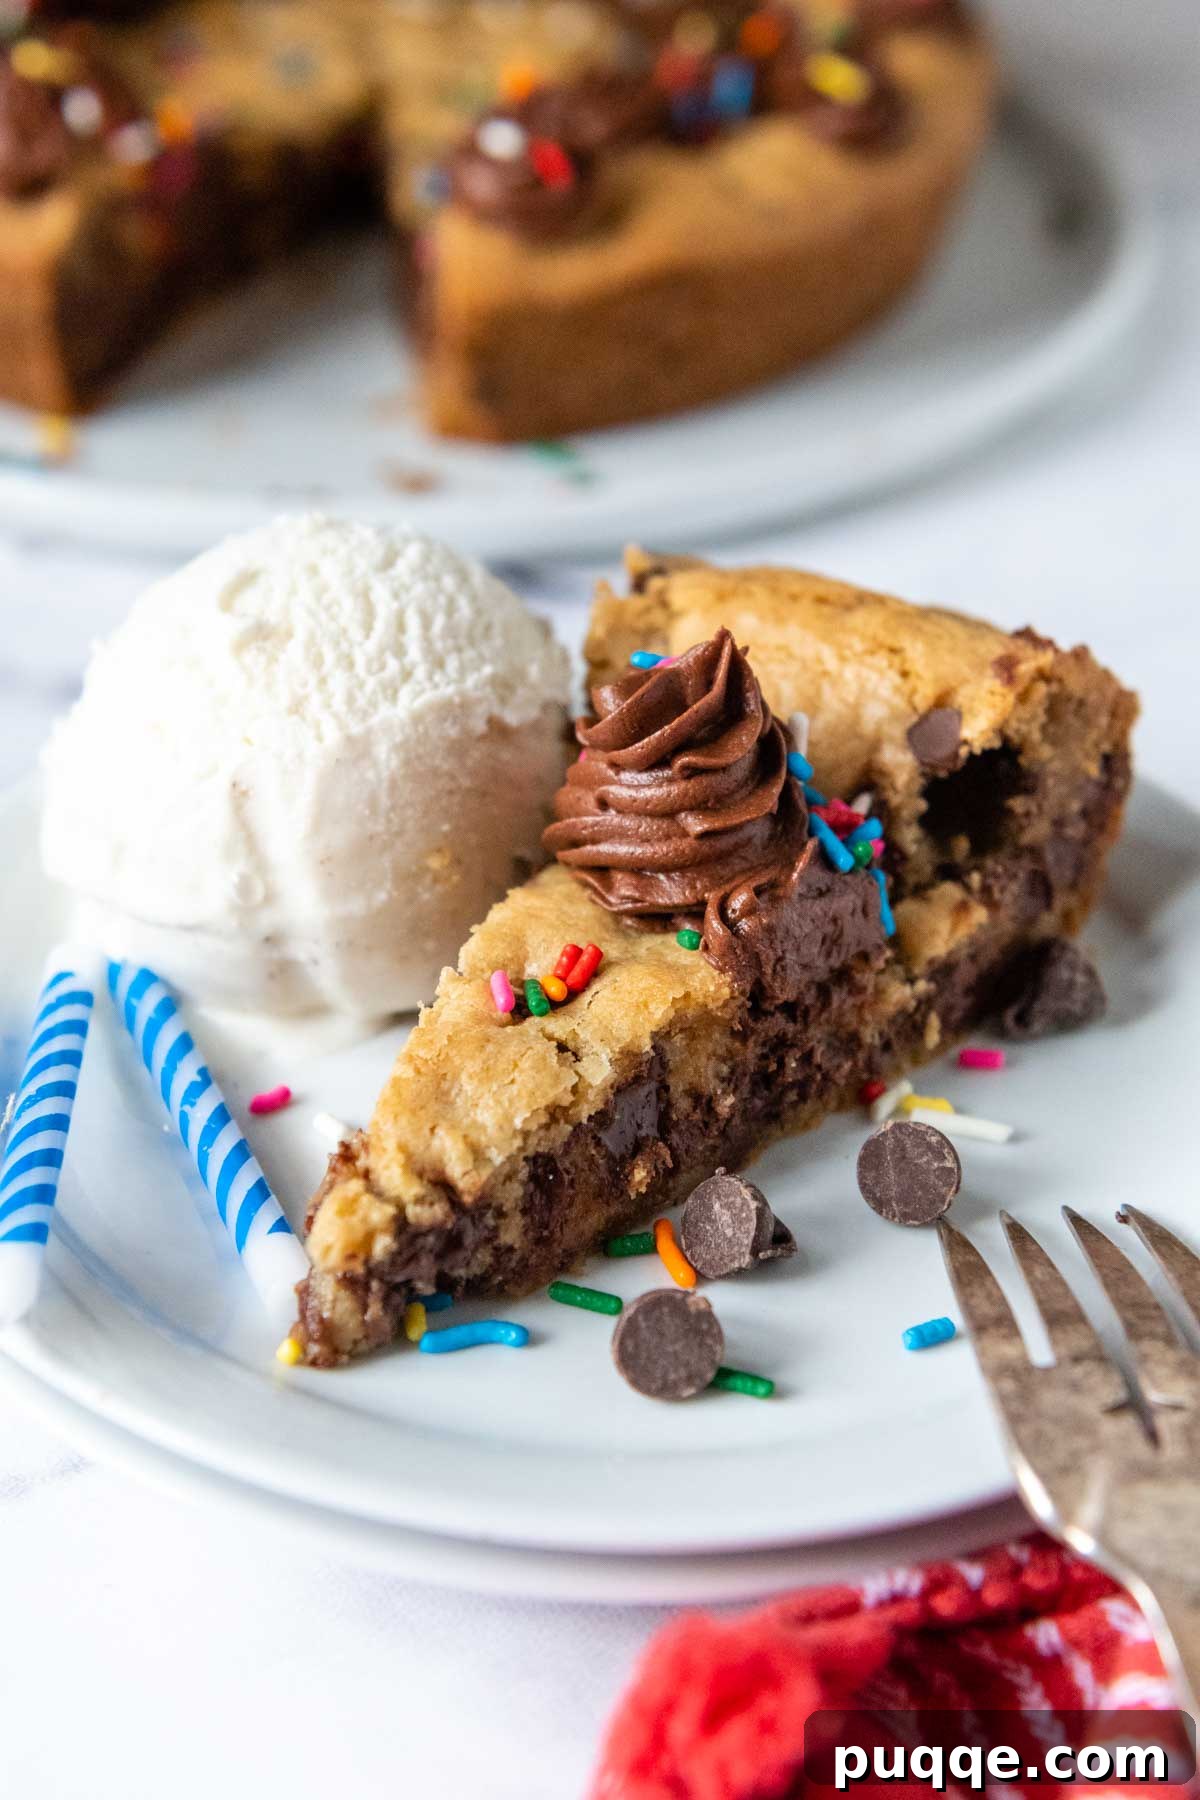
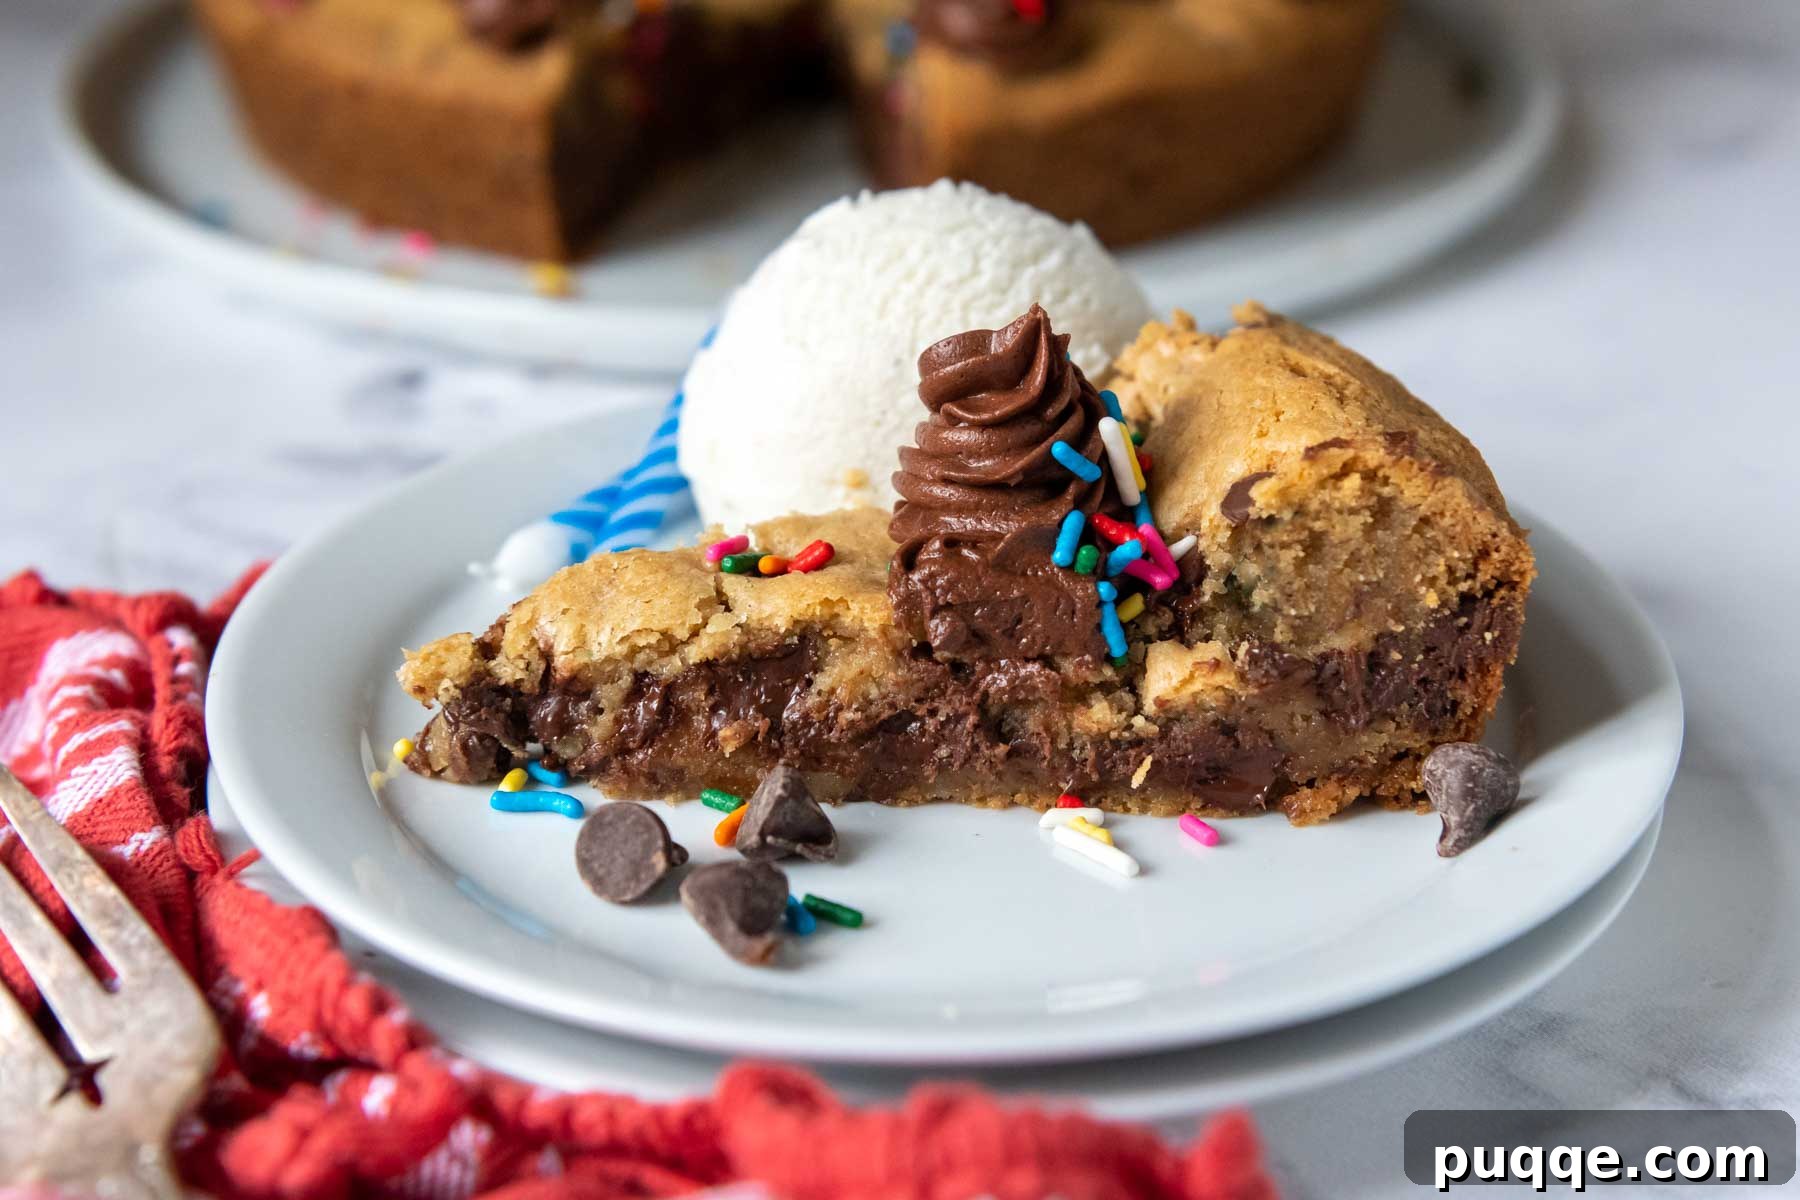
This gluten-free cookie cake is glorious on its own, but it truly shines when paired with complementary toppings. A scoop of vanilla bean ice cream melting into a warm slice is pure heaven. Consider adding a drizzle of caramel or hot fudge sauce, a dollop of fresh whipped cream, or a sprinkling of fresh berries for a vibrant contrast. For an extra touch of festivity, colorful gluten-free sprinkles are always a hit.
Want to customize your cookie cake? Get creative with mix-ins! Instead of just chocolate chips, try adding white chocolate chunks, chopped nuts (like walnuts or pecans), dried cranberries, or even a swirl of peanut butter before baking. A touch of almond extract can also add a delightful nuance to the cookie base. The possibilities are endless for making this cookie cake uniquely yours!
Choosing the Ideal Baking Pan for Your Cookie Cake
When it comes to baking a gluten-free cookie cake, the right pan can make a significant difference in both presentation and baking consistency. This recipe primarily utilizes a standard 9-inch round cake pan, largely because it’s a common kitchen staple, aligning with my goal to provide easy, approachable, and affordable recipes that don’t require specialized equipment.
However, if your aim is to replicate the iconic, flat, bakery-style giant chocolate chip cookie cake you remember from mall food courts, you might want to invest in a dedicated cookie cake pan. These are typically shallower and wider. You can find excellent inexpensive cookie cake pans online. When purchasing, ensure it’s specifically an 11.5-inch diameter cookie cake pan, and not a standard pizza pan, which tends to be slightly larger and shallower, potentially altering baking times and texture.
If you opt for an 11.5-inch cookie cake pan, you will need to adjust your baking time. Since the dough will be spread thinner in a wider pan, the baking time will likely be reduced by approximately 10 minutes. Always monitor for doneness: the edges should be firmly set and golden, and a toothpick inserted into the center should come out clean or with moist crumbs, indicating it’s perfectly baked without being dry.
A 9-inch cake pan will typically yield about 10-12 generous slices, making it perfect for smaller gatherings. A larger 11.5-inch cookie cake pan will provide 12-14 larger slices, ideal for bigger parties. An 8-inch layer cake pan can also be used in a pinch, but remember that the dough will be thicker, requiring you to extend the baking time by about 2-3 minutes. Always use the toothpick test to confirm doneness, regardless of your pan choice.
Save this recipe to your Pinterest board!
Let’s be friends on Pinterest! I’m always sharing great recipes!
Did you make this recipe? I love hearing from you! Leave a star rating and comment below the recipe card. It helps others when searching for recipes and I appreciate feedback from our community. You will always hear back from me! -Melissa
Gluten-Free Cookie Cake (Soft, Chewy, Not Dry!)
 Melissa Erdelac
A giant gluten-free cookie cake with festive buttercream decorations is the ultimate way to celebrate birthdays or special occasions. This big, soft, chewy chocolate chip cookie will be the talk of the party when everyone learns it’s deceptively gluten-free!
Pin Recipe
Rate Recipe
Remove Ads
Ingredients
- ½ cup unsalted butter, room temperature
- 1 cup packed light brown sugar
- 1 large egg
- 1 egg yolk
- 2 teaspoons vanilla extract
- 2 cups gluten free all purpose flour, I recommend Cup4Cup GF flour blend
- 1 teaspoon baking soda
- ½ teaspoon salt
- 1 cup semi-sweet chocolate chips
- ½ cup miniature chocolate chips, (or omit and use 1 ½ cups regular chocolate chips)
Chocolate Frosting
- 4 tablespoons unsalted butter, room temperature
- 2 tablespoons unsweetened cocoa powder
- 1 cup powdered sugar
- 1 ½ tablespoons milk
- pinch salt
- (optional) gluten-free sprinkles,, for decorating
Equipment
-
Cup 4 Cup Gluten Free Flour
-
Piping Bag & Tips
-
9 inch Cake Pans
Instructions
-
Preheat the oven to 350ºF (175ºC). Grease a 9-inch cake pan with nonstick cooking spray. For best results, line the bottom with cut-to-size parchment paper for easy removal.
-
In a large mixing bowl or stand mixer with paddle attachment, cream together the butter and brown sugar until light and fluffy, about 3 minutes.½ cup unsalted butter, 1 cup packed light brown sugar
-
Add the egg, egg yolk, and vanilla extract, beating until well combined.1 large egg, 1 egg yolk, 2 teaspoons vanilla extract
-
Slowly mix in the gluten-free flour, baking soda, and salt. Once no flour streaks remain, stir in the chocolate chips on low speed.2 cups gluten free all purpose flour, 1 teaspoon baking soda, ½ teaspoon salt
-
Transfer the cookie dough to the prepared pan and spread evenly. Bake for 25-27 minutes, or until the edges are firmly set and a toothpick inserted in the middle comes out without wet dough. Cool completely on a wire rack before removing from pan and decorating with frosting.1 cup semi-sweet chocolate chips, ½ cup miniature chocolate chips
Chocolate Frosting
-
In a medium bowl add all the buttercream frosting ingredients. Mix on low speed until combined. Increase speed to medium-high and beat until fluffy.4 tablespoons unsalted butter, 2 tablespoons unsweetened cocoa powder, 1 cup powdered sugar, 1 ½ tablespoons milk, pinch salt
-
If the frosting is too thick, add an additional dash of milk. If the frosting is too thin, gradually add a little more powdered sugar until desired consistency is reached.
-
Once the cookie cake is completely cool, place a wire rack over the cooled cookie cake pan and carefully invert the cake onto the rack, so the bottom faces up. Gently peel off the parchment paper. Place your desired serving platter on top of the overturned cake and flip it onto the platter, so it is right side up and ready for decorating.
-
Transfer the chocolate frosting into a piping bag fitted with an open star tip. Decorate the edges with beautiful rosettes or any design you prefer. If desired, add gluten-free sprinkles to the frosting and the top of the cake for extra flair.
-
DID YOU MAKE THIS RECIPE? DON’T FORGET TO LEAVE FEEDBACK AND RATE BELOW!
Notes
Alternative Baking Pans
If you wish to replicate a bakery-style giant cookie cake, you will need one of these inexpensive cookie can pans. Make sure it’s 11.5-inch diameter and not a pizza pan, which is slightly larger.
You will need to reduce the baking time by about 10 minutes if using a cookie cake pan since the dough will be spread thinner. The edges should be firmly set and a toothpick inserted in the middle should come out without wet dough.
Using a 9-inch cake pan will serve about 10-12 small slices, while a cookie cake pan typically yields 12-14 larger slices. An 8-inch layer cake pan may also be used, but you will have to bake it about 2-3 minutes longer.
Storing and Freezing Your Gluten-Free Cookie Cake
To maintain its optimal taste and texture, store your gluten-free cookie cake at room temperature, ensuring it is well-covered with aluminum foil or in an airtight container. For the freshest experience, it’s best to consume the cake within 1-2 days.
A common characteristic of gluten-free baked goods is their tendency to lose moisture more quickly than their gluten-containing counterparts, which can result in a dry and crumbly texture. To counteract this, I highly recommend freezing any leftovers promptly or, if you’re making the cake in advance, freezing it until the day you plan to serve it.
The cookie cake, even when decorated with buttercream, can be frozen. Allow the frosting to firm up completely in the freezer first. Once the cake and frosting are solid, wrap it securely with plastic wrap, then cover it again with aluminum foil to prevent freezer burn. It can be stored this way for up to 2 months.
When you’re ready to enjoy your frozen cookie cake, simply remove all wrapping and place it on a serving platter. Allow it to thaw at room temperature for approximately 2 hours. This gradual thawing will help preserve its soft and chewy texture.
Recipe adapted from Sally’s Baking Addiction