
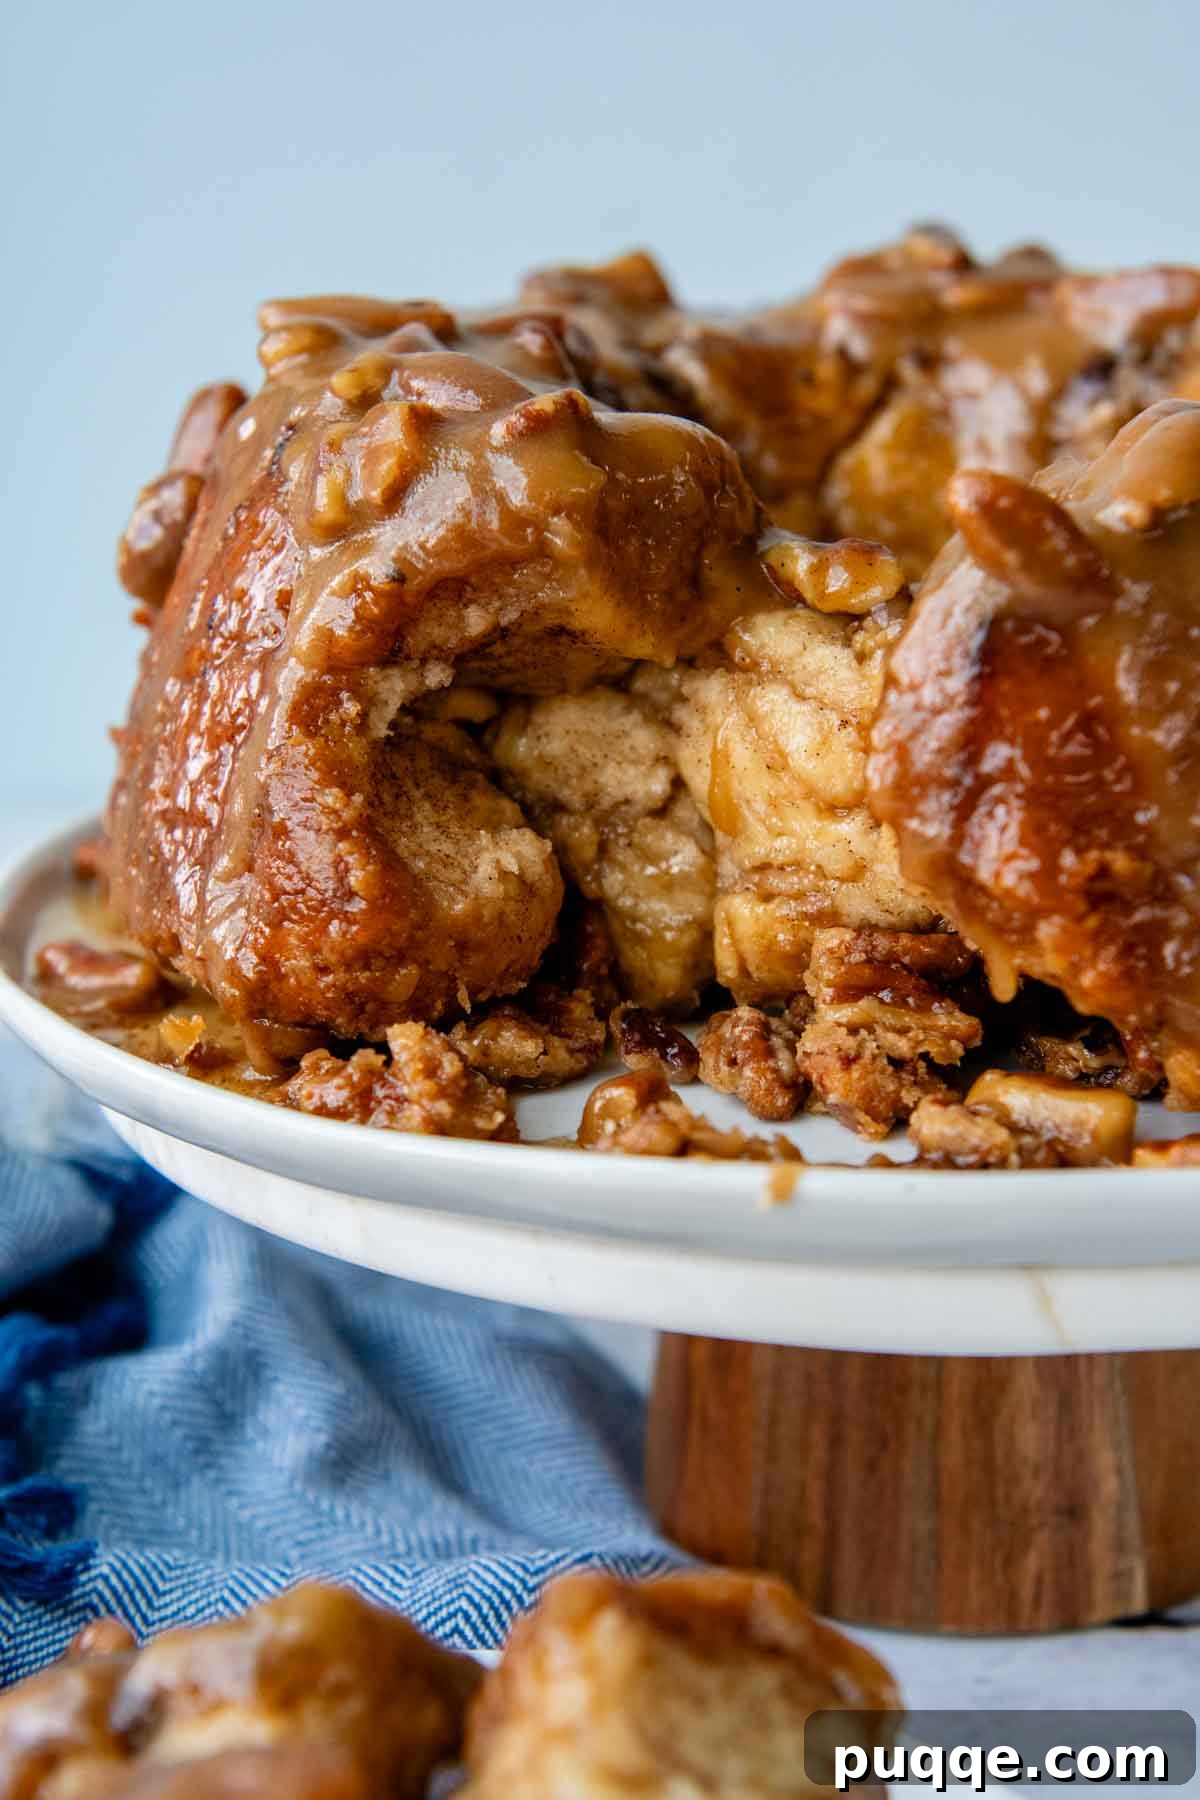
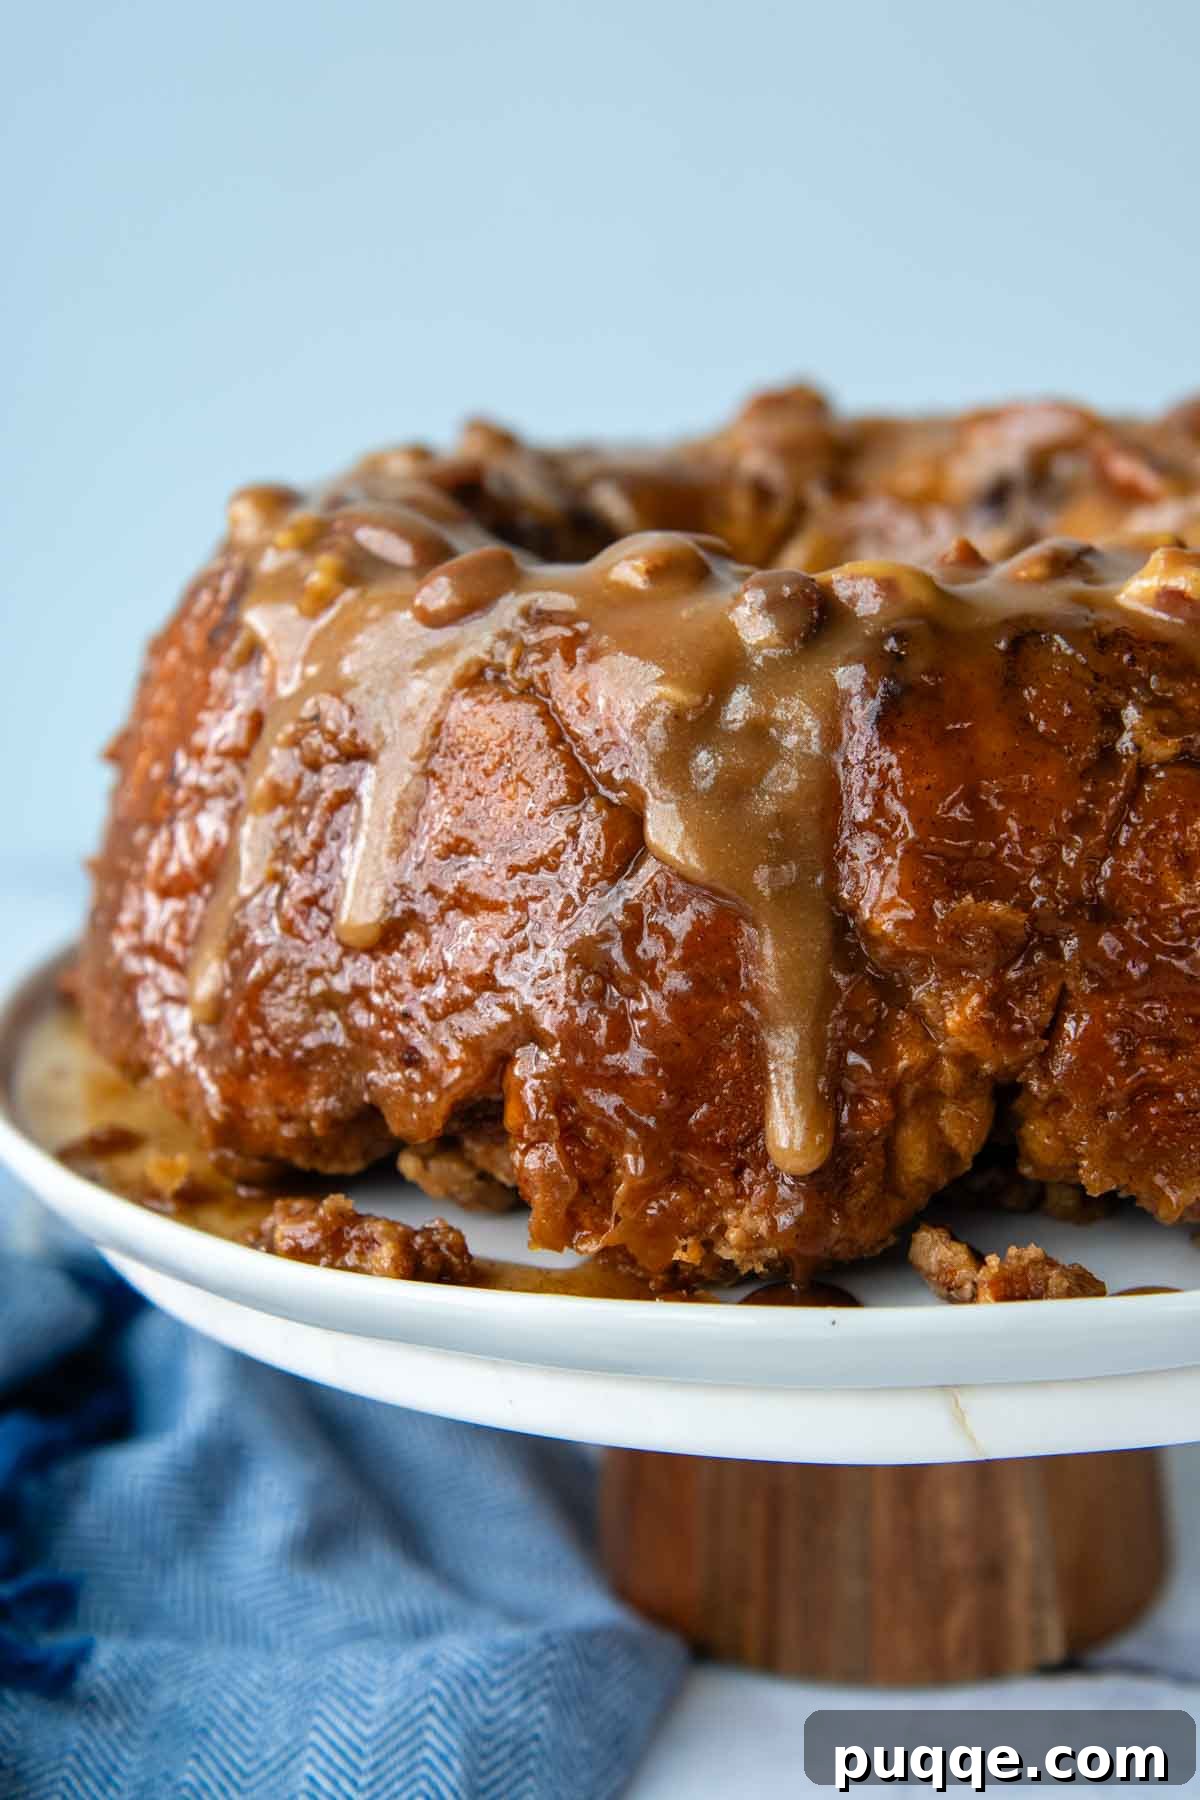
Rediscover the comforting joy of a classic homemade treat, perfected for those following a gluten-free diet, with this easy-to-follow gluten-free monkey bread recipe. Imagine soft, pillowy cinnamon-laced dough bites, each generously coated in a decadent, sticky caramel pecan sauce, baked to golden perfection until bubbly and irresistibly gooey. This isn’t just a recipe; it’s an invitation to bring back cherished traditions, effortlessly adapted for modern dietary needs.
Whether you’re planning a festive holiday breakfast, brunch with overnight guests, or simply craving a delightful weekend indulgence, this gluten-free monkey bread delivers. Its make-ahead, overnight option means you can prepare most of the work the day before, waking up to the aroma of freshly baked goodness. Perfect for a crowd, the full recipe is designed for a bundt pan, but a convenient small-batch adaptation for a loaf or smaller cake pan is also included. I’ll guide you through every step, ensuring a successful and delicious outcome that will impress even the most discerning palates.
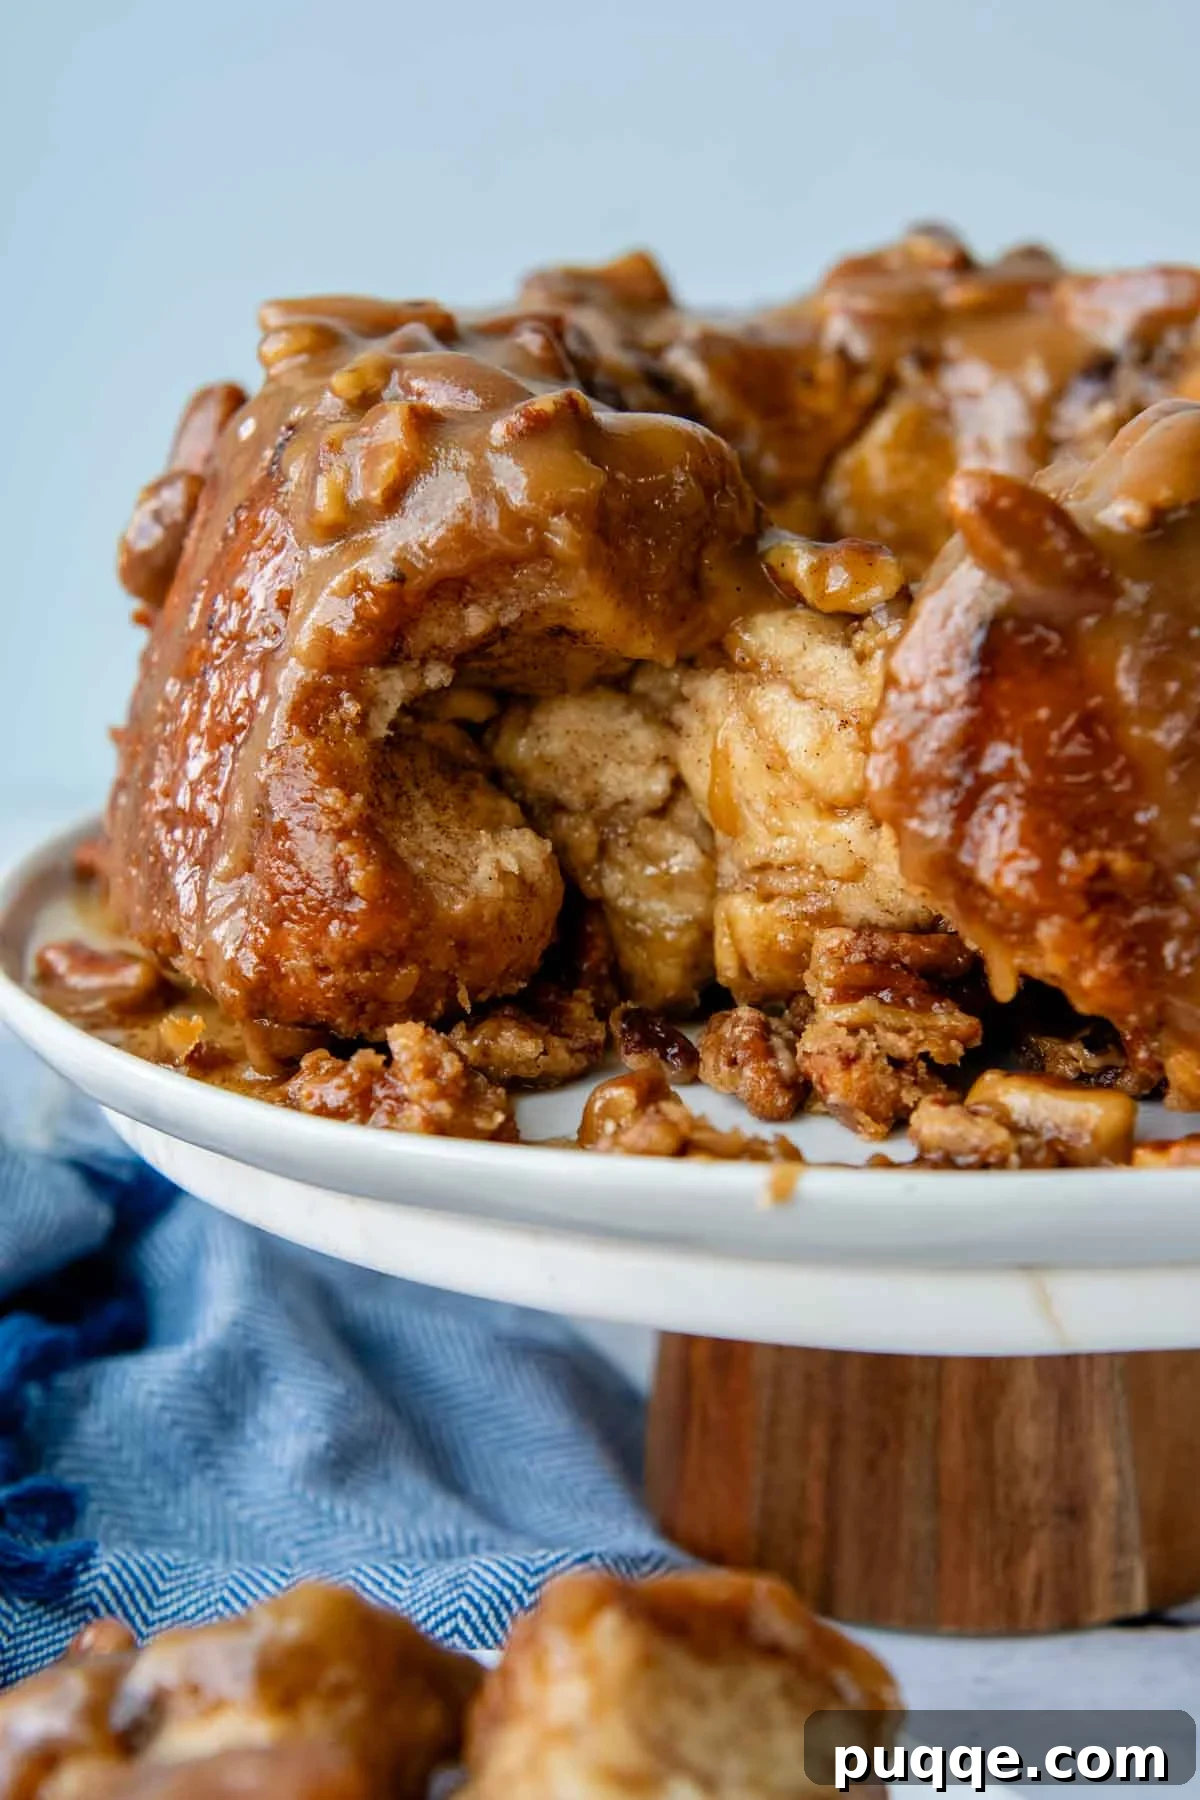
Why This Gluten-Free Monkey Bread Recipe Is a Game Changer
For many years, I believed that enjoying classic, gooey cinnamon monkey bread again was an impossible dream in the world of gluten-free baking. Traditional recipes rely heavily on wheat gluten for their signature chewy, pull-apart texture, and I often found gluten-free versions to be dense, crumbly, or simply underwhelming. The thought of replicating that fluffy, soft interior and sticky, caramelized exterior seemed overly complicated, often leading to disappointing results.
However, through extensive experimentation and a growing understanding of gluten-free baking science, I discovered ingenious techniques that transform ordinary gluten-free yeast dough into something truly extraordinary. My journey led to mastering pillowy soft gluten-free dinner rolls and even copycat Cinnabon gluten-free cinnamon rolls. This expertise culminated in this absolutely magical gluten-free monkey bread recipe – a testament that gluten-free treats can not only rival but often surpass their gluten-containing counterparts in taste and texture.
This recipe demystifies gluten-free yeast baking, making it accessible even for novice bakers. While it requires a bit of time to portion out the individual dough balls, the process itself is remarkably straightforward. The most brilliant feature is the make-ahead, overnight option. Imagine the luxury of preparing this festive breakfast the day before a busy holiday, like Christmas morning, and simply popping it into the oven when you wake up. This allows for more time with loved ones and less stress in the kitchen, without compromising on that irresistible, fresh-baked experience.
Traditional monkey bread is often baked in a bundt cake pan, making it an ideal choice for large gatherings, family brunches, or hosting overnight guests. A full recipe generously yields approximately 40 dough balls, providing enough deliciousness to serve anywhere from 12 to 20 people, depending on appetite and what other dishes are served alongside it. For smaller families or less ambitious cravings, a convenient small-batch adaptation is also provided, perfectly suited for a loaf pan or a 9-inch cake pan.
The Secrets to Unbelievably Soft Gluten-Free Dough
The unparalleled softness and delightful pull-apart texture of this gluten-free yeast dough are not achieved by chance. They are the result of carefully refined baking techniques, borrowed and adapted from my highly acclaimed 5-star gluten-free dinner rolls recipe. Two key methods stand out:
- The Tangzhong Method (Roux): This technique involves cooking a small portion of the flour with water and milk to create a thick, pudding-like paste. This pre-gelatinizes the starches in the flour, allowing them to absorb and retain significantly more liquid than they would otherwise. In gluten-free baking, where flours tend to absorb liquids differently and can result in dry or crumbly textures, the tangzhong method is a game-changer. It ensures a highly hydrated dough that bakes into an incredibly soft, fluffy bread, effectively preventing the dense, gummy texture sometimes associated with gluten-free baked goods.
- Strategic Use of Potato Starch: To achieve a stiff yet workable dough, many gluten-free recipes rely on adding additional gluten-free flours. However, this can sometimes lead to a tougher or drier final product. In this recipe, we ingeniously replace a portion of the gluten-free flour with potato starch. Potato starch is excellent at absorbing moisture, but crucially, it bakes into a much softer, more tender texture compared to additional flour. This subtle substitution is instrumental in achieving that delicate, melt-in-your-mouth quality that makes this monkey bread truly special.
Essential Ingredients for Gluten-Free Monkey Bread Success
When developing this recipe, I meticulously tested an ingredient list that has proven consistently successful across all my homemade gluten-free bread creations. Understanding the role of each component is key to achieving the best results. Below, you’ll find detailed notes on specific ingredients and any workable substitutions or modifications that have been tried and tested.
- Gluten-Free All-Purpose Flour: The quality of your gluten-free flour blend is paramount and can genuinely make or break the outcome of your GF breads. After extensive testing, I enthusiastically recommend Cup4Cup gluten-free flour for its superior taste, texture, and reliable performance. It often contains a blend of rice flours, cornstarch, and milk powder (for richness), which contributes to a more traditional bread-like consistency. While other blends may work, results can vary, so sticking to this recommendation is best for first-timers.
- Potato Starch (Not Potato Flour): This is truly one of the “secret ingredients” that contributes significantly to the dough’s soft and fluffy texture. Instead of solely relying on additional gluten-free flours to build the dough’s structure – which can sometimes lead to a denser crumb – potato starch absorbs moisture and helps create a lighter, more tender baked good. For optimal results, use potato starch. If unavailable, tapioca starch is a decent alternative, or you may use a small amount of additional gluten-free flour, though the texture may be slightly different.
- Psyllium Husk Powder: An unsung hero in gluten-free baking, psyllium husk powder is vital for maintaining moisture, preventing your rolls from becoming crumbly, and mimicking the elasticity and structure that gluten provides. It acts as a binder, allowing the pull-apart buns to be shaped effectively and giving them a pleasant chewiness. I highly recommend using a specific brand, such as the one linked here, as some darker psyllium powders can, surprisingly, impart a purple hue to your baked goods.
- Instant (Rapid Rise) Yeast: This type of yeast is incredibly convenient as it doesn’t require prior proofing with warm liquids. It can be added directly into your dry ingredients, streamlining the process. For those who bake frequently, buying instant yeast in bulk and storing it in a tightly sealed glass jar in the refrigerator or freezer is an economical and practical tip to ensure freshness. If you only have active dry yeast, simply stir it into the warm milk with 1 teaspoon of granulated sugar and let it sit for about 5 minutes until it becomes frothy before incorporating it into the wet ingredients.
- Pecans: While entirely optional, I find that pecans add a wonderful dimension to this monkey bread. Their slightly salty crunch provides a delightful contrast to the intense sweetness of the caramel sauce and soft cinnamon dough. If pecans aren’t to your taste or you have nut allergies, feel free to omit them entirely or substitute with another preferred nut, such as walnuts, or even chocolate chips for a different twist.
Step-by-Step: Crafting Your Gooey Gluten-Free Monkey Bread
Let’s walk through the creation of this delectable gluten-free monkey bread together! The following sections provide step-by-step photographic guidance and detailed instructions. For the complete recipe, including precise ingredient amounts and nutritional information, please scroll down to the dedicated recipe card.
1. Begin with the Roux (Tangzhong Method)
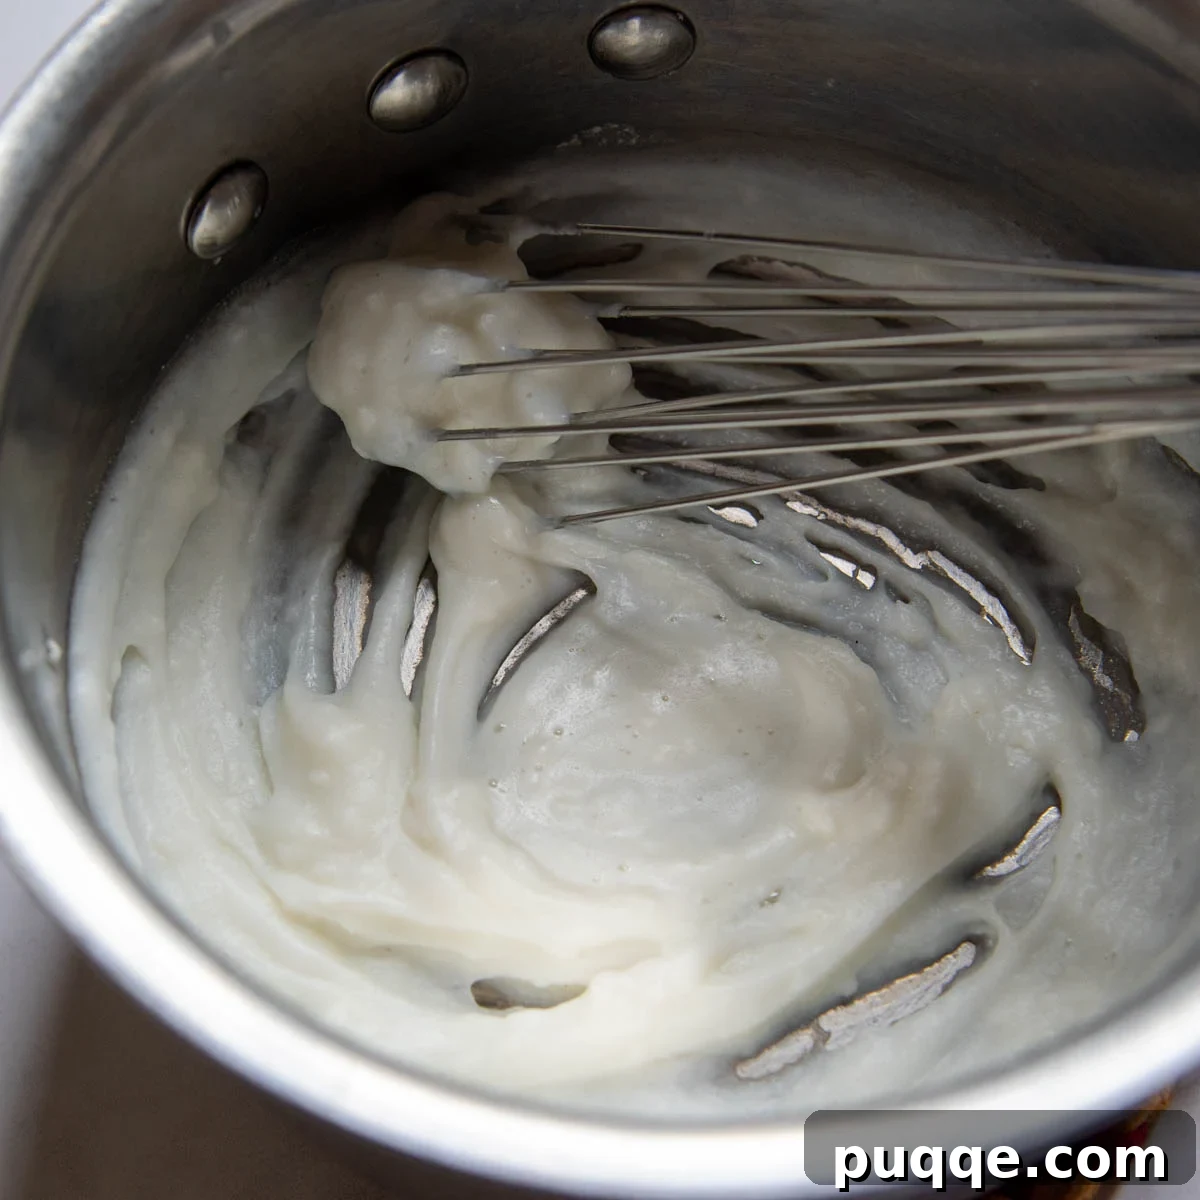
The roux, also known as tangzhong, is the secret weapon for incredibly soft gluten-free bread. Since gluten-free flours don’t absorb liquids as efficiently as wheat flour, this method pre-saturates some of the flour, allowing it to absorb more liquid and resulting in a wonderfully soft and fluffy texture instead of a dense or gummy one.
Despite its fancy name, preparing a roux is surprisingly simple. In a small saucepan, combine 2 tablespoons of gluten-free flour with the specified amounts of milk and water. Whisk continuously over medium heat. Within about a minute, you’ll notice a thickened paste forming at the bottom of the pan, leaving a trail when stirred. As soon as this occurs, remove it from the heat. That’s all it takes for this crucial step!
2. Mix the Gluten-Free Yeast Dough
In a large mixing bowl of a stand mixer fitted with a paddle attachment, combine all the dry ingredients for the rolls: gluten-free flour, potato starch, granulated sugar, psyllium husk powder, instant rapid-rise yeast, baking powder, and salt. Mix on low speed until well combined.
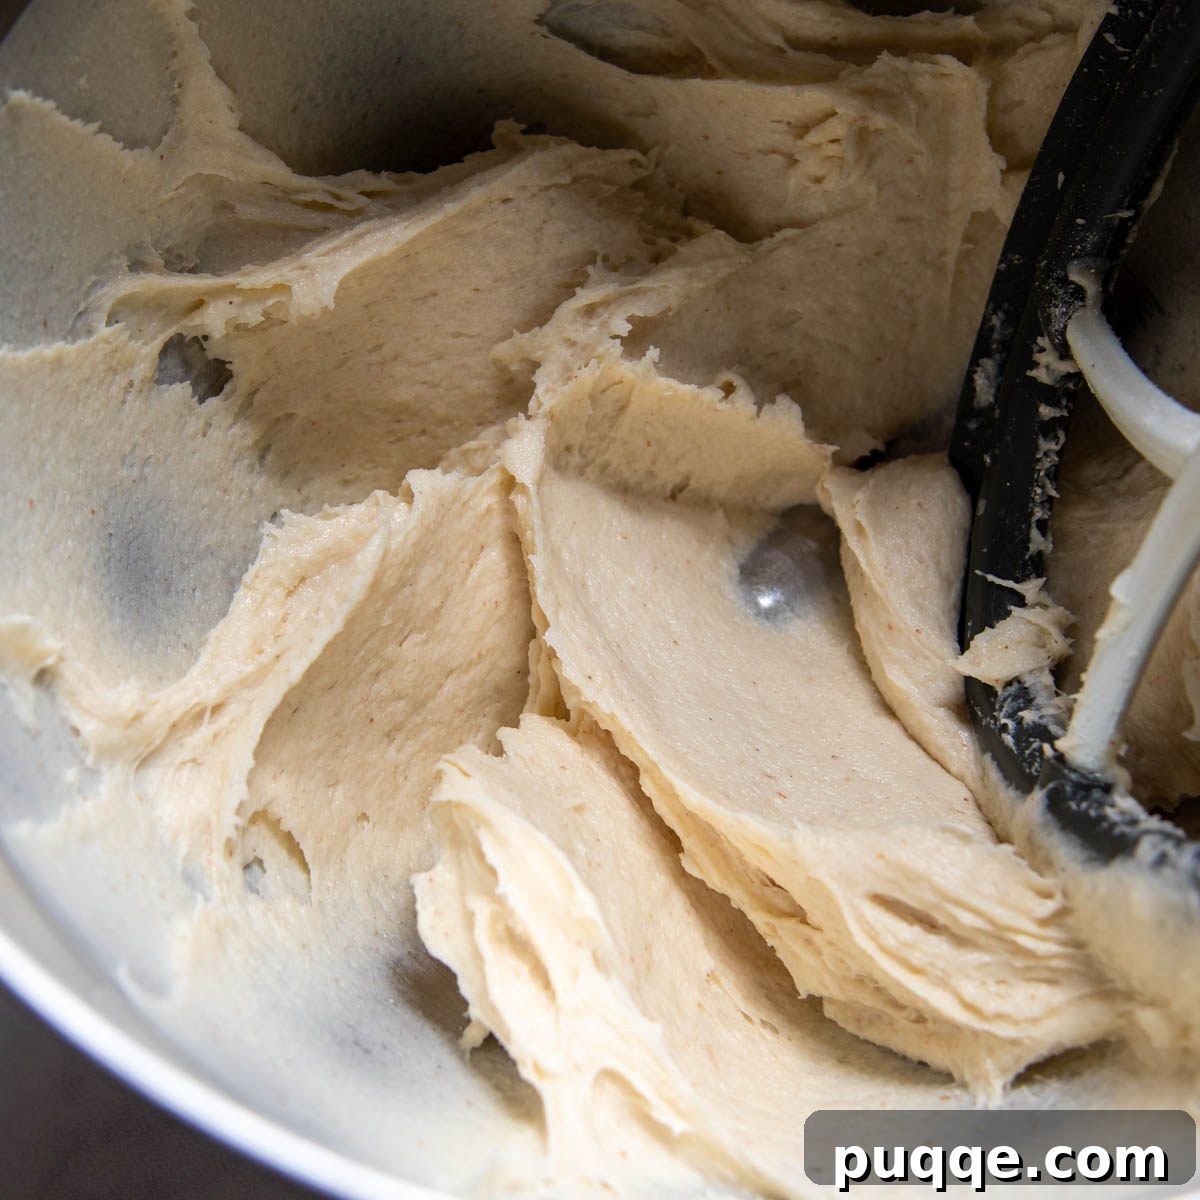
Next, add the warm milk (ensure it’s around 110°F for optimal yeast activity), the room temperature eggs, the slightly cooled melted butter, and, importantly, the prepared roux. Mix on low speed until all ingredients are just blended. Increase the speed to medium-low and beat for a full 5 minutes, stopping once or twice to scrape down the sides of the bowl. The resulting dough will be thick and stiff, but it should still have a noticeable stickiness. This stickiness is desirable for gluten-free yeast dough.
3. Portioning and Initial Shaping
Efficient portioning is key here! First, grease a large piece of parchment paper or a silicone baking mat with cooking spray and lay it on your work surface. Prepare your cookie scoop by spraying the inside of a medium-sized scoop (approximately 1 ½ tablespoons capacity) with nonstick cooking spray. This prevents the sticky dough from adhering.
Scoop out about 1 ½ tablespoons of dough for each ball and transfer them to the greased parchment paper. Don’t worry about rolling them into perfect smooth balls at this stage; we’ll refine their shape later. For maximum efficiency, scoop out all the dough first. You’ll likely need to re-spray your cookie scoop every few balls and may find it helpful to lightly grease your hands with cooking spray as well. This method minimizes handling the dough more than necessary.
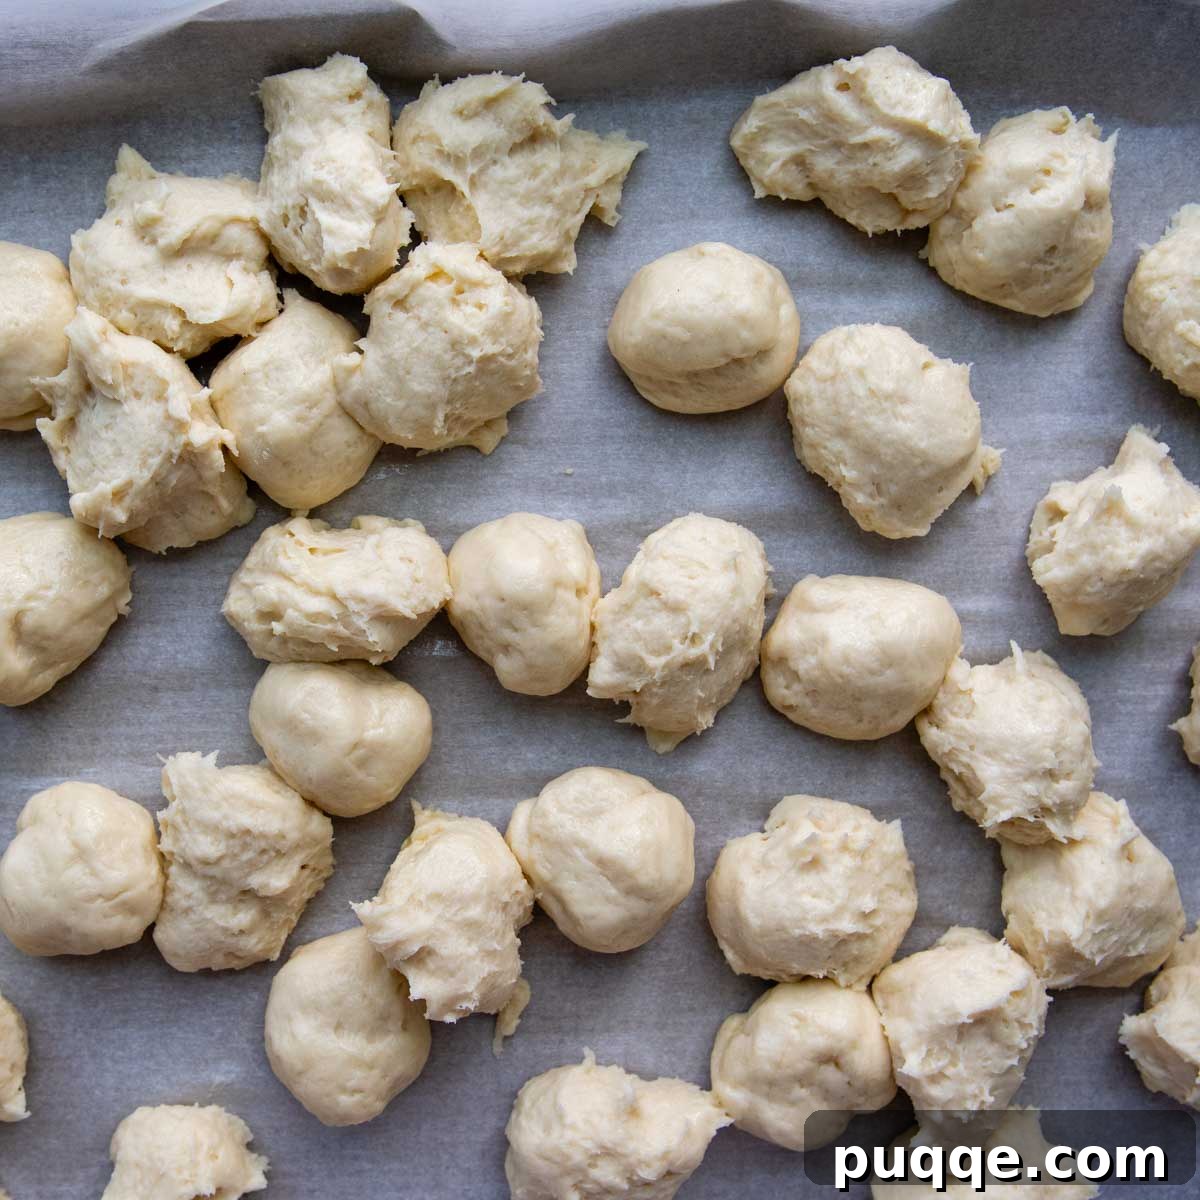
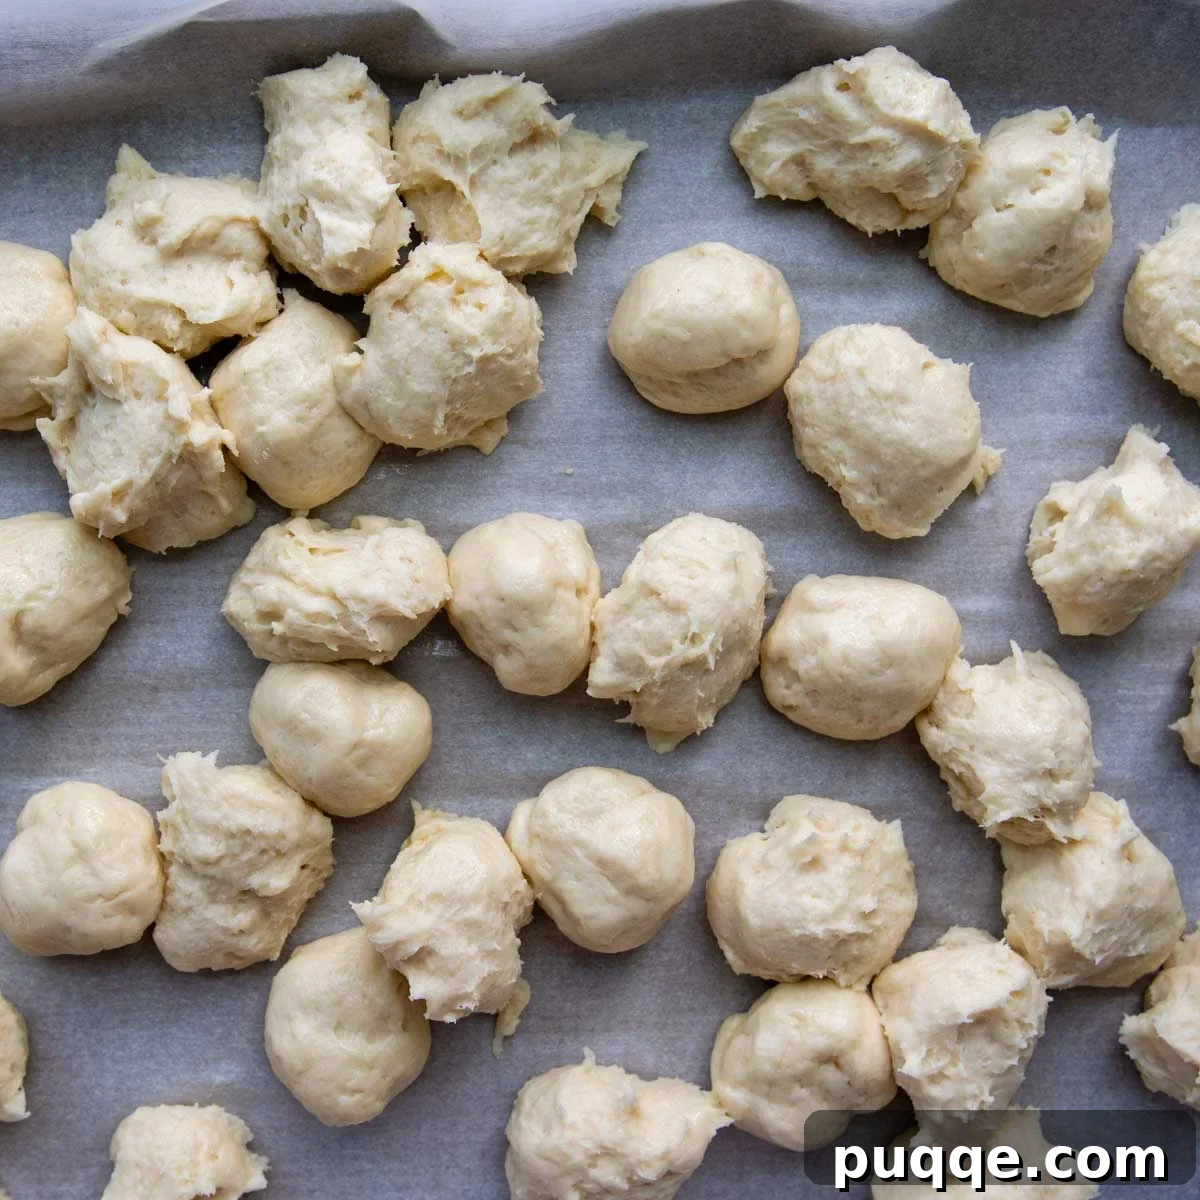
4. Setting Up the Dipping Station and Assembling the Bundt
Once all the dough has been portioned, it’s time to set up your dipping station. Melt the specified amount of butter in one small bowl. In another bowl, combine the granulated sugar and ground cinnamon for your cinnamon-sugar coating. Finally, make sure your greased bundt pan is ready.
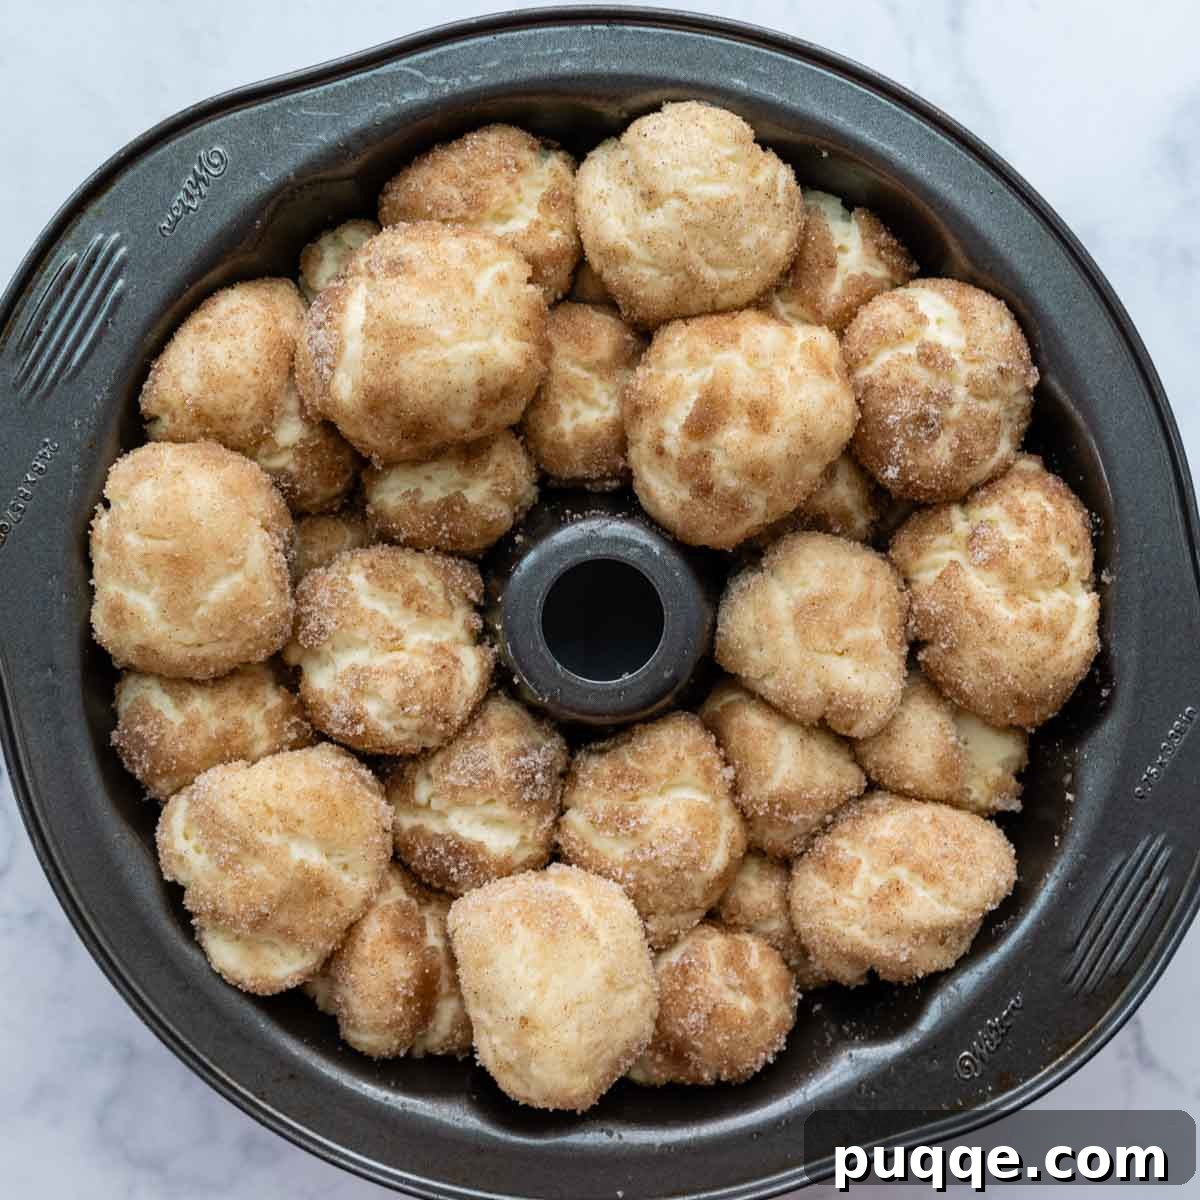
Lightly grease your hands with cooking spray. Take one of the dough balls and quickly roll it into a round shape; it doesn’t have to be perfectly spherical. First, dip the dough ball completely in the melted butter, ensuring it’s fully coated. Then, transfer it to the cinnamon-sugar mixture and roll it until it’s evenly coated. Begin arranging these coated dough balls in a single layer at the bottom of your bundt pan, placing them close together but not tightly touching for the initial layer. Continue this process with the remaining dough balls, stacking them on top of each other and filling in any gaps as you build layers in the pan. This layering creates the characteristic pull-apart effect.
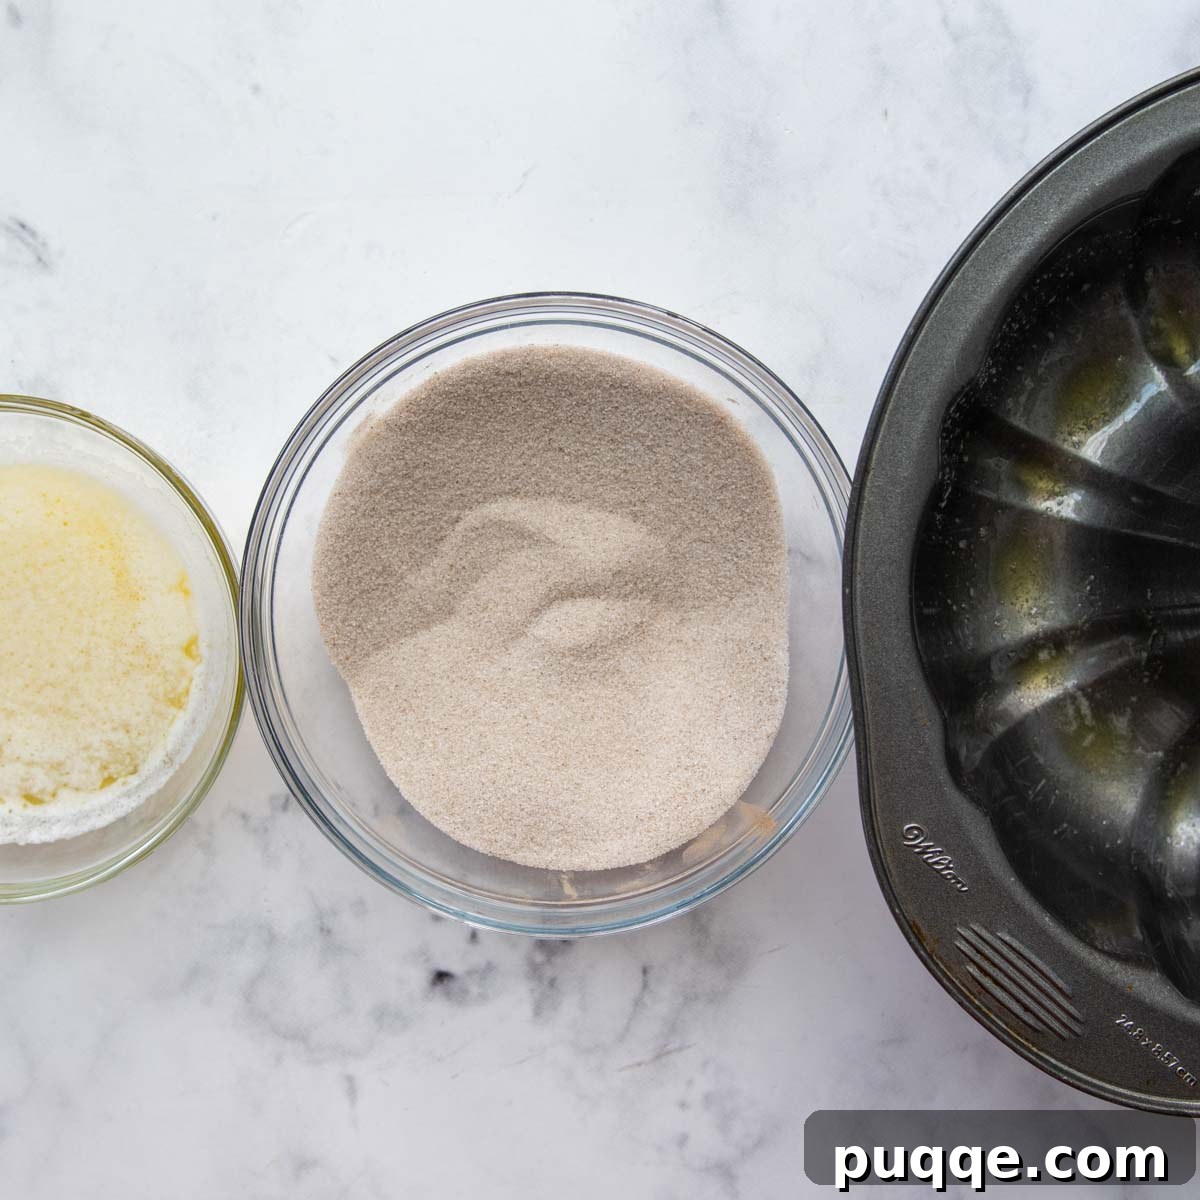
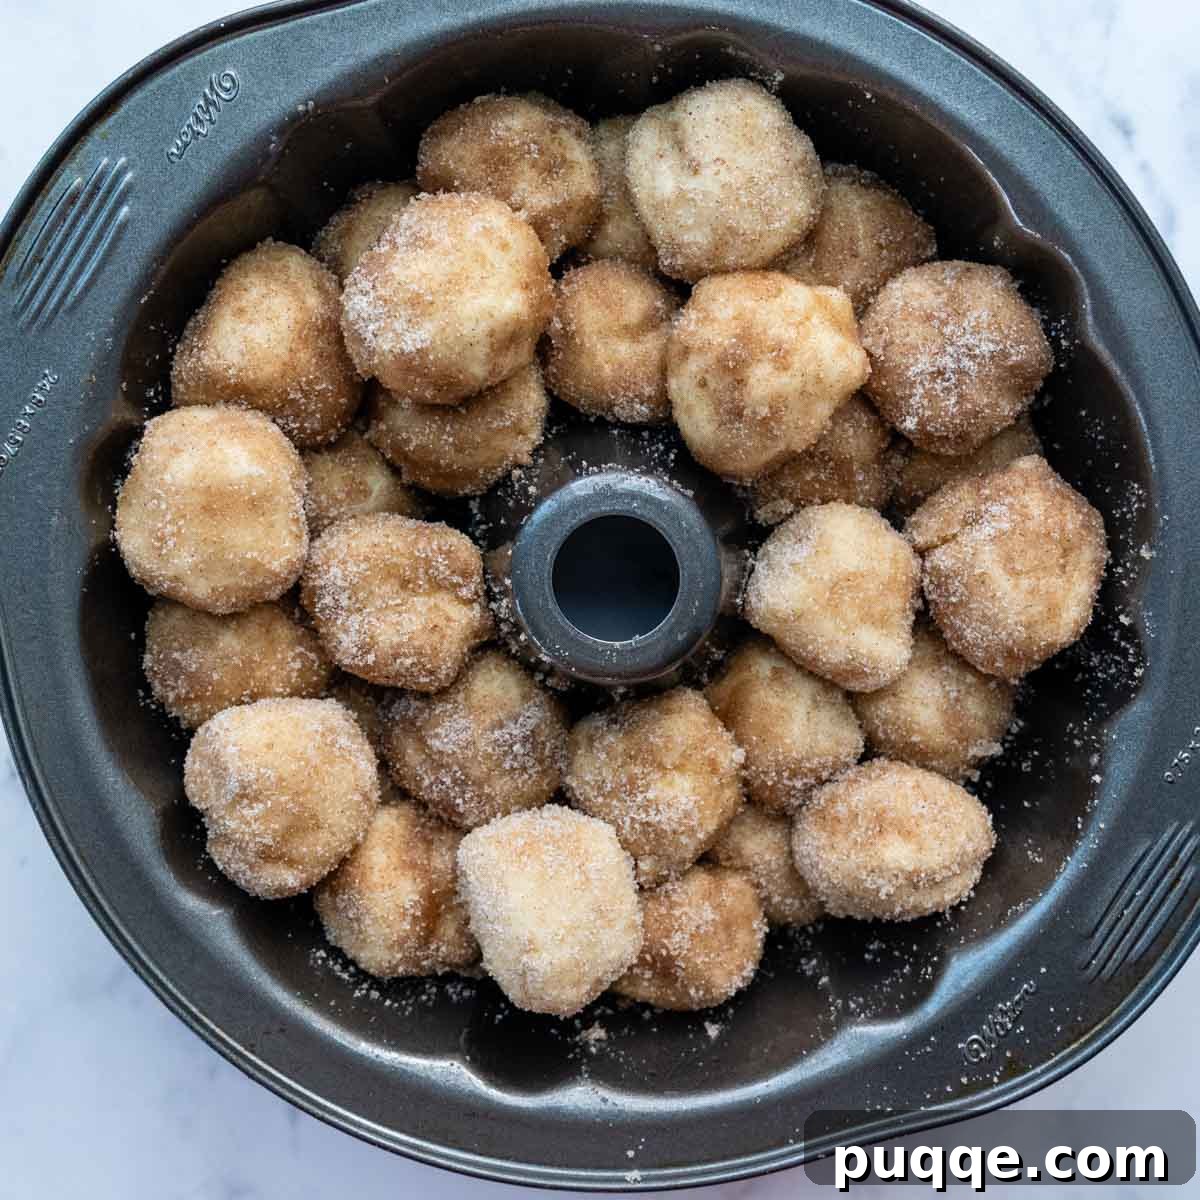
5. The Rise and Oven Preheat
Once all the dough balls are arranged in the bundt pan, cover the pan loosely with plastic wrap. Allow the dough to rise in a warm place for about 30 minutes. During this time, the yeast will activate, and the dough balls will slightly expand. Simultaneously, preheat your oven to 350°F (175°C). While the dough is rising and the oven is preheating, it’s the perfect moment to prepare your irresistible caramel sauce, ensuring it has adequate time to cool slightly before use.
6. Prepare the Sticky Caramel Pecan Sauce
The caramel pecan sauce is the crowning glory of this monkey bread, creating that coveted sticky, gooey coating. When I envisioned the perfect monkey bread, I knew a rich, homemade caramel with heavy cream was essential. While traditional salted caramel can sometimes be intimidating, this recipe yields a foolproof sauce that comes together in mere minutes.
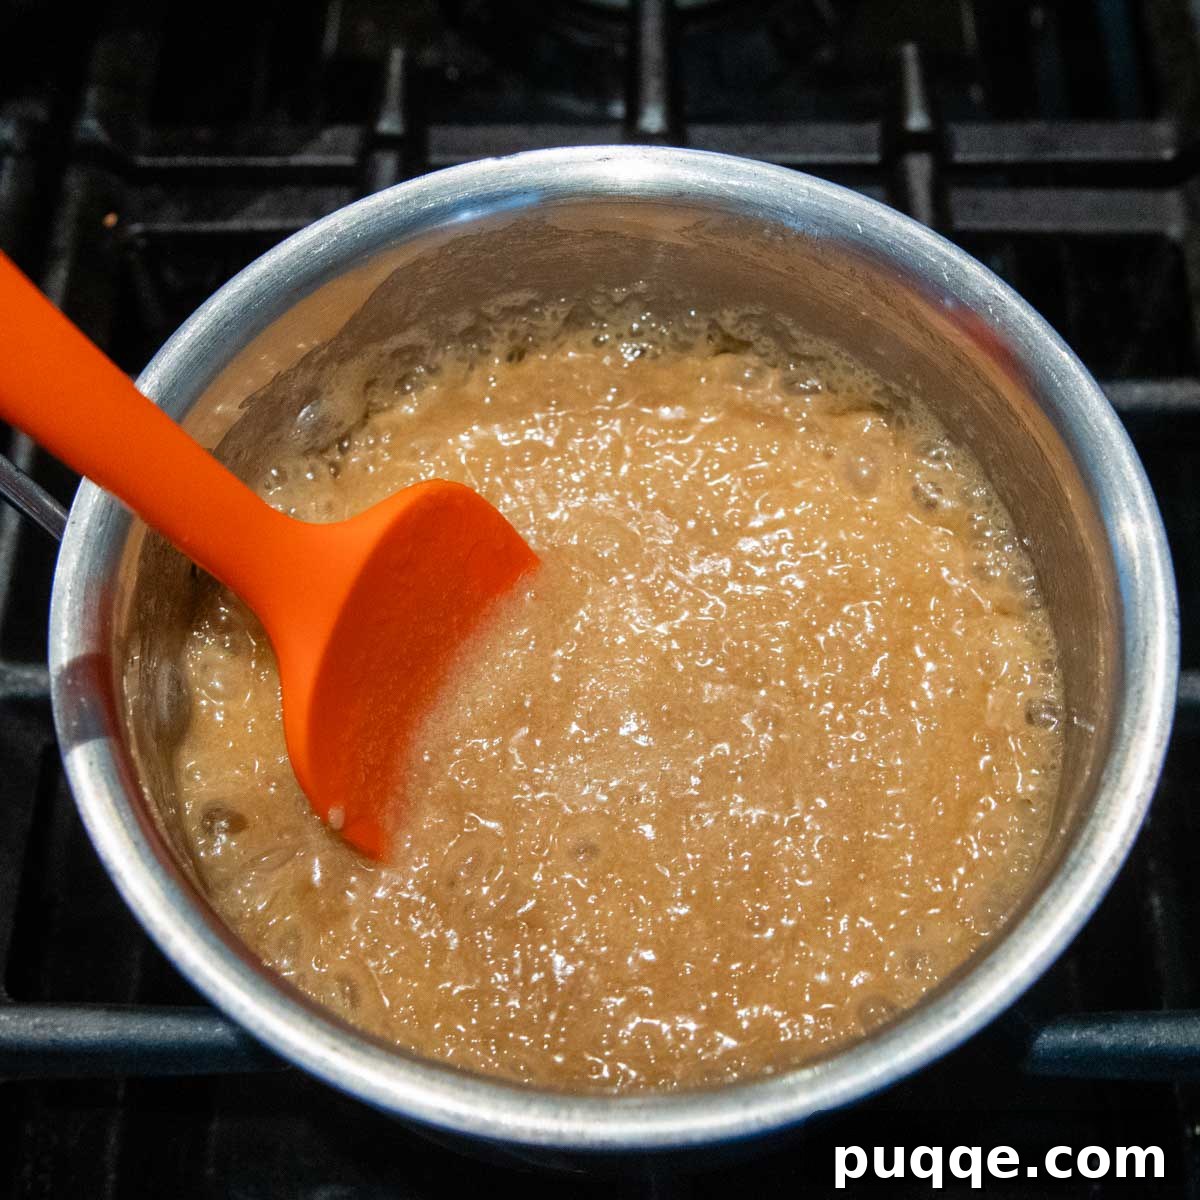
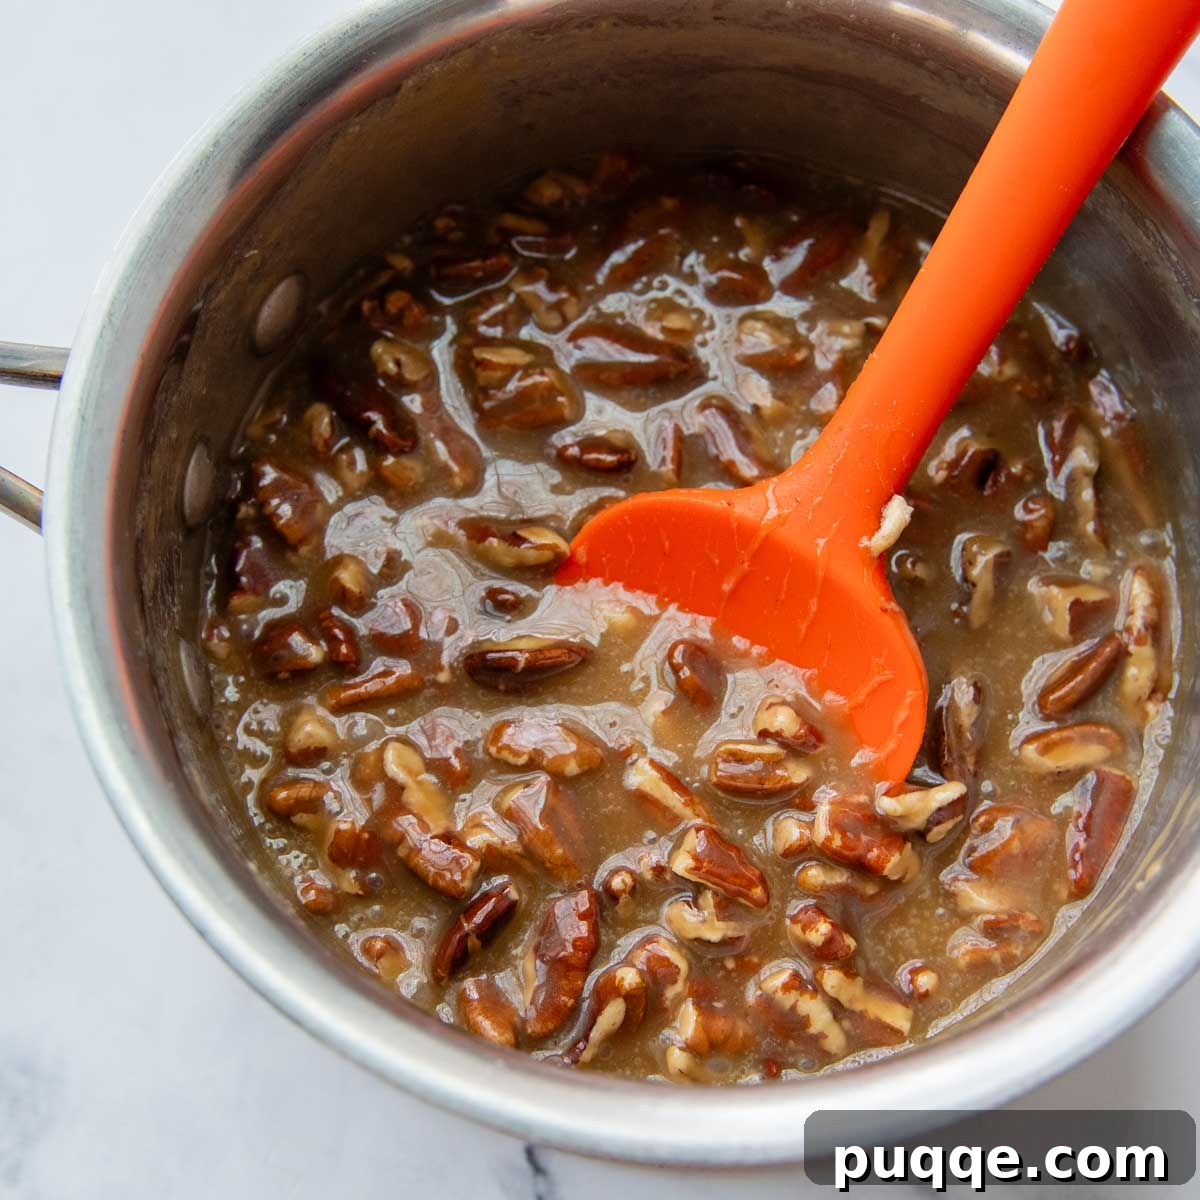
In a medium saucepan, combine the light brown sugar, butter (chopped into pieces for even melting), heavy cream, and salt. Stir these ingredients together over medium heat, continuing to stir frequently until the mixture reaches a full, rolling boil. Once it’s actively boiling, set a timer for exactly 4 minutes. Continue to cook and stir constantly throughout this period. If the boil becomes too high, you can slightly reduce the heat to prevent scorching. After 4 minutes, remove the saucepan from the heat and stir in the vanilla extract and the optional chopped pecans. Stir occasionally as the sauce cools slightly to prevent a skin from forming.
Once the caramel sauce has cooled just enough to be handled, pour about two-thirds of it evenly over the top of the risen dough balls in the bundt pan. Reserve the remaining one-third for drizzling over the baked monkey bread later. Place the bundt pan in the preheated 350°F oven. To catch any potential drips and keep your oven clean, place a baking sheet lined with foil on the rack directly below the bundt pan.
Baking and Serving Your Gluten-Free Monkey Bread
Bake the monkey bread for 50-55 minutes. Be aware that the top might appear fully baked earlier than the deeper layers, but the longer baking time is necessary to ensure the dough cooks through in the deep bundt pan. If you notice the top browning too quickly during the last 15 minutes of baking, you can loosely tent a piece of aluminum foil over the pan to prevent over-browning.
To check for doneness, gently lift one of the dough balls from the top layer and examine one underneath. It should be cooked through and feel springy. Once baked, remove the monkey bread from the oven and allow it to cool in the pan for approximately 15 minutes. This cooling period is crucial as it allows the caramel to set slightly and makes the inversion process much easier, preventing the bread from sticking.
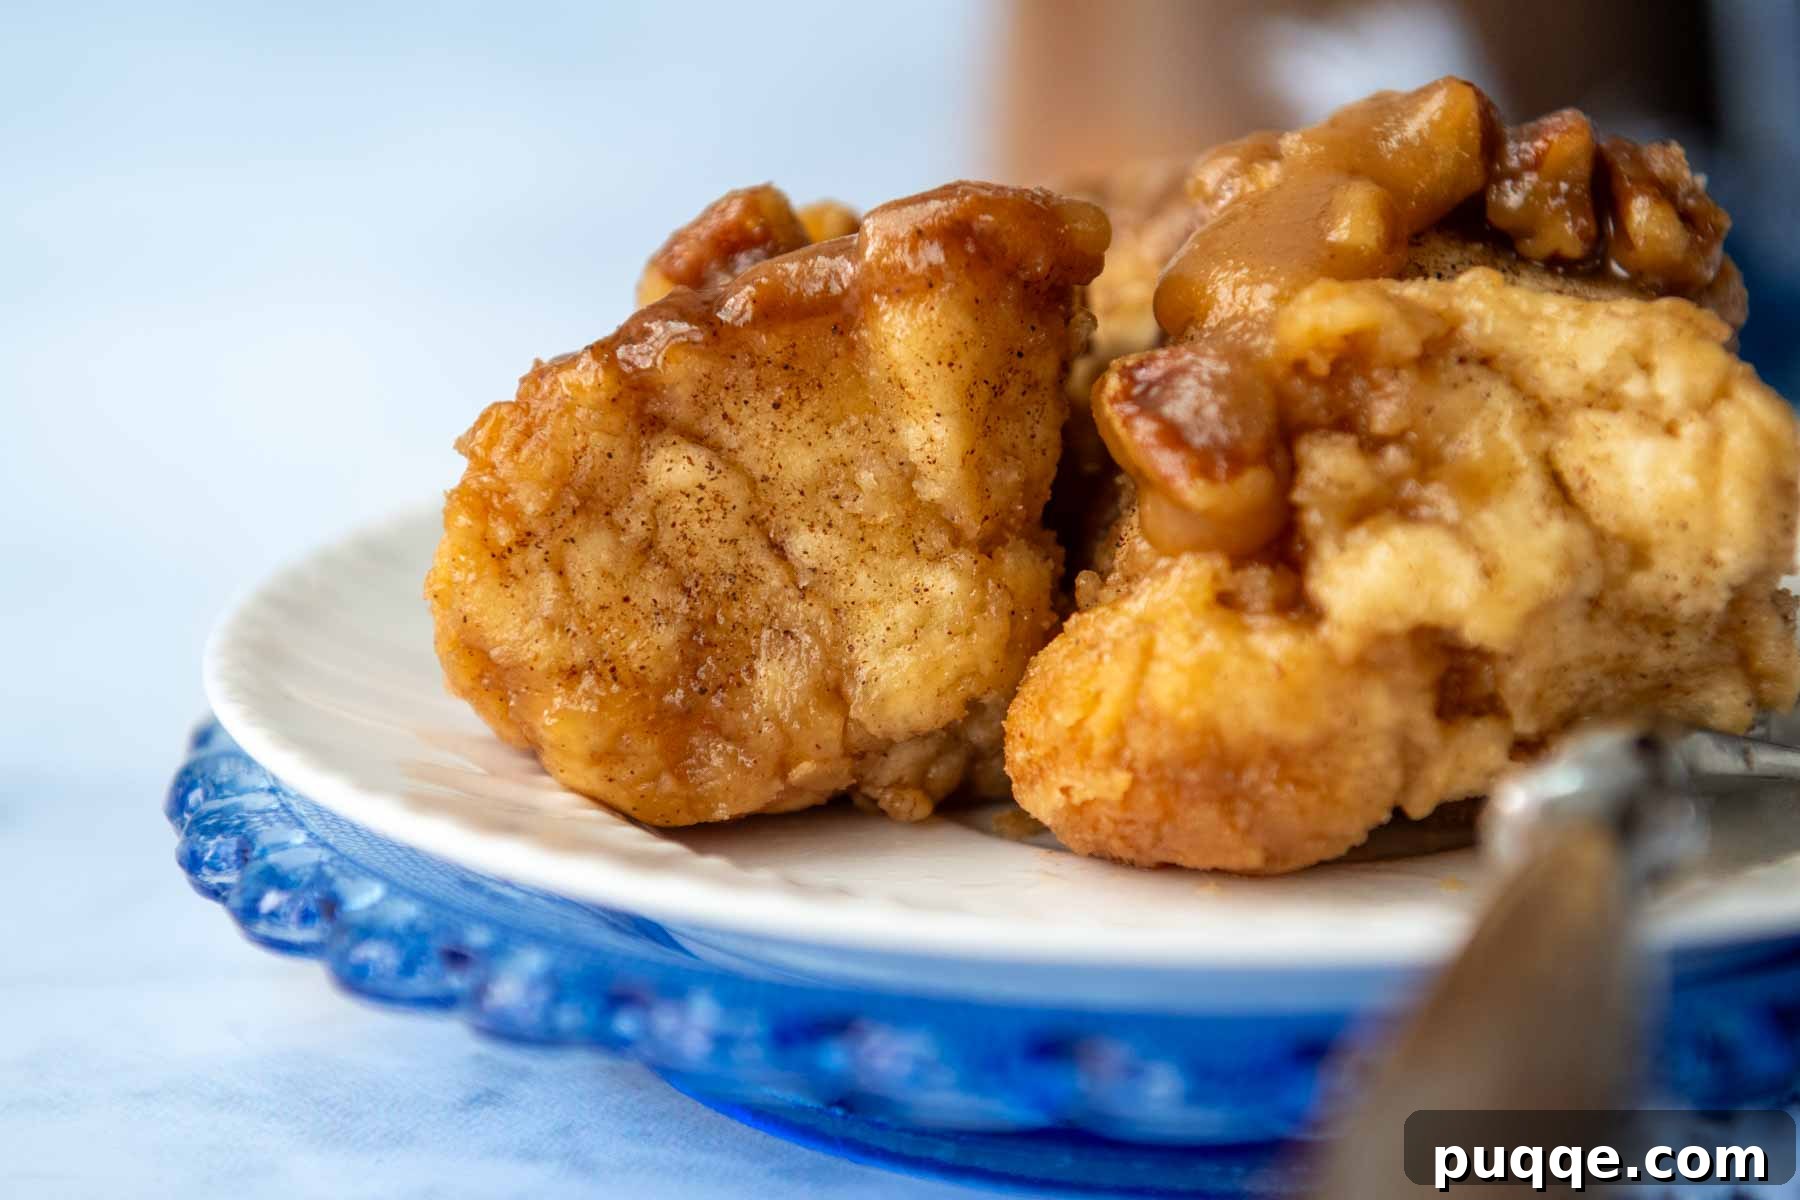
After cooling, run a thin knife carefully around both the outer and inner edges of the bundt pan to loosen any sticky caramel. Place a serving platter upside down over the top of the bundt pan, then, holding the platter and pan tightly together, carefully invert them to release the monkey bread onto the platter. If any caramel remains in the pan, gently rewarm the reserved caramel sauce on the stovetop or in the microwave for a few seconds until pourable, then generously drizzle it over the inverted monkey bread. Serve warm for the ultimate gooey, pull-apart experience. Trust me, it tastes just as incredible as it looks!
Dairy-Free Adaptation for Gluten-Free Monkey Bread
Yes, absolutely! This delicious gluten-free monkey bread can be easily adapted to be dairy-free, allowing even more people to enjoy this delightful treat. You will need to make specific substitutions for both the milk and butter in the recipe.
For the milk, simply substitute with your preferred dairy-free milk alternative, such as unsweetened almond milk, soy milk, or oat milk. Ensure it’s a plain variety to avoid altering the flavor profile. When it comes to butter, opt for a high-quality plant-based vegan butter. Many excellent brands are available on the market that perform wonderfully in baking. It’s also crucial to double-check the ingredient label on your chosen gluten-free flour blend, as some blends may contain milk powder or other hidden dairy products. Always read labels carefully if dairy is a concern.
For the caramel sauce in the dairy-free version, a slightly modified approach is needed. In a saucepan, combine 1/3 cup of melted plant-based butter, 3/4 cup of packed light brown sugar, and 1 teaspoon of vanilla extract. Stir these ingredients together until well combined and heated through. Instead of the traditional heavy cream-based caramel, this simpler sauce is poured entirely over the dough balls before baking. This ensures a rich, sweet coating without any dairy components. Bake according to the original instructions.
Save this recipe to your Pinterest board!
Let’s be friends on Pinterest! I’m always sharing great recipes!
Did you make this recipe? I love hearing from you! Leave a star rating and comment below the recipe card. It helps others when searching for recipes and I appreciate feedback from our community. You will always hear back from me! -Melissa
Gooey & Soft Gluten-Free Monkey Bread

Melissa Erdelac
Yield: 12 servings
Prep Time: 40 mins
Cook Time: 50 mins
Total Time: 2 hrs
Enjoy a classic, homemade treat again with this easy gluten-free monkey bread recipe. Doughy soft cinnamon bites are covered in a sticky caramel pecan sauce and baked until bubbly and gooey. This make-ahead, overnight holiday gluten-free breakfast idea has a bundt-cake option, perfect for a crowd, or prepare the small-batch adaptation. I’ll show you how, step-by-step.
Pin
Rate
Remove Ads
Ingredients
Roux
- 4 tablespoons (35 g) gluten free all purpose flour (I highly recommend Cup4Cup brand)
- 6 tablespoons (90 g) water
- 6 tablespoons (90 g) milk
Rolls
- 3 cups (438 g) gluten free all purpose flour (I highly recommend Cup4Cup brand)
- 6 tablespoons (64 g) potato starch
- ½ cup (100 g) granulated sugar
- 2 tablespoon (22 g) psyllium husk powder (what is psyllium husk?)
- 1 packet (2 ¼ tsp, 9 g) instant rapid rise yeast (see recipe notes for active dry yeast)
- 1 ½ teaspoons baking powder
- ½ teaspoon salt
- 1 ½ cups (368 g) warm milk (110°F), microwaved for 90 seconds
- 2 large eggs, room temperature
- 4 tablespoons (57 g) melted butter, slightly cooled
Cinnamon Sugar Coating
- ½ cup (113 g) butter, melted and cooled
- 1 ½ cup (300 g) granulated sugar
- 1 ½ tablespoons ground cinnamon
Caramel Sauce
- 1 ½ cups (351 g) packed light brown sugar
- ½ cup (113 g) butter, chopped into 6-8 pieces
- ½ cup (120 g) heavy whipping cream
- ½ teaspoon salt (reduce to ¼ tsp if you don’t prefer “salted” caramel)
- ½ teaspoon vanilla extract
- 1 cup (125 g) chopped pecans (optional)
Equipment
- Stand Mixer
- Bundt Pan (12-cup)
- Medium Cookie Scoop
- Small saucepan
- Large mixing bowl
- Parchment paper or silicone baking mat
Instructions
- Prepare for Baking: Before starting the roux, turn your oven to 200ºF (95°C) for a few minutes, then turn it OFF. This creates a warm, cozy environment for the dough to initially rise. Grease a nonstick 12-cup bundt cake pan thoroughly with cooking spray and set aside.
- Make the Roux: In a small saucepan, combine 4 tablespoons of gluten-free flour with the milk and water. Whisk constantly over medium heat until a trail separation appears at the bottom of the pan, indicating it has thickened. Remove from heat and set aside to cool slightly.
- Mix Dry Ingredients: In the large mixing bowl of your stand mixer, combine the 3 cups GF flour, potato starch, ½ cup granulated sugar, psyllium husk powder, instant rapid-rise yeast, baking powder, and ½ teaspoon salt. Mix on low speed using a paddle attachment until well blended.
- Combine Wet and Dry: Add the warm milk (110°F), 2 large eggs, 4 tablespoons melted butter, and the prepared (and slightly cooled) roux to the dry ingredients. Mix on low speed until well blended. Increase to medium speed and beat for 5 minutes, stopping to scrape down the bowl once or twice. The dough will be stiff but still sticky.
- Portion Dough Balls: You’ll need about 40 dough balls in total. Grease a silicone baking mat or parchment paper with cooking spray and lay it on your work surface. Spray the inside of a medium cookie scoop (approx. 1 ½ tablespoons) with nonstick cooking spray. Scoop out all the dough onto the greased paper. You will need to re-spray the scoop and potentially your hands every few balls. (Remember, you’ll roll them into smooth balls in the next step, so no need for perfect spheres yet!)
- Dipping Station & Assembly: Set up your dipping station: 1) A bowl with ½ cup melted butter, 2) a bowl with 1 ½ cups granulated sugar and 1 ½ tablespoons ground cinnamon mixed together, and 3) your greased 12-cup bundt pan. With greased hands, take each dough ball, roll it into a round shape, dip it in melted butter, then roll it in the cinnamon-sugar mixture. Arrange the coated balls at the bottom of the bundt pan in a single layer, close but not touching. Continue stacking remaining balls on top, filling in spaces.
- Rise Dough: Cover the bundt pan loosely with plastic wrap. Place it in the previously warmed (now off) oven for 10 minutes. Remove the pan from the oven and let it sit at room temperature for an additional 20 minutes while your oven preheats to 350°F (175°C). During this time, crucial caramel sauce preparation should begin!
Caramel Sauce Instructions
- Make the Caramel Sauce: In a medium saucepan, combine 1 ½ cups packed light brown sugar, ½ cup butter (chopped), ½ cup heavy whipping cream, and ½ teaspoon salt. Stir frequently over medium heat until it comes to a FULL, rolling boil.
- Cook Caramel: Once boiling, cook and stir constantly for exactly 4 minutes. Reduce heat slightly if the boil becomes too vigorous. Remove from heat and stir in ½ teaspoon vanilla extract and 1 cup (optional) chopped pecans. Stir occasionally as it cools slightly.
Baking Instructions
- Sauce and Bake: Pour 2/3 of the slightly cooled caramel sauce over the top of the risen dough balls in the bundt pan, reserving the rest for later. Place the bundt pan on the middle rack of your preheated oven. On the rack below it, place a baking sheet lined with foil to catch any potential drips.
- Bake Until Golden: Bake for 50-55 minutes. The top will likely brown sooner, but the longer time is needed for the center to cook through. If the top becomes too dark, lightly tent with foil for the last 15 minutes. To check for doneness, gently lift a top roll to check the one underneath for a cooked, springy texture.
- Cool and Serve: Cool in the pan for 15 minutes. Run a knife around the outer and inner edges to loosen. Place a serving platter on top and carefully invert the pan to release the monkey bread. Gently rewarm the reserved caramel sauce and drizzle over the top. Serve warm and enjoy immediately!
Notes
Using Active Dry Yeast
If you only have active dry yeast, proof it first: mix it in the warm milk (110ºF) with 1 tsp sugar and let sit for 5 minutes until frothy, then add with the other wet ingredients.
Small Batch Adaptation
- Half all the ingredients, but use 1 packet of instant active yeast and 1 teaspoon baking powder.
- Layer the shaped and dipped balls in a 9-inch cake pan or loaf pan. Arrange at the bottom close, but not touching for the first layer. Repeat with remaining balls, stacking on top of each other and filling in spaces.
- Make a half recipe of the caramel sauce. Pour 2/3 over before baking. Bake for 30-35 minutes.
- Cool in the pan for 15 minutes, run a knife around the edges, then invert onto a serving platter. Pour the remaining sauce over.
Overnight Instructions (Make-Ahead)
After shaping the rolls and layering them in the baking dish, cover loosely with plastic wrap. Let sit at room temperature for 20 minutes to begin rising. Then, transfer to the refrigerator overnight. You will make the caramel sauce the next day.
On serving day, remove the pan from the refrigerator about 2 ½-3 hours before you plan to serve. Let it sit at room temperature for 1 ½ hours while you prepare the caramel sauce (freshly made). Preheat the oven to 350°F (175°C). Pour ⅔ of the freshly made sauce over the dough, then bake according to the main recipe directions. After inverting the pan, pour the remaining sauce over the top.
Storing and Serving
Monkey bread is best enjoyed warm and fresh on the day it is made. Store any leftovers at room temperature, wrapped securely in plastic wrap or foil. To reheat individual servings, microwave for about 20-30 seconds until warm and gooey again.
Baked monkey bread can also be frozen in individual serving-size portions for longer storage. Thaw at room temperature, then rewarm in the microwave for a quick treat.
Nutrition Facts (per serving)
Calories: 663kcal, Carbohydrates: 93g, Protein: 7g, Fat: 32g, Saturated Fat: 16g, Polyunsaturated Fat: 3g, Monounsaturated Fat: 10g, Trans Fat: 1g, Cholesterol: 93mg, Sodium: 385mg, Potassium: 258mg, Fiber: 6g, Sugar: 64g, Vitamin A: 847IU, Vitamin C: 0.4mg, Calcium: 149mg, Iron: 2mg
Did you make this recipe?
Please leave a star rating and review below. It helps others when searching for recipes and I LOVE feedback!