
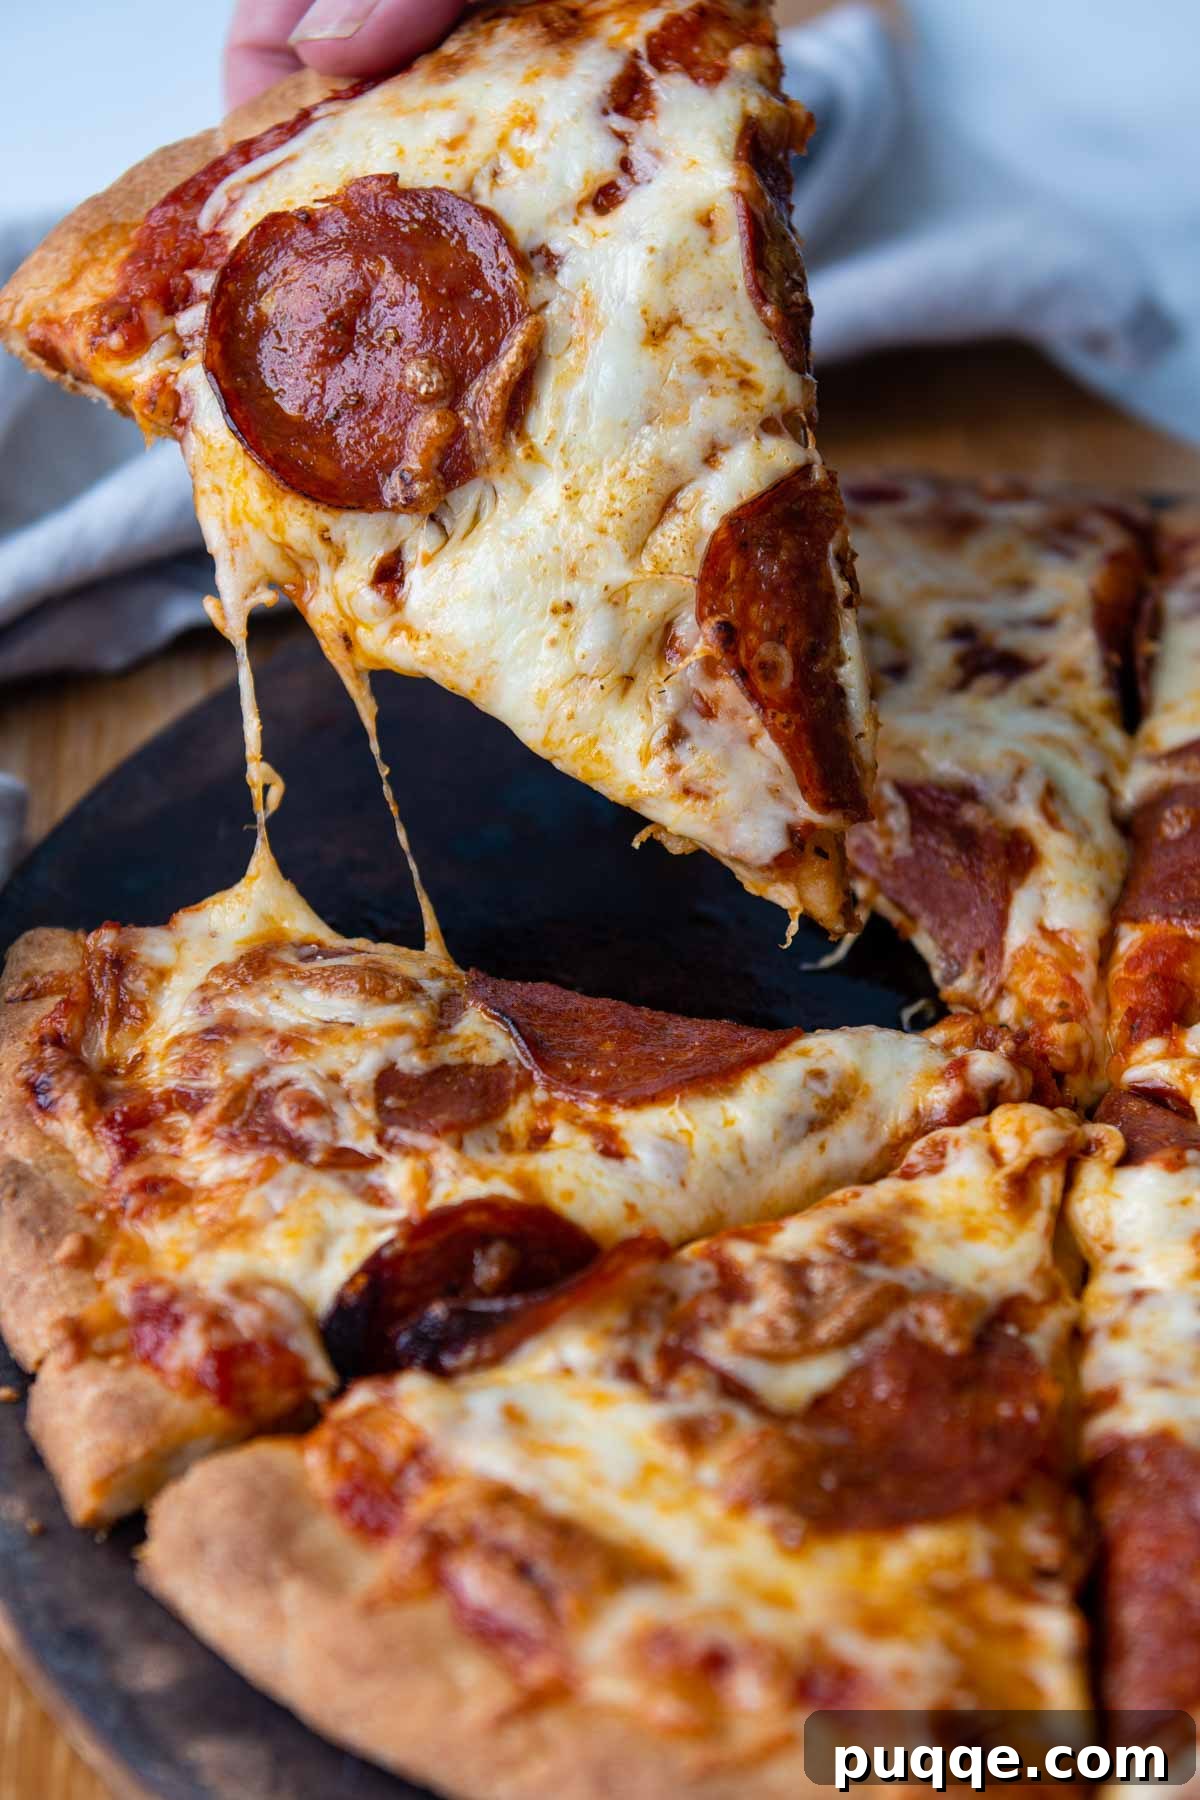
Welcome to your ultimate guide for crafting the perfect gluten-free pizza crust at home! Whether you’re a newcomer to gluten-free baking or a seasoned enthusiast, this recipe is meticulously designed to become your new kitchen essential. It delivers everything you desire in a homemade pizza base: a delightfully soft and fluffy interior, beautifully golden and crisp edges, and that satisfying chewiness often missing in gluten-free alternatives. Developed through extensive recipe testing, our unique blend of gluten-free flours and the power of psyllium husk creates a remarkably sturdy crust. This robust foundation can proudly support generous layers of rich pizza sauce, melting cheese, and all your favorite toppings without ever compromising its structure or falling apart.
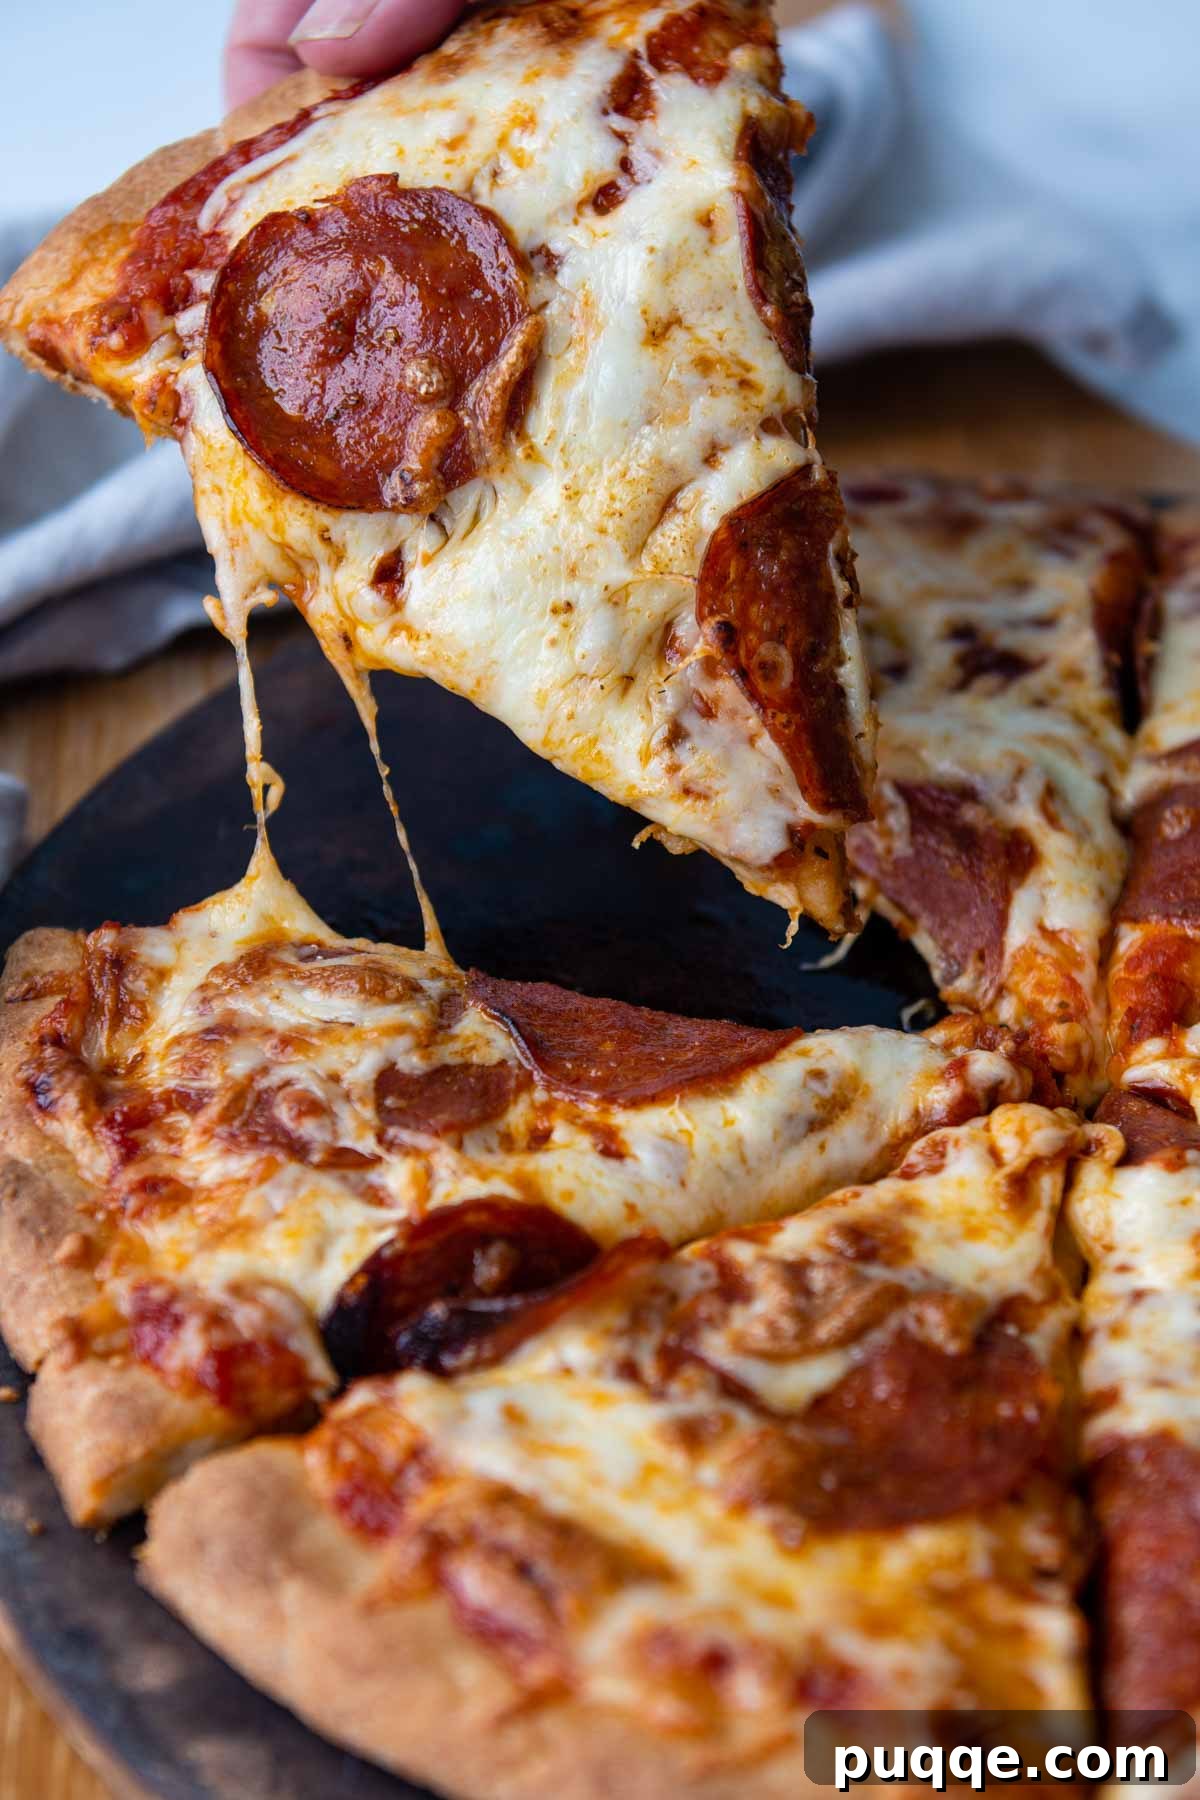
Skeptics, Prepare to Be Amazed – This Gluten-Free Pizza Crust Truly Works!
We understand your hesitation. The world of gluten-free baking can be fraught with disappointments, leading to rubbery textures or crumbly messes. Many have tried, and many have failed, to replicate the magic of traditional pizza dough without gluten. As you glance at this homemade gluten-free pizza crust recipe, you might find yourself thinking, “She wants me to bake it for how long?!” or “How could this dough possibly turn out as good as she claims?!”
Trust us when we say, we’ve been exactly where you are. Our journey to perfecting this gluten-free pizza dough began with similar doubts and a healthy dose of skepticism. The initial inspiration for this recipe came from an invaluable resource during my transition to a gluten-free diet: the acclaimed America’s Test Kitchen: How Can It Be Gluten-Free Cookbook. When I first reviewed their detailed process for making gluten-free pizza crust, those “no-way” thoughts definitely crossed my mind.
However, after dedicating countless hours to testing and refining numerous America’s Test Kitchen recipes, I quickly came to realize the unparalleled depth of their culinary expertise. Their meticulous techniques and scientific approach to baking became a profound source of inspiration, directly influencing many of my own gluten-free bread and baking innovations, ultimately culminating in the publication of my very own gluten-free cookbook. So, when we say this recipe works, it comes with a strong foundation of tested and proven methodologies. (Toot, Toot! 😊)
Let’s delve into the magic behind this gluten-free pizza crust. While it relies on gluten-free flours, its success hinges on a few ingenious “ingredient friends” that work in harmony to prevent the dreaded cardboard-like outcome. One crucial technique involves strategically swapping a portion of the gluten-free flour blend with another type of starch. This simple yet effective modification ensures the crust remains light and wonderfully fluffy, rather than becoming dense or excessively chewy.
During the development of our doughy, soft gluten-free pizza rolls, we found that a small amount of potato starch yielded excellent results. For this specific gluten-free pizza crust recipe, however, the addition of almond flour plays a vital role. It significantly boosts moisture retention and effectively reduces chewiness, a particularly important benefit since this recipe is intentionally crafted without eggs or butter. This thoughtful ingredient choice also confers an additional advantage: the recipe is naturally dairy-free and vegan, making it accessible to a wider range of dietary needs.
Beyond these thoughtful flour adjustments, you’ll discover another touch of culinary enchantment in this dough: psyllium husk powder. You might wonder, “Why psyllium husk?” The answer lies in its extraordinary ability to greatly enhance the dough’s structure, elasticity, and overall stretchy texture. These are precisely the qualities we seek to achieve that truly “bomb-diggity” homemade gluten-free crust experience, mimicking the characteristics of traditional wheat-based dough without any gluten. These ingredient choices work together to create a remarkable dough that defies typical gluten-free limitations.
All of these clever substitutions and additions make perfect sense, right? So, where might the lingering questions arise? Typically, it’s about the time commitment. The dough itself comes together incredibly fast – simply dump all ingredients into a mixer and blend. The secret ingredient here isn’t a complex technique, but rather a bit of patience during the rising and baking phases. I’ll guide you through these extended timelines below, step by step. Just remember to trust the process; the results are absolutely worth the wait.
After trying many other recipes for a year, this is my go-to recipe for GF pizza! It’s easy and is consistently delicious! I make this gluten free pizza for everyone when my daughter with celiac visits, and no one misses the wheat pizza–it’s THAT GOOD.
—Kate
Let’s Craft This Masterpiece Together!
This section provides detailed step-by-step photos and modified instructions to help you visualize each stage of the pizza-making process. For the precise ingredient measurements and complete recipe instructions, please scroll down to the comprehensive recipe card located at the bottom of this page. Follow along and discover how simple it is to create your own incredible gluten-free pizza crust!
Effortless Preparation – Simply Dump and Mix
The first step couldn’t be simpler! In the spacious bowl of a stand mixer, fitted with a paddle attachment, begin by combining all the dry ingredients. This includes your chosen gluten-free all-purpose flour (we highly recommend Cup4Cup GF flour for its superior performance and consistent results), almond flour, psyllium husk powder (which is key for elasticity and structure), baking powder (to provide an essential boost of rise and loftiness), salt, and instant yeast. Mix these dry components thoroughly on a low speed to ensure an even distribution.
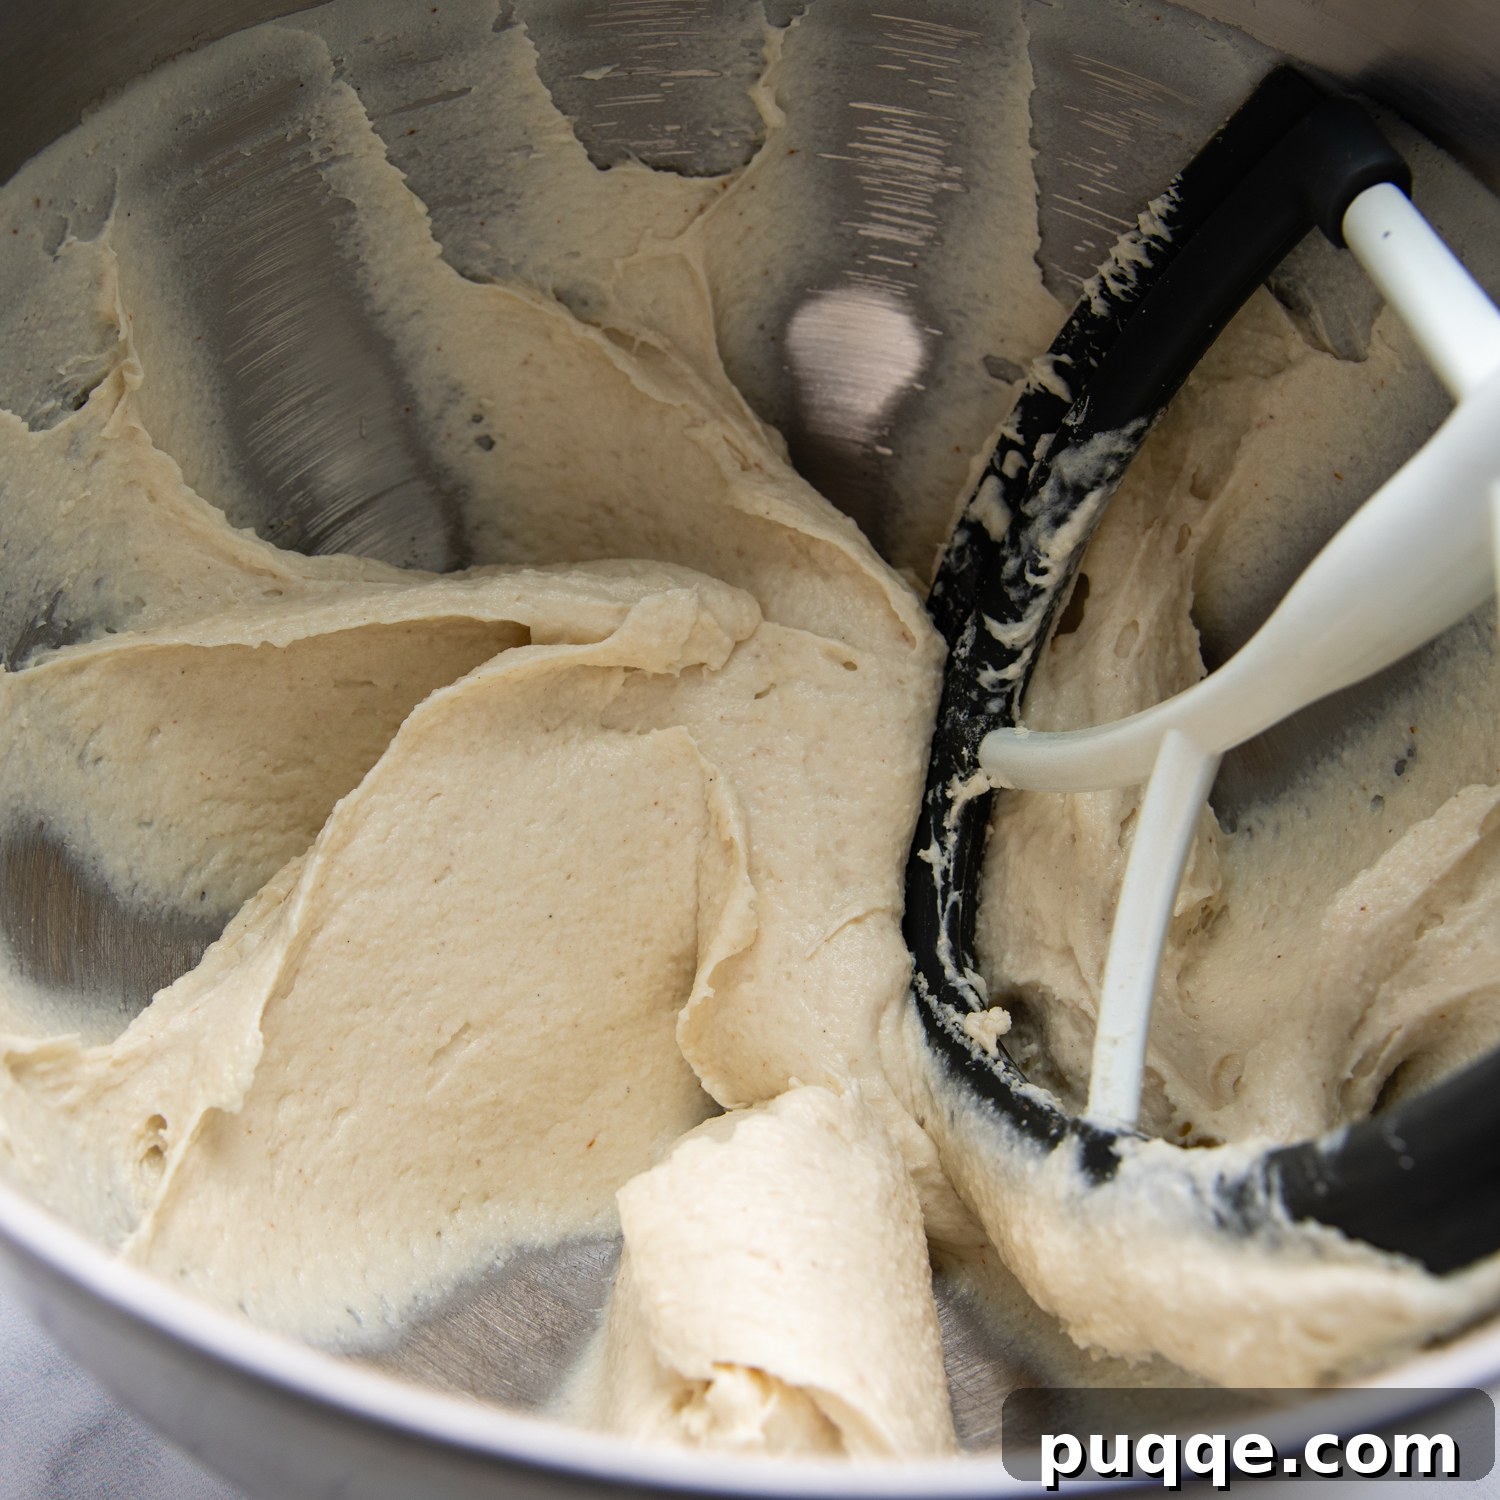
Once the dry ingredients are well combined, gradually and slowly pour in the warm water and olive oil while the mixer continues to run on low speed. Continue mixing until all the ingredients are fully incorporated and form a cohesive dough. Then, increase the mixer speed to medium-high and beat the dough for a full 5 minutes. At this stage, the dough will have a noticeably sticky consistency, almost like a thick batter, which is perfectly normal for gluten-free dough. The best part? There’s no need for any strenuous kneading or hands-on shaping at this point, making it incredibly easy to manage!
Strategize for Optimal Rise Time
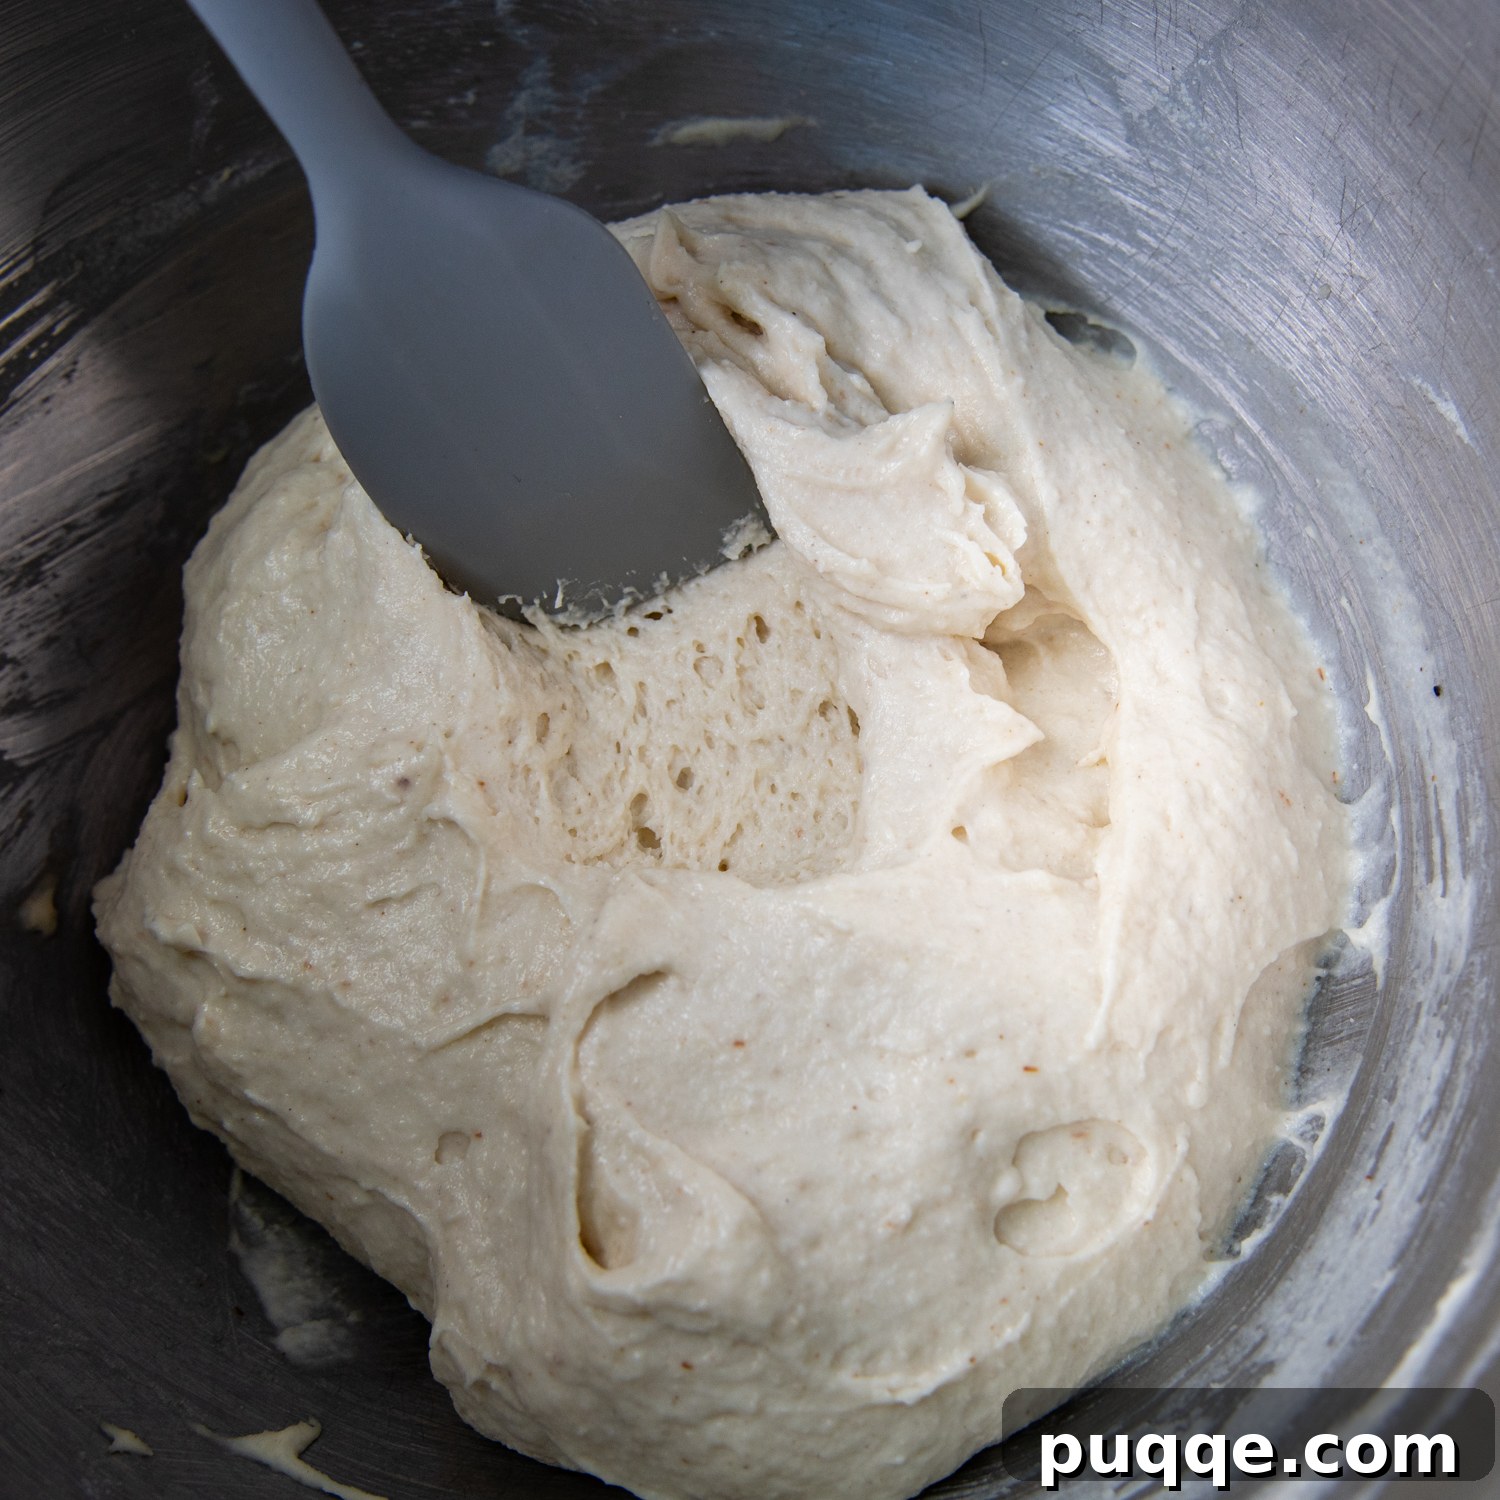
After mixing, use a rubber spatula to carefully scrape down all the dough from the sides of the bowl and consolidate it into the center. Once gathered, cover the bowl securely with plastic wrap, ensuring an airtight seal. Then, place the covered bowl in a warm, draft-free location to rise for approximately 90 minutes. We understand this is a significant amount of time, so planning ahead is crucial to integrate it seamlessly into your schedule. The dough is ready when you gently peek inside with a spoon, and you notice a distinct bubbly texture, indicating the yeast has been actively working its magic.
Skillfully Shaping the Dough
Before you begin shaping, preheat your oven to 325°F (160°C). You’ll need a pizza stone or a large baking sheet, both of which should be lined with a sheet of parchment paper that has been lightly greased with cooking spray. This crucial step prevents the dough from sticking and ensures an easy release.
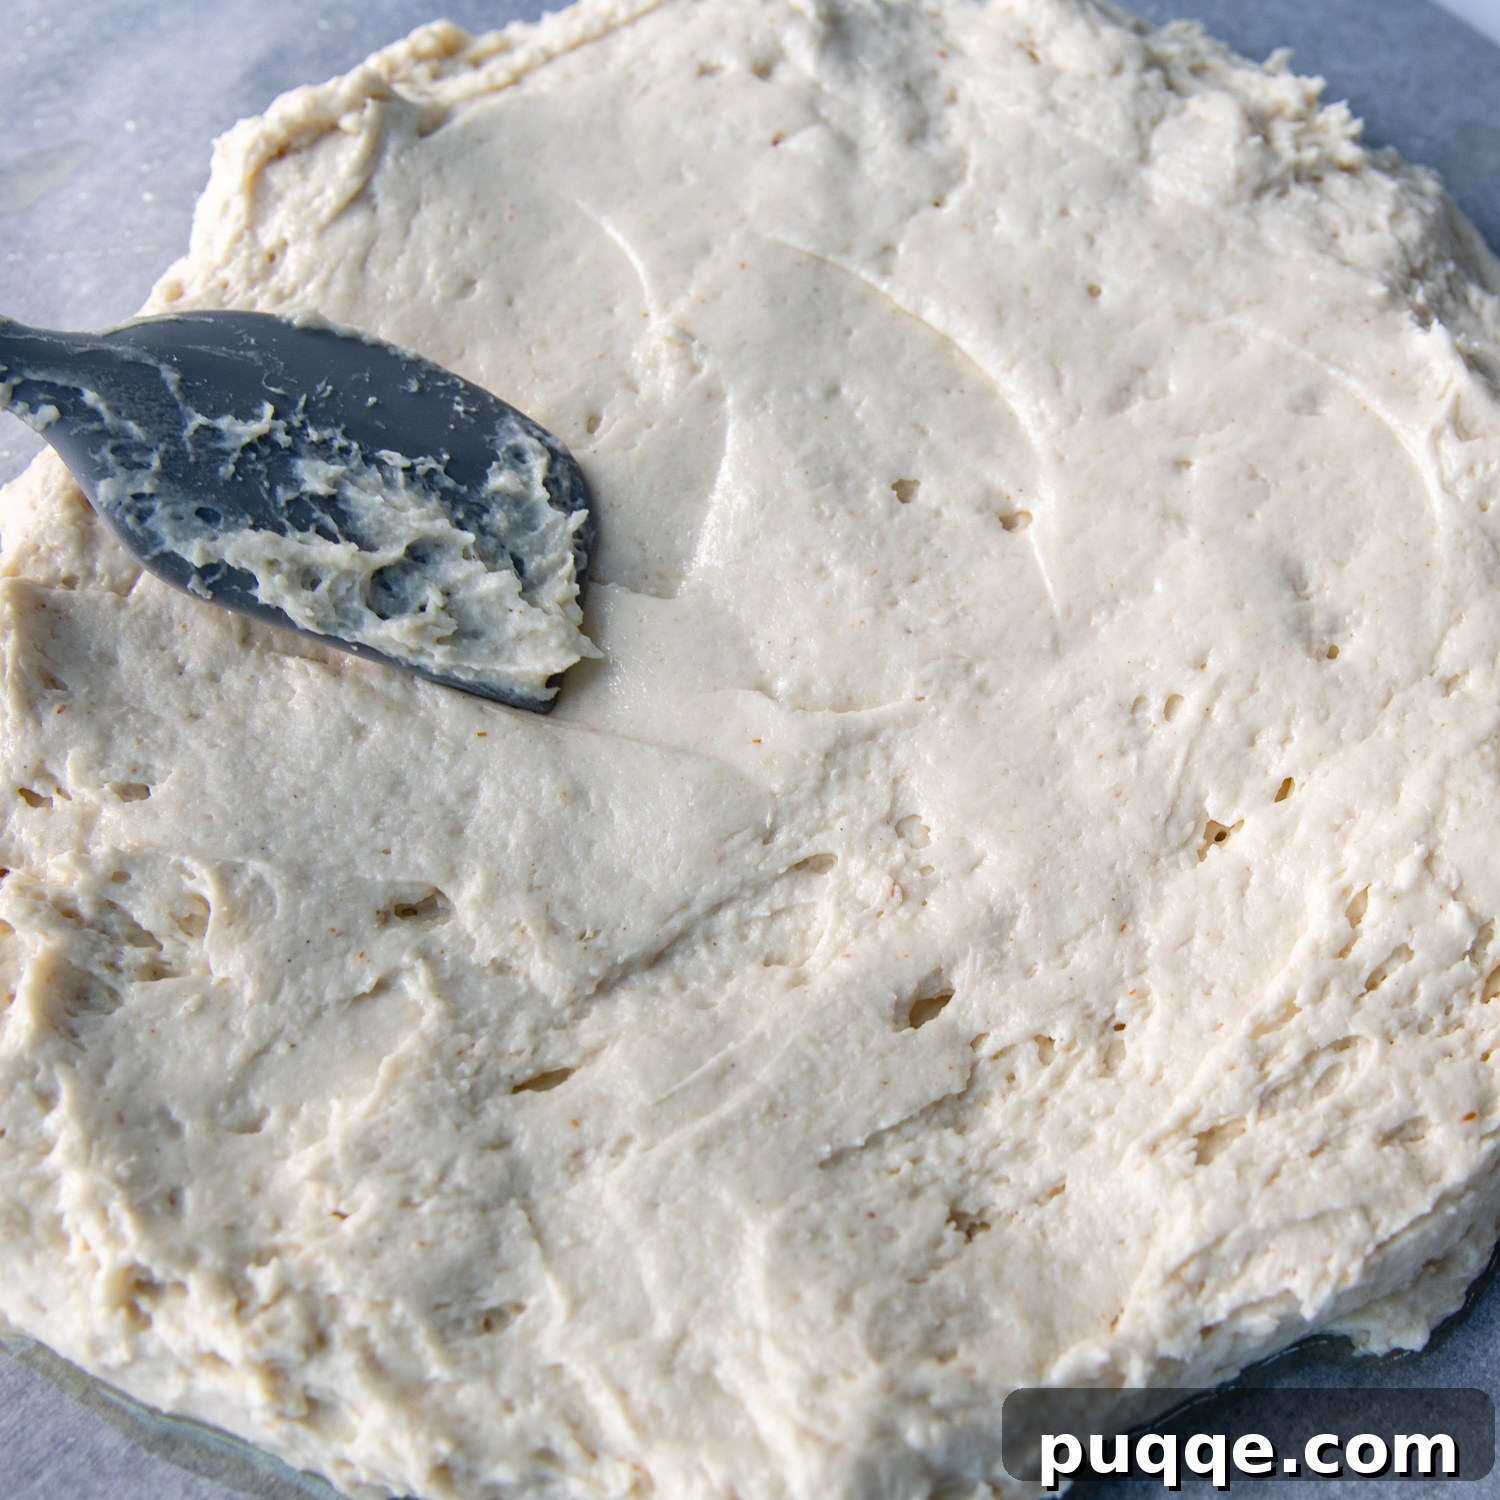
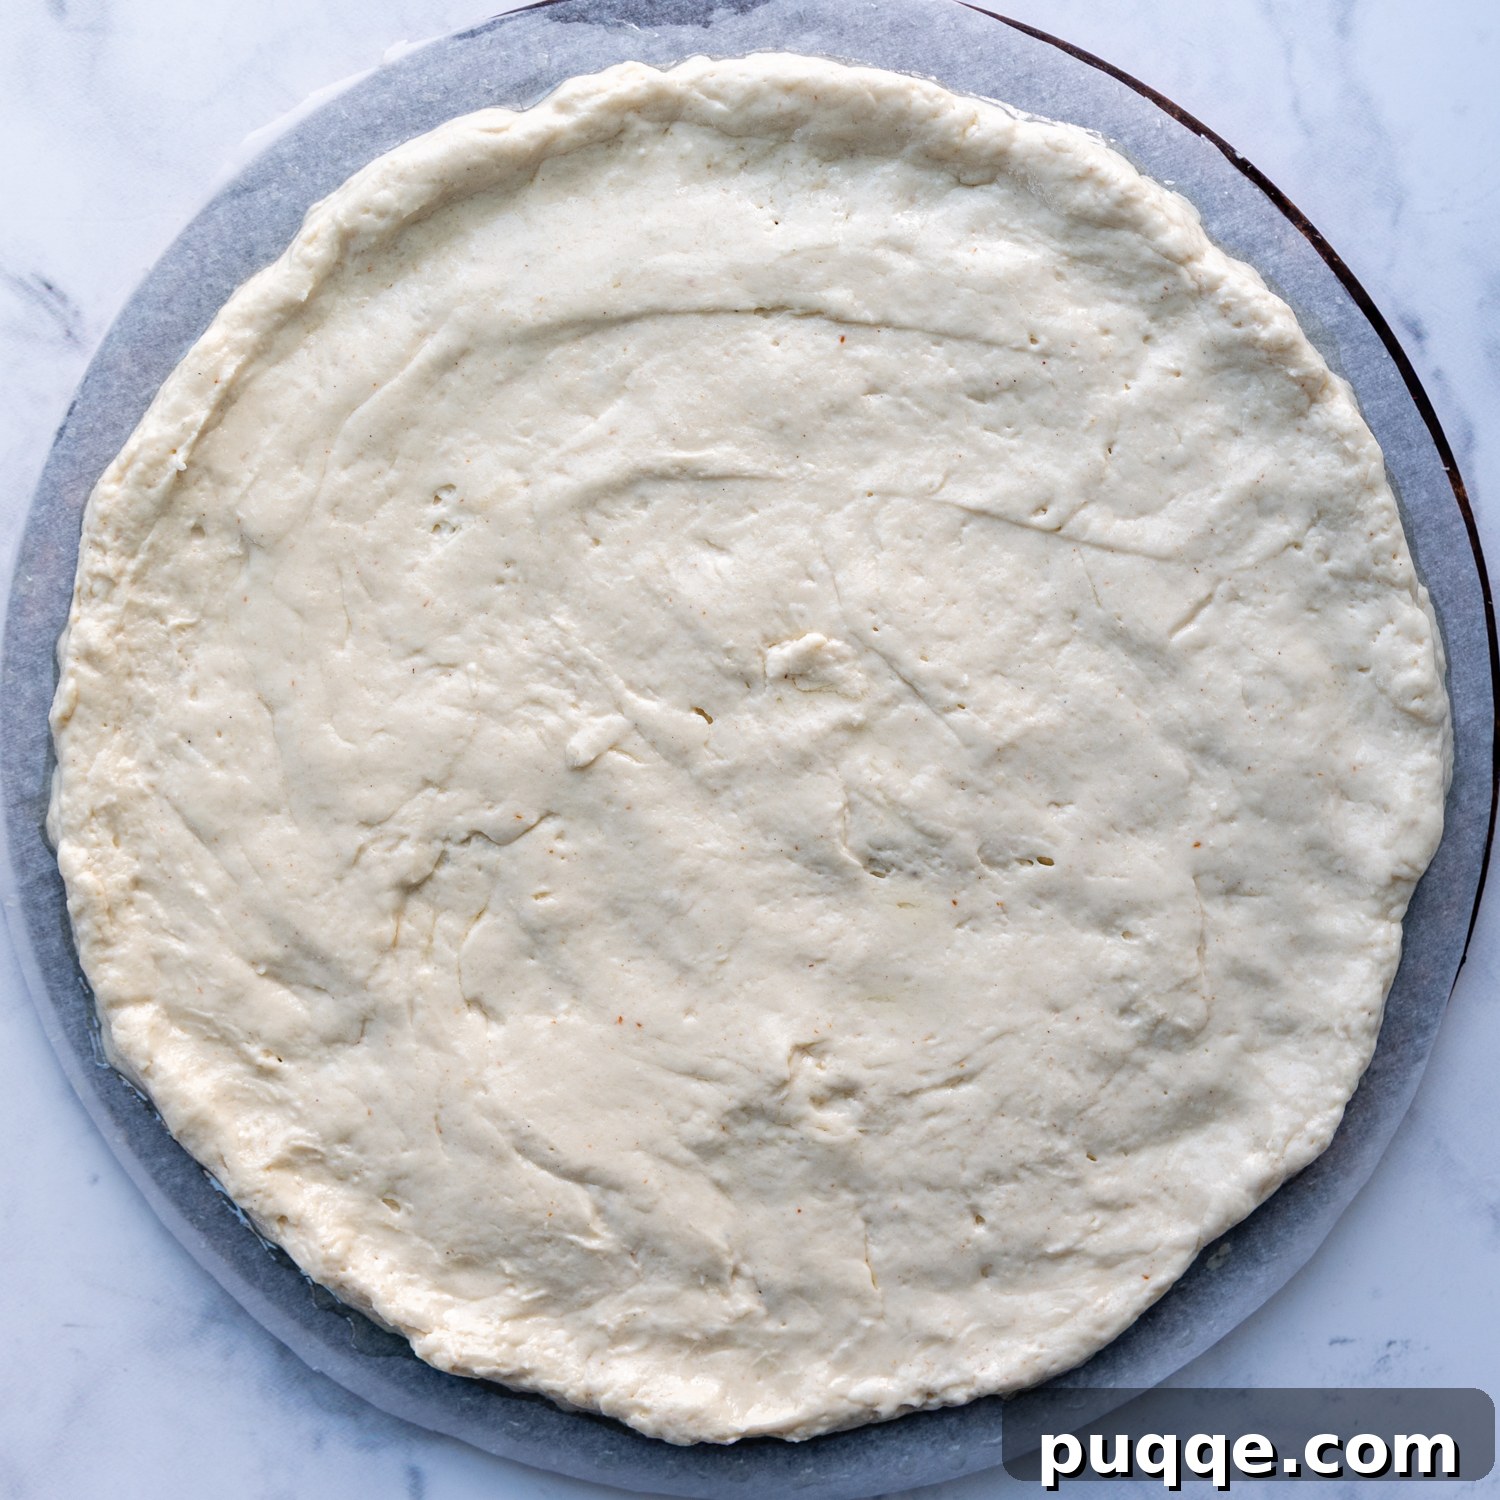
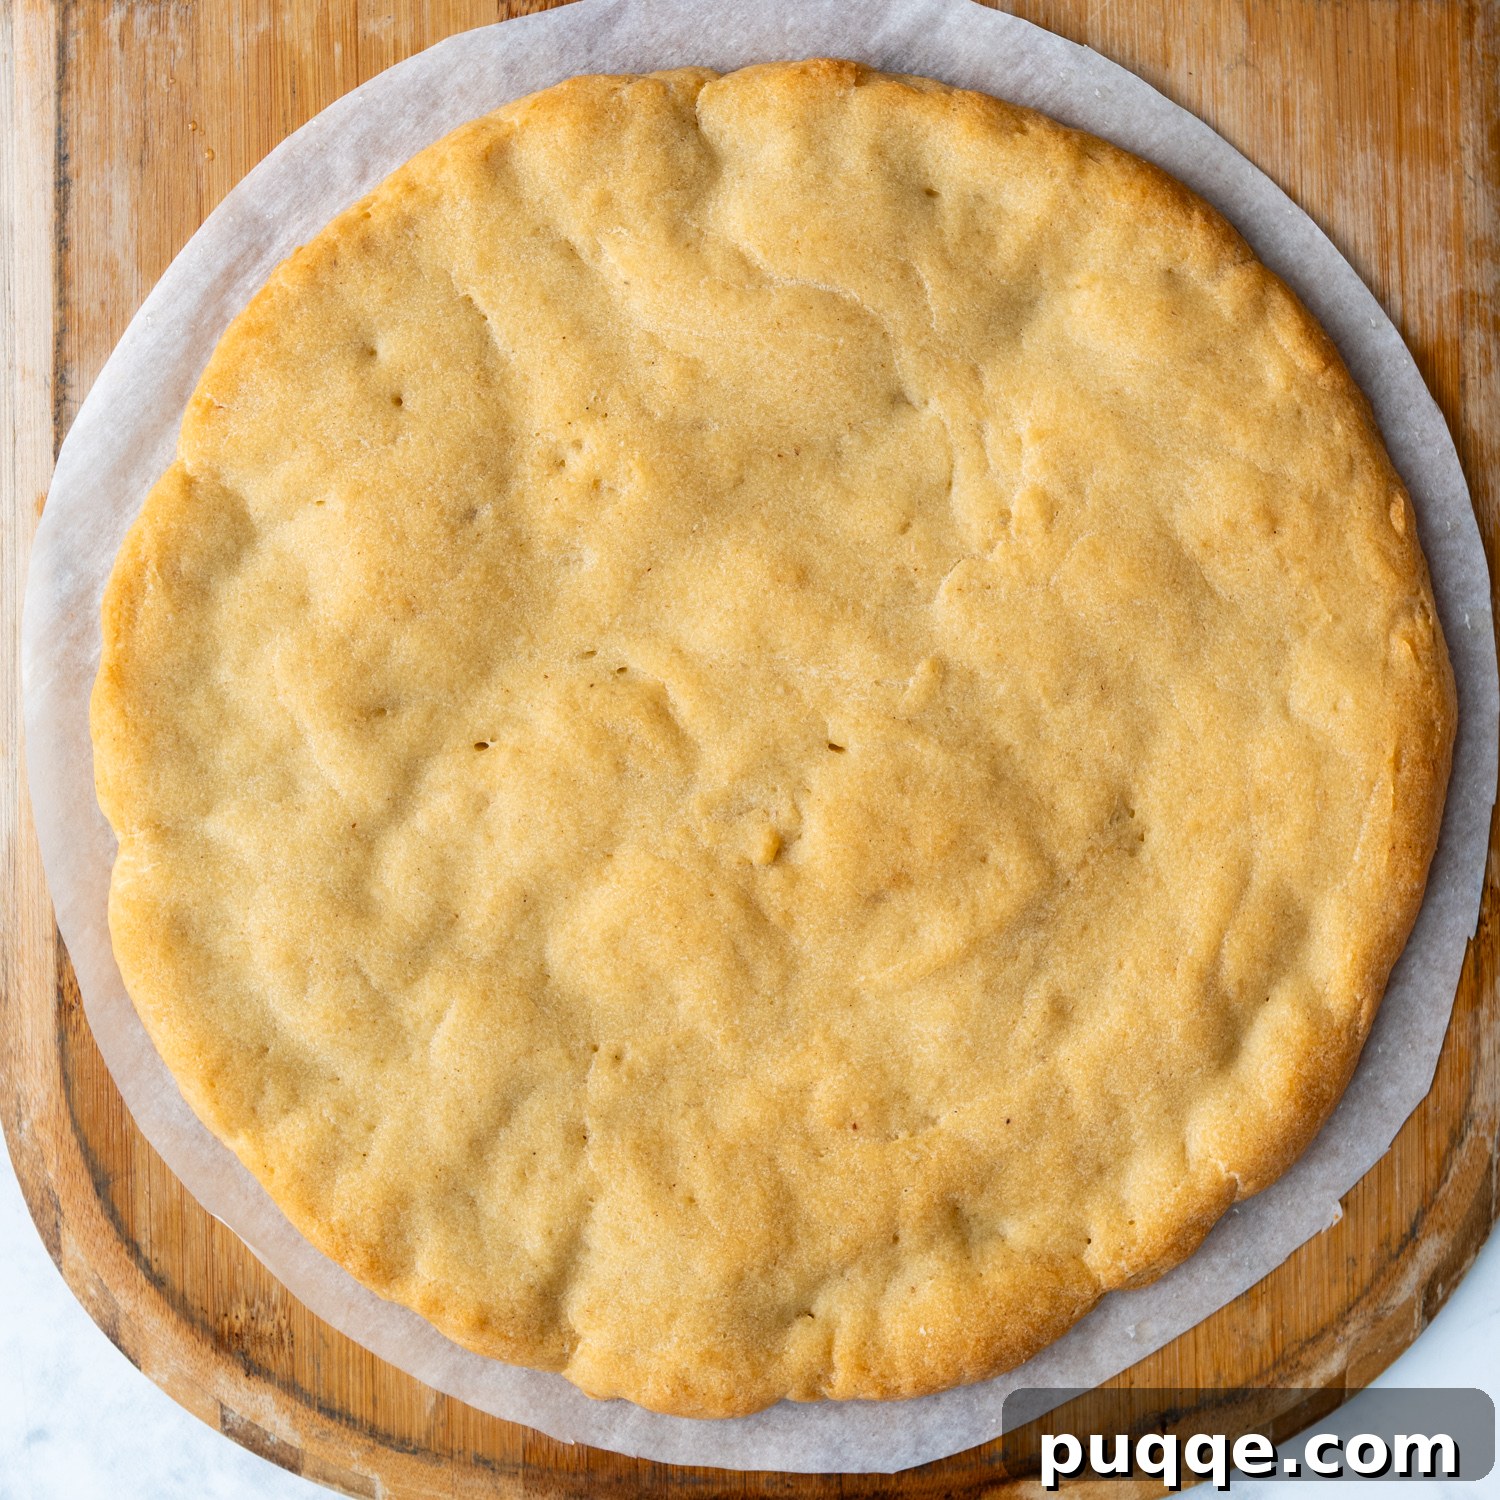
Carefully scoop the risen dough from the bowl and place it directly into the center of the prepared parchment paper. To spread the sticky dough evenly, use a liberally greased silicone spoon. Continuously grease the spoon or the surface of the dough as needed to prevent sticking. Work the dough outwards from the center, gently shaping it into a uniform circle until it reaches approximately an 11 ½-inch diameter. If you desire a slightly thicker, rustic edge, you can use greased fingers to gently push up the edges, creating a raised crust. Once shaped, bake the crust at this lower oven temperature for a substantial 45-50 minutes. Yes, you read that correctly – this extended bake time is essential for developing the crust’s structure and flavor. The crust will be firm to the touch and just beginning to brown on the underside, indicating it’s perfectly par-baked and ready for the next stage.
The Grand Finale: Sauce, Toppings, and Final Bake
Now, the moment you’ve been waiting for – it’s time to bring your homemade pizza night dreams to life! First, remove the pizza stone from the oven (if using) and place it back into the oven to preheat to a blistering 500°F (260°C). This high temperature is vital for achieving that coveted crispy crust. For effortless transfer to the scorching hot stone, we highly recommend assembling your par-baked crust directly on a pizza peel.
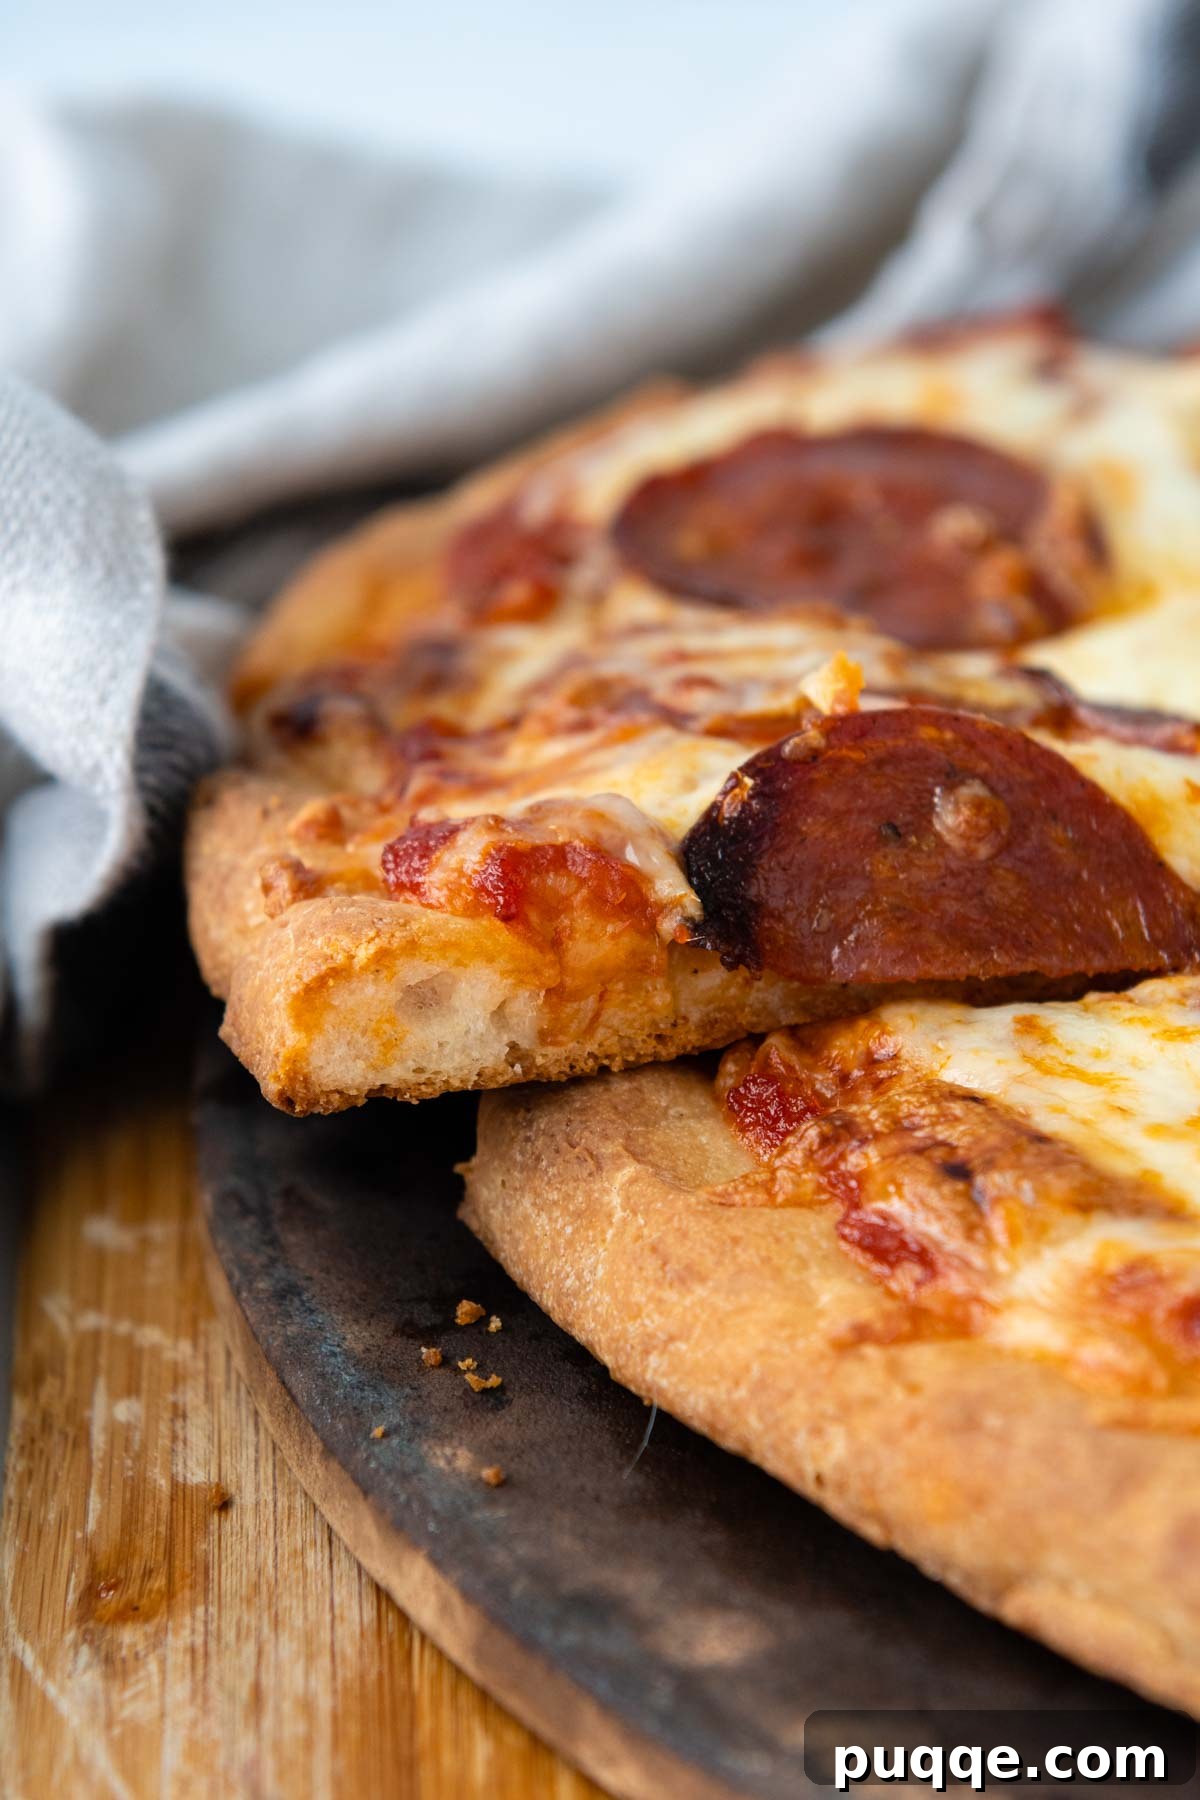
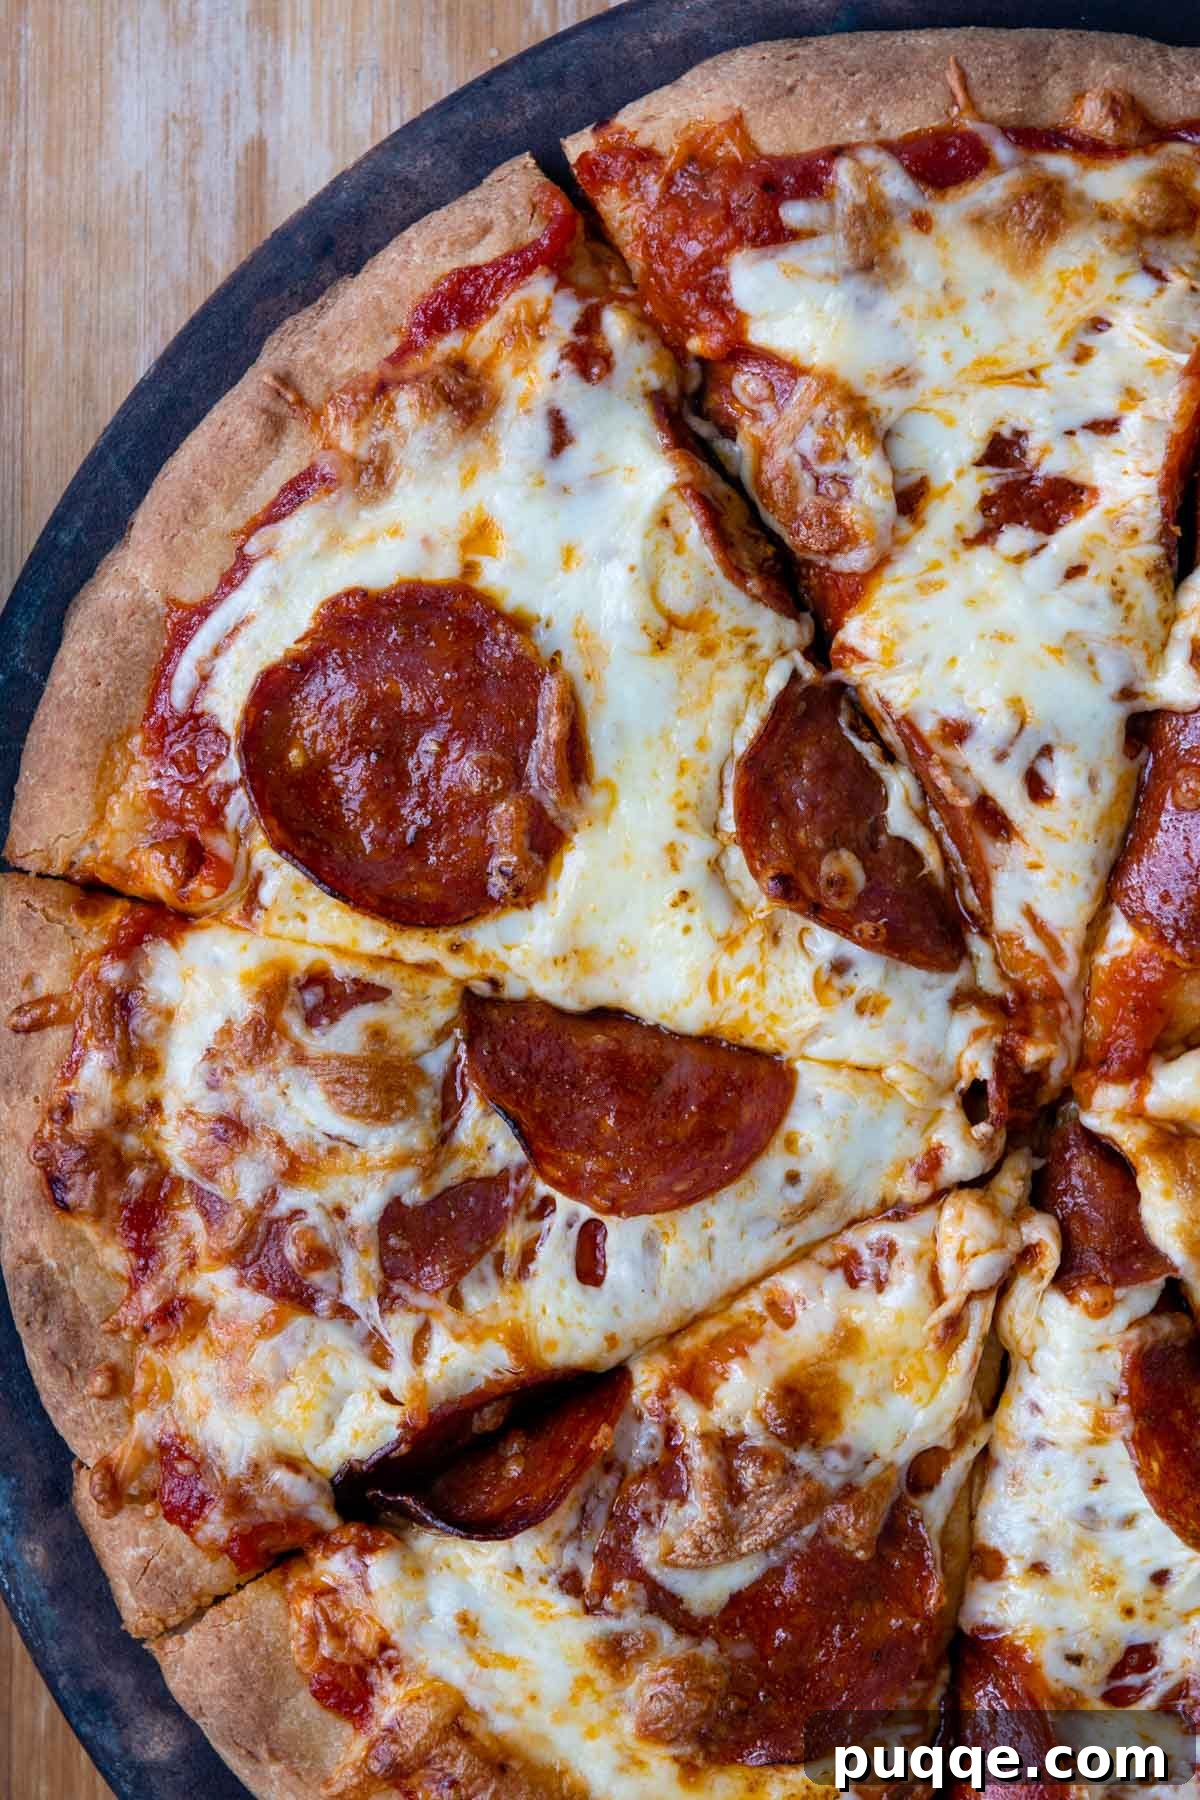
Generously spread your favorite pizza sauce over the par-baked crust, ensuring even coverage. Then, pile on a bountiful layer of shredded cheese and arrange all your beloved toppings. Once your masterpiece is assembled, confidently slide it onto the preheated hot stone. Allow it to bake for a quick 8-10 minutes. During this final bake, you’ll witness the crust transforming into a deeper, richer golden brown, and the cheese will melt into a beautifully bubbly, irresistible layer. Don’t delay—dig in immediately and prepare to declare this gluten-free pizza crust the absolute best you’ve ever tasted! Be sure to share your triumph in the comments below! 😎
Essential Equipment for Your Gluten-Free Pizza Journey
To truly replicate those cherished pizza parlor dreams – a crust that boasts a perfectly crispy exterior while retaining a wonderfully doughy, soft interior – we wholeheartedly recommend investing in a high-quality pizza stone. A pizza stone absorbs and retains heat, distributing it evenly to the crust, which is paramount for achieving that ideal crispness. We particularly favor this circular pizza stone because its shape serves as an excellent visual guide for perfectly forming your round dough. However, rectangular pizza stones are also widely available and perform just as admirably.
Should you not possess a pizza stone, don’t despair! You can still achieve a fantastic homemade gluten-free pizza. Simply preheat a heavy-duty baking sheet or a dedicated pizza pan in the oven along with your initial oven preheating. While this method may not produce a crust quite as profoundly crisp as one baked on a stone, it is significantly more effective than placing your pizza on a cold pan, which can result in a soggy bottom. Preheating the pan gives your crust a crucial head start in cooking, promoting a better texture.
Another incredibly useful tool for the home pizza chef is a pizza paddle or peel. This flat, shovel-like tool makes the process of assembling your pizza and then seamlessly transferring it onto the piping hot stone or baking sheet considerably easier. Without a peel, transferring an uncooked pizza with all its toppings can be a tricky endeavor, often risking disturbance to your carefully arranged ingredients. If a pizza peel isn’t part of your current kitchen arsenal, you can improvise! Place your parchment-lined pizza onto a rimless baking sheet, or simply turn a rimmed baking sheet upside down, using its flat bottom as a makeshift slide to gently transfer your pizza into the oven. Creativity in the kitchen is always a win!
Maximize Your Time: Make-Ahead Friendly Crust!
While this recipe does involve two distinct rounds of baking, this thoughtful staging actually works to your advantage, offering incredible flexibility! After the initial par-bake, you have two convenient options: you can immediately pile on your favorite toppings and proceed with the final bake, enjoying a fresh pizza right away. Or, and this is where the make-ahead magic truly shines, you can prepare the crust in advance for future use. This adaptability makes homemade gluten-free pizza a realistic and stress-free option for busy weeknights or impromptu gatherings.
If you choose to bake your pizza at a later time, the proper cooling and storage of your par-baked crust are essential. First, carefully transfer the par-baked crust to a wire rack and allow it to cool completely to room temperature. This prevents condensation and keeps the crust from becoming soggy. Once fully cooled, you can either let it stand at room temperature for up to 4 hours if you plan to use it the same day. For longer storage, wrap the cooled crust securely in plastic wrap, ensuring no air can get in. Then, for added protection against freezer burn, cover it again with aluminum foil. In this state, your gluten-free pizza crust can be frozen for up to 3 weeks. When you’re ready for pizza night, there’s no need to thaw! Simply assemble your desired toppings on the frozen crust and bake directly from its frozen state, following the instructions for the final bake. This preparation method transforms what might seem like a lengthy recipe into a wonderfully convenient solution for delicious, homemade gluten-free pizza anytime.
Craving an Extra Crispy Crust? Here’s How!
For those who adore a pizza crust with an exceptional, deep crispiness, integrating a pizza stone into your baking process is an absolute game-changer. Some comprehensive pizza stone sets even come complete with a sturdy pizza paddle, which unequivocally elevates your home pizza-making experience to a professional level. The true genius of a pizza stone lies in its ability to absorb and intensely retain heat when preheated in a high-temperature oven. Before you even slide your dough and toppings onto it, the stone is incredibly hot.
This preheated, super-hot surface delivers an immediate and powerful burst of heat to the bottom of the pizza crust the moment it makes contact. This instantaneous heat transfer is the secret to achieving that signature crispy crust, providing a vital head start on cooking the base. Because the crust begins to crisp so rapidly, it allows for a shorter overall baking time, which is perfect for ensuring your toppings and cheese cook through and melt beautifully without overcooking the crust. It’s a true win-win situation for maximum crispness and perfectly cooked toppings, resulting in an unforgettable gluten-free pizza experience! #winwin
Bookmark This Recipe on Pinterest!
Let’s connect on Pinterest! We’re always sharing delicious and inspiring recipes!
Did you make this incredible recipe? We absolutely love hearing from our community! Please leave a star rating and comment below the recipe card to share your experience. Your feedback is invaluable, helping other home cooks discover and enjoy these recipes. We appreciate every comment, and you can always expect to hear back from us! -Melissa

Crispy, Doughy Gluten-Free Pizza Crust (No Knead!)
 Melissa Erdelac
Pin
Rate
Remove Ads
Ingredients
- 1 ⅔ cup (257 g) gluten-free all purpose flour
- ¼ cup (25 g) almond flour, (for best results, but may also sub additional GF flour)
- 2 teaspoons (8 g) psyllium husk powder, (what is psyllium husk?)
- 1 ¼ teaspoon baking powder
- 1 teaspoon salt
- ½ teaspoon instant yeast
- 1 ¼ cup (275 g) warm water
- 2 tablespoons (28 g) olive oil
Equipment
-
Pizza Stone
-
Pizza Peel
-
Stand Mixer
Instructions
-
In the large mixing bowl of a stand mixer, use a paddle attachment to combine on low speed gluten-free flour, almond flour (or additional flour), psyllium husk powder, baking powder, salt, and yeast.1 ⅔ cup (257 g) gluten-free all purpose flour, ¼ cup (25 g) almond flour, 2 teaspoons (8 g) psyllium husk powder, 1 ¼ teaspoon baking powder, 1 teaspoon salt, ½ teaspoon instant yeast
-
Continue mixing on low speed and slowly pour in water and oil. Mix until combined. Increase the speed to medium-high and beat for 5 minutes. The dough will be a sticky batter.1 ¼ cup (275 g) warm water, 2 tablespoons (28 g) olive oil
-
Use a rubber spatula to scrape all the dough into the center of the bowl. Cover securely with plastic wrap and let rise in a draft-free place for 90 minutes. When using a spoon to look inside the dough, it should be bubbly.
-
Preheat oven to 325°F. Line a pizza stone with parchment paper. If you do not have a pizza stone, line a large baking sheet with parchment. Spray the paper with cooking spray to grease.
-
Transfer the dough into the center of the prepared stone or pan. Use a liberally greased silicone spoon to spread the dough into a circle. Continue greasing the spoon, or the top of the pizza dough, to spread out into a 11 ½” circle. If desired, use greased fingers to shape the edges into a raised crust.
-
Bake for 45-50 minutes, or until the dough is firm to the touch and slightly starts to brown underneath.
-
If assembling and baking the pizza crust later, move to a wire rack to cool completely. At this point it may sit at room temperature for 4 hours or wrap securely in plastic, cover with aluminum foil, and freeze up to 3 weeks. When ready to bake, assemble and bake from frozen.
-
When ready to make the pizza, place the pizza stone in the oven and then preheat to 500°F. (See recipe notes if you do not have a pizza stone.) Transfer the parbaked crust to pizza peel for an easy transfer to the hot stone.
-
Spread on pizza sauce, cheese, and toppings. Slide the pizza onto the hot stone using the pizza peel. Bake for 8-10 minutes, or until the crust has browned and the cheese is bubbly.
Notes
Making without pizza stone
If you do not have a specialized pizza stone, you can still achieve a delicious crust. Simply preheat a heavy-duty baking sheet or a standard pizza pan in the oven while it comes to temperature. While this alternative method may not produce a crust that is quite as profoundly crispy as one baked on a stone, it is a far better approach than placing your pizza onto a cold pan, which often leads to a soggy or undercooked bottom. For an easier transfer of your assembled pizza into the hot oven without a pizza paddle, a rimless baking sheet or an inverted rimmed baking sheet can serve as a suitable substitute.
Freezing and Storing Your Crust
Although this recipe does require a bit of upfront time for both rising and the initial par-baking, its freezer-friendly nature offers tremendous convenience! This crust can be baked directly from its frozen state, making it an ideal make-ahead option for quick and easy weeknight meals.
Consider doubling the recipe to make two crusts at once. You can use one immediately and freeze the second for a spontaneous, hassle-free Friday pizza night!
To freeze: Ensure the par-baked crust has cooled completely. Wrap it tightly and securely in plastic wrap, then provide an additional layer of protection by covering it with aluminum foil. This method helps prevent freezer burn. Store in the freezer for up to 3 weeks. When you’re ready to bake, there’s no need to thaw; simply assemble your toppings on the frozen crust and bake as directed.
To store: After the initial bake, allow the crust to cool completely. It can be left at room temperature for up to 4 hours, or wrapped securely in plastic wrap for slightly longer storage at room temperature.
Expert Tips to Remember for Success
- The superior texture and effortless handling of this gluten-free pizza crust are greatly enhanced by certain essential pizza-making equipment. Utilizing a high-quality pizza stone is key to achieving that desirable crispy crust, while a pizza paddle ensures a smooth and flawless transfer of your pizza to and from the hot oven.
- When you begin shaping the sticky pizza dough, it’s crucial to spread it out to at least an 11 ½-inch circle. Using a standard rectangular baking sheet might inadvertently limit the dough’s diameter, potentially resulting in a thicker, denser crust. For optimal results, a round pizza stone (which is highly recommended) or a circular pizza pan is preferred.
- Since this crust is thoughtfully par-baked, it offers fantastic versatility! This means it can also be successfully used for delicious grilled pizza, adding another exciting dimension to your pizza repertoire.
- Working with this gluten-free dough is surprisingly easy, provided you keep it liberally greased. Always have nonstick cooking spray or a small bowl of olive oil and a pastry brush readily available. Continually grease your silicone spoon or fingers as you shape the dough to prevent any sticking, ensuring a smooth and enjoyable shaping process.
Recipe adapted from America’s Test Kitchen: How Can It Be Gluten-Free Cookbook