
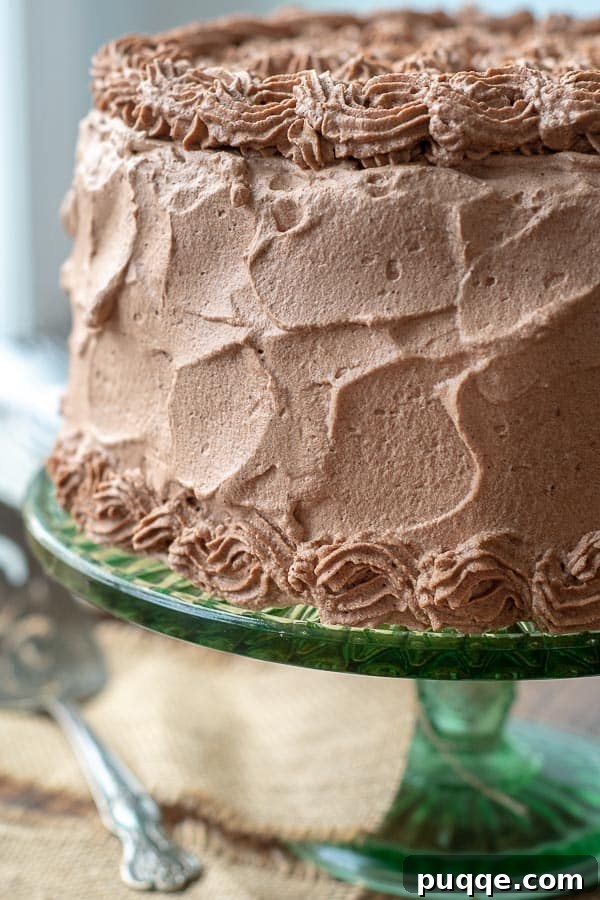
Welcome to the ultimate guide for crafting the most delightful chocolate whipped cream frosting! This recipe delivers a light, airy, and incredibly rich chocolate frosting that is also remarkably sturdy and stabilized. Perfect for piping intricate designs on cupcakes or elegantly spreading over a layered cake, its delicate texture and deep cocoa flavor complement a wide array of desserts. Whether you’re baking an ethereal angel food cake, a classic white cake, a decadent chocolate cake, or a moist banana cake, this whipped cream frosting is the ideal companion, adding a touch of sophisticated sweetness without being overly heavy.
Unlocking the Secret to Perfectly Stabilized Chocolate Whipped Cream Frosting
For any true dessert enthusiast, the choice of frosting is just as critical as the cake itself. While the world of cake flavors offers endless possibilities—from rich chocolate to vibrant vanilla, tropical coconut, or comforting banana—the frosting is what ties it all together, adding moisture, sweetness, and a decorative flourish. Often, traditional buttercreams, while delicious, can feel too heavy or dense, especially when paired with lighter cake bases. This is where a meticulously crafted chocolate whipped cream frosting truly shines.
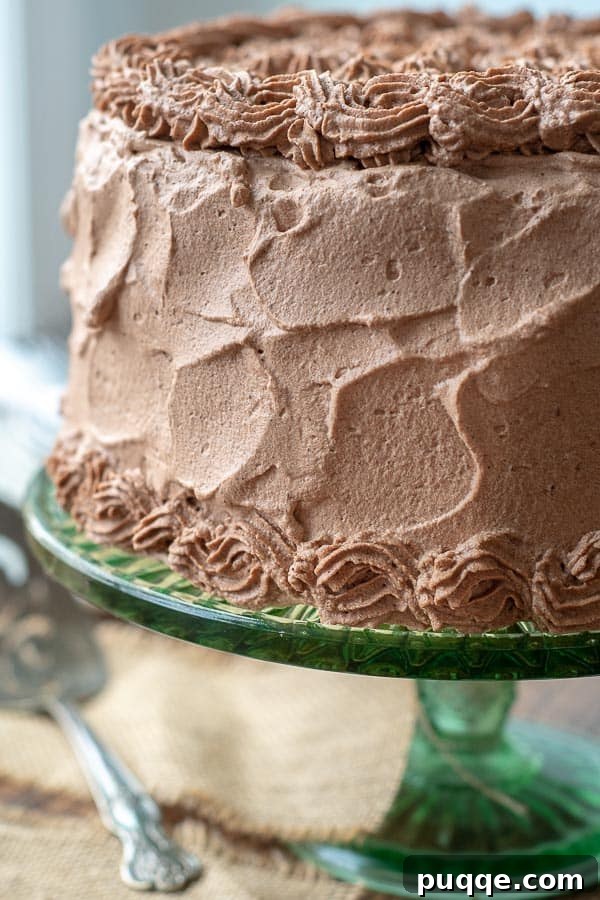
Our recipe for stabilized chocolate whipped cream frosting offers the perfect solution. It strikes an exquisite balance: rich and chocolatey, yet incredibly light and airy. The secret to its remarkable sturdiness lies in a subtle addition of cream of tartar, which acts as a stabilizer. This allows the frosting to maintain its elegant piped shape or smooth spread for hours at room temperature, and even for days when refrigerated, without collapsing or weeping. It’s the ideal choice when you desire a frosting that’s less cloyingly sweet and more ethereal than its buttercream counterparts, providing a delicate finish that enhances rather than overwhelms your dessert.
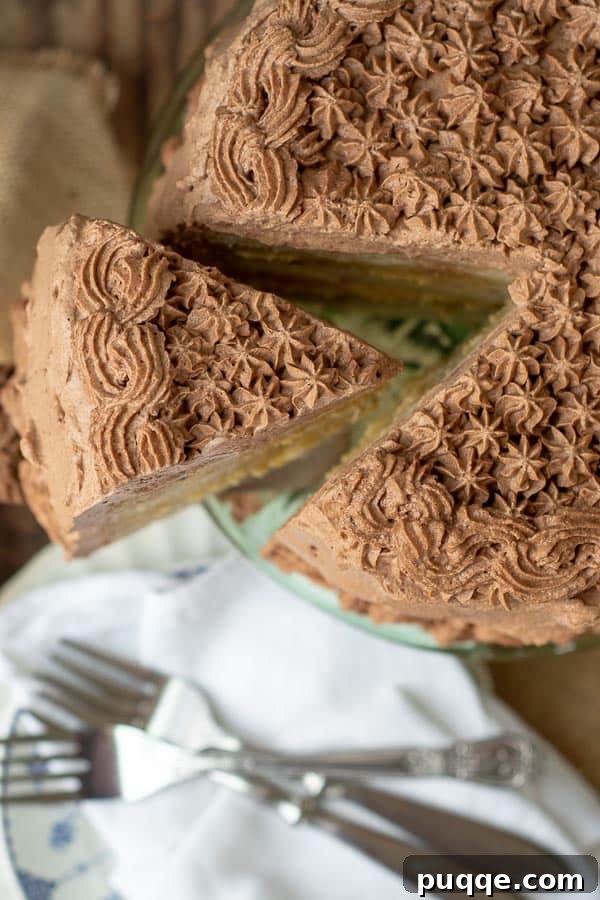
Imagine pairing this cloud-like chocolate frosting with a fluffy banana cake and a fresh banana curd filling. The cake layers, robust with banana flavor, find their perfect match in the light, chocolatey embrace of the whipped cream, creating a harmonious symphony of tastes and textures. This frosting elevates any dessert, proving that a lighter option can be just as impactful and satisfying.
Crafting the Ideal Chocolate Intensity: From Mild to Decadent
The beauty of this chocolate whipped cream frosting recipe is its adaptability to your personal preference for chocolate intensity. For those who crave a truly deep, dark, and sophisticated chocolate flavor, we highly recommend using Dutch-processed cocoa powder. Unlike natural unsweetened cocoa, Dutch-processed cocoa has been treated with an alkali to neutralize its acidity, resulting in a darker color and a smoother, less bitter chocolate taste. This makes it an exceptional choice for desserts where a profound chocolate presence is desired, such as a luxurious fudgy almond flour cake or as a decadent topping for an Oreo ice cream cake.
If you’re looking to amplify the chocolate factor even further, don’t hesitate to add an extra 2 to 4 tablespoons of cocoa powder to the base mixture. This simple adjustment allows you to customize the flavor profile, taking your frosting from a delightful cocoa whisper to a bold, chocolatey statement. Experiment to find your perfect balance! The rich, velvety texture of this whipped cream provides an excellent counterpoint to any cake, ensuring every bite is a memorable experience. It’s not just frosting; it’s a celebration of chocolate in its lightest and most elegant form.
Your Step-by-Step Guide to Fluffy Chocolate Perfection
Creating this exquisite stabilized chocolate whipped cream frosting is a straightforward process, ensuring a perfect result every time. Follow these detailed steps to achieve a light, airy, and pipeable frosting that will impress everyone.
Step 1: Prepare the Chilled Chocolate Base
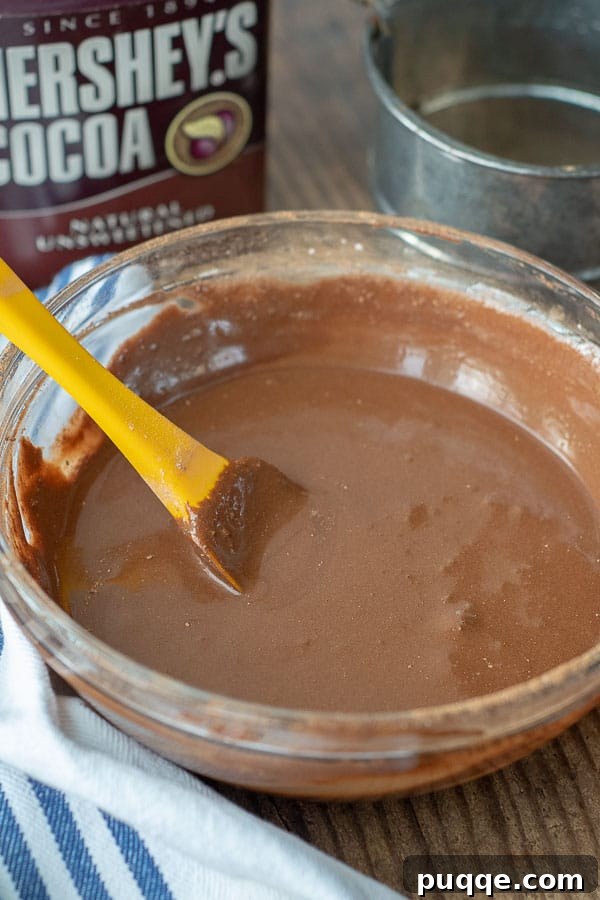
The first crucial step for a stable whipped cream is creating a well-chilled chocolate base. In a medium bowl, combine the unsweetened cocoa powder, powdered sugar, and a pinch of cream of tartar. Sift these dry ingredients together to ensure there are no lumps, which will contribute to a smoother final frosting. Gradually stir in the cold milk until all the dry ingredients are thoroughly incorporated. At this stage, the mixture will be quite thick, almost paste-like. This thick consistency is exactly what you want! Cover the bowl tightly with plastic wrap and refrigerate for at least 30 minutes, or until the mixture is thoroughly chilled. This chilling period is vital as it helps the cocoa and sugar to fully dissolve and become very cold, which in turn aids in creating a stable and voluminous whipped cream when combined with the heavy cream.
Step 2: Whip to Silky Perfection
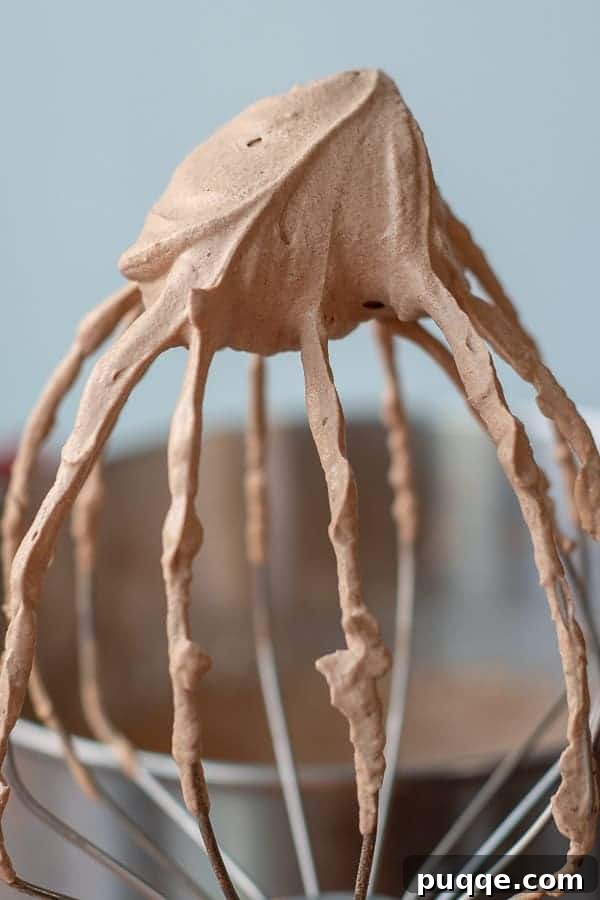
Once your chocolate base is thoroughly chilled, transfer it to a large mixing bowl. Add the well-chilled heavy cream. It is essential that the heavy cream is as cold as possible, straight from the refrigerator, as this significantly contributes to its ability to whip up light and airy. Using a stand mixer fitted with a whisk attachment, or a hand mixer, begin beating the mixture on medium-high speed. Gradually increase the speed as the cream begins to thicken. Continue beating until soft to medium-stiff peaks form. You’re looking for a consistency that is firm enough to hold its shape when the whisk is lifted, but still maintains a lovely light and billowy texture. Avoid over-whipping to the point where it becomes grainy or overly rigid, similar to butter, as this can cause it to lose its characteristic lightness. The entire process should take about 3-5 minutes, depending on your mixer’s power and the chill of your ingredients. At this point, the frosting is ready to be used immediately or covered and chilled for up to 24 hours. Ensure your cakes or cupcakes are completely cooled before frosting to prevent the whipped cream from melting and losing its beautiful shape.
Tips for Seamless Piping and Decorating
One of the greatest advantages of this stabilized chocolate whipped cream frosting is its exceptional performance for piping and decorating. Whether you’re aiming for elegant swirls on cupcakes, intricate borders on a layer cake, or simply a smooth, even coating, this frosting holds its shape beautifully. For the best results when piping, always ensure your whipped cream is well-chilled before transferring it to a piping bag. The cold temperature helps maintain its firmness and prevents it from becoming too soft while you work. If you find your frosting softening during a long decorating session, simply place the piping bag (or the bowl of frosting) back into the refrigerator for 10-15 minutes to firm up.
Once your masterpiece is complete, immediate refrigeration is key to preserving the frosting’s freshness and structural integrity. This whipped cream can comfortably hold at room temperature for several hours, provided the environment isn’t excessively warm or humid. However, for extended display or storage, always refrigerate any leftover cakes or cupcakes. This ensures the frosting remains fresh, delicious, and perfectly shaped, ready for continued enjoyment.
Can You Freeze Chocolate Whipped Cream Frosting?
Absolutely! The stability of this chocolate whipped cream frosting makes it an excellent candidate for freezing, offering fantastic convenience for future baking projects. I’ve personally used this frosting to decorate numerous cakes and then frozen them, only to find no noticeable difference in taste or texture upon thawing. This makes it perfect for preparing desserts ahead of time for special occasions or simply to have a sweet treat on hand.
If you’re freezing a fully decorated cake, the process is simple: first, place the uncovered cake in the freezer until the frosting is completely firm to the touch. This step prevents the frosting from smudging when wrapped. Once frozen, wrap the cake securely in several layers of plastic wrap, ensuring no air pockets remain. Follow this with a layer of aluminum foil to protect against freezer burn and ice crystals. When you’re ready to enjoy, simply unwrap the cake and thaw it overnight in the refrigerator. The frosting will return to its original light and fluffy texture, ready to be sliced and served. While I haven’t extensively tested freezing just the frosting on its own, its proven stability suggests it should hold up equally well, offering a convenient make-ahead option for your next baking adventure.
Troubleshooting: Rescuing Soft Whipped Cream
Even seasoned bakers can sometimes encounter issues with whipped cream, the most common being a frosting that’s too soft or doesn’t hold its shape. This usually boils down to two main culprits: insufficient chilling of ingredients or not whipping the heavy cream long enough. The colder your ingredients are, especially the heavy cream and the chocolate base, the more efficiently they will whip and the more stable your frosting will be. Always ensure your heavy cream comes straight from the coldest part of your refrigerator.
If your whipped cream appears “done” on top but seems soft underneath, it’s likely that the bottom layers weren’t adequately whipped. This often occurs when using a stand mixer, where the whisk might not fully incorporate the mixture at the very bottom of the bowl. Make sure to scrape down the sides of the bowl frequently during whipping to ensure even consistency. If your frosting ends up too soft, don’t despair! You can often salvage it by returning it to the mixer and beating it for a few more minutes until it reaches the desired firmness. Conversely, if you accidentally over-whip it and it starts to look too thick or slightly grainy, you can often bring it back by adding a tiny splash (a tablespoon at a time) of cold heavy cream and gently folding it in until the texture is smooth and velvety again. Patience and a watchful eye are your best tools when whipping cream!
Don’t Forget to Pin This Recipe!
Let’s connect on Pinterest! I’m always sharing delicious recipes and baking inspiration!
Made this recipe? I’d love to hear from you! Please leave a star rating and comment below the recipe card. Your feedback is incredibly valuable to our community, helping others discover and enjoy this recipe. I always look forward to connecting with you! -Melissa
Easy Chocolate Whipped Cream Frosting (Stabilized)
 Melissa Erdelac
Pin
Rate
Ingredients
- ▢ 1 cup powdered sugar
- ▢ ½ cup unsweetened cocoa powder
- ▢ pinch cream of tartar
- ▢ ¼ cup milk
- ▢ 2 cups heavy cream, well chilled
Equipment
- ▢
Stand Mixer
- ▢
Sifter
- ▢
Frosting Piping Kit
Instructions
-
Sift together the powdered sugar, unsweetened cocoa, and cream of tartar into a large bowl. Stir in the milk until well incorporated. The mixture will be very thick. Cover the bowl and refrigerate for 30 minutes, or until well chilled.1 cup powdered sugar, ½ cup unsweetened cocoa powder, pinch cream of tartar, ¼ cup milk
-
Using an electric or stand mixer with whisk attachment, gradually beat the heavy cream into chocolate mixture, scraping down bowl to make sure all the chocolate is mixed in. Continue mixing on high until stiff peaks form.2 cups heavy cream
-
Spread or pipe onto a 2-layer cake or 24 cupcakes. Makes 5 cups. Refrigerate leftovers.