
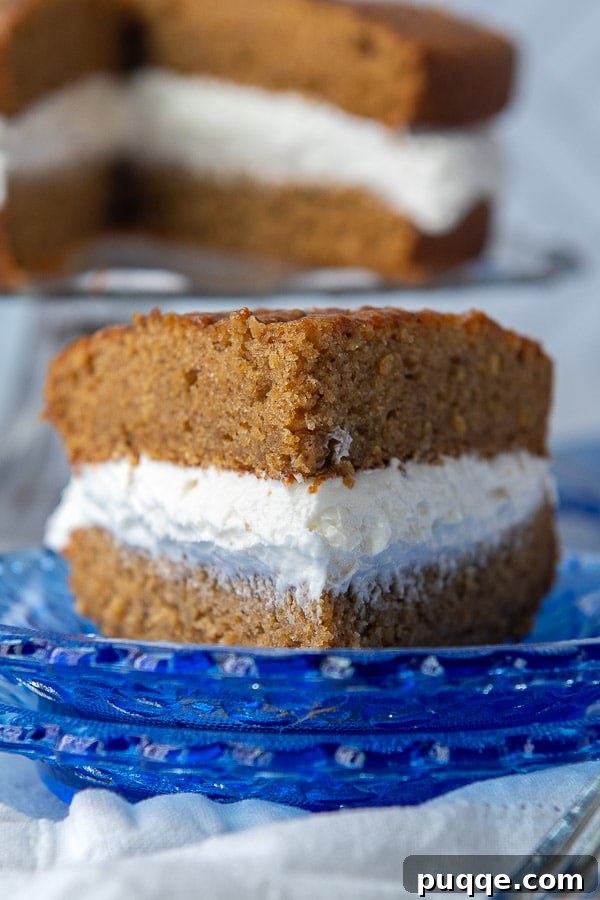
Prepare to embark on a nostalgic journey with the BEST Homemade Oatmeal Creme Pie Cake recipe! This sensational dessert reimagines the beloved classic Little Debbie’s Oatmeal Cream Pies, transforming them into a grand, impressive cake that’s perfect for sharing. Featuring tender, spiced oatmeal cake layers generously filled with a velvety, fluffy white creme filling, every bite promises to whisk you back to cherished childhood memories. It’s not just a cake; it’s an epic celebration of a snack time icon, elevated to an unforgettable homemade treat.
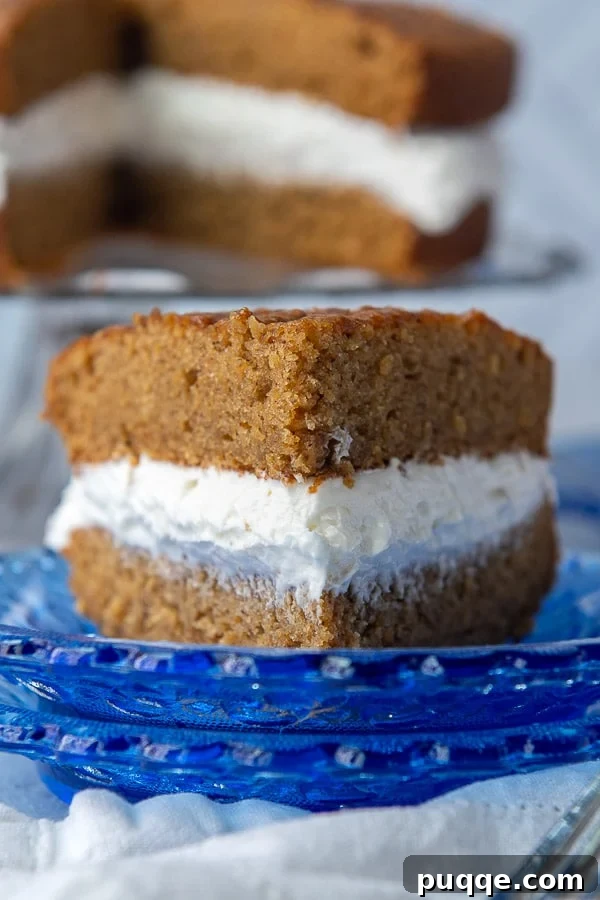
For anyone who grew up savoring the soft, chewy, and irresistibly sweet Little Debbie oatmeal cream pies, prepare to be amazed. This cake masterfully captures all those familiar flavors, but on a dramatically larger, “super-sized” scale! Imagine sinking your teeth into a giant creme pie, where soft, gingerbread-spiced oatmeal cake embraces a perfect replica of that iconic, sweet filling. It’s an experience so delightful, it will transport you straight to lunchbox dessert heaven.
Why You’ll Love This Homemade Oatmeal Creme Pie Cake
This isn’t just another dessert; it’s a labor of love that brings a beloved classic to your kitchen. Here’s why this giant oatmeal creme pie cake will become your new favorite:
- Nostalgia in Every Bite: It perfectly recreates the comforting flavors and textures of the original Little Debbie snack, triggering wonderful childhood memories.
- Impressive Presentation: Transforming the small snack into a grand cake makes for a stunning centerpiece at any gathering or celebration.
- Surprisingly Simple: Despite its impressive appearance, the recipe uses straightforward ingredients and techniques. The cake layers bake quickly, and with no intricate frosting work, you’ll be enjoying this dream dessert in no time.
- Customizable for Dietary Needs: Easily adaptable for gluten-free diets, ensuring everyone can indulge in this delightful treat.
- Perfect Texture: The cake layers are wonderfully soft and moist, perfectly complementing the light and airy creme filling.
Essential Ingredients for Your Epic Dessert
Crafting this special dessert or birthday cake relies on a simple yet effective list of ingredients. The layers bake in mere minutes, and because the filling assembly is straightforward, you’ll be slicing into this dream-come-true sooner than you think!
For the Spiced Oatmeal Cake Layers:
- Quick Cooking Oats: Essential for achieving the delicate, fine texture reminiscent of the classic cookie. Avoid old-fashioned rolled oats here, as they create a heartier, chewier result not suited for this specific copycat.
- Unsalted Butter, Softened: Provides richness and structure to the cake. Softened butter creams easily with sugar, incorporating air for a light texture.
- Granulated Sugar & Brown Sugar: A blend of both sugars contributes to the cake’s sweetness, moisture, and characteristic caramel notes. Brown sugar also adds to the soft, chewy texture.
- Eggs, Room Temperature: Help bind the ingredients, add moisture, and contribute to the cake’s rise and tender crumb. Room temperature eggs emulsify better with the butter and sugar.
- Dark Molasses: The secret ingredient for that authentic gingerbread-like warmth and deep, rich flavor that defines Little Debbie’s oatmeal pies. It also enhances the cake’s color and moisture.
- Vanilla Extract: A crucial flavor enhancer that complements the spices and oats beautifully.
- All-Purpose Flour: Forms the structural base of the cake. For a gluten-free version, Cup4Cup gluten-free flour is highly recommended for its excellent performance in baked goods.
- Baking Soda & Baking Powder: The leavening agents that give the cake its lift and airy texture.
- Ground Cinnamon & Ground Cloves: These warm spices are vital for replicating the signature flavor profile of the classic oatmeal creme pie. They provide depth and a comforting aroma.
For the Signature Fluffy Creme Filling:
The unique egg white-based filling is mixed with powdered sugar and gently heated over simmering water. This process safely pasteurizes the egg white, ensuring a smooth, stable, and deliciously airy filling without the need for raw eggs.
- Egg White: Provides the structure and characteristic lightness of the filling.
- Powdered Sugar: Creates the smooth, sweet base of the filling.
- Heavy Cream: Adds richness and helps achieve that desirable fluffy texture. While half and half or milk can be substituted, be aware that some of the luxurious fluffiness might be lost.
- Vanilla Extract: Enhances the sweet flavor of the filling. Clear vanilla extract is recommended if you desire a pure white filling, but regular vanilla works just as well for taste.
- Shortening: Crucial for the filling’s stability, texture, and bright white color. Opt for white vegetable shortening over butter-flavored varieties to maintain the authentic taste and appearance.
Step-by-Step Guide: How to Bake Your Homemade Oatmeal Creme Pie Cake
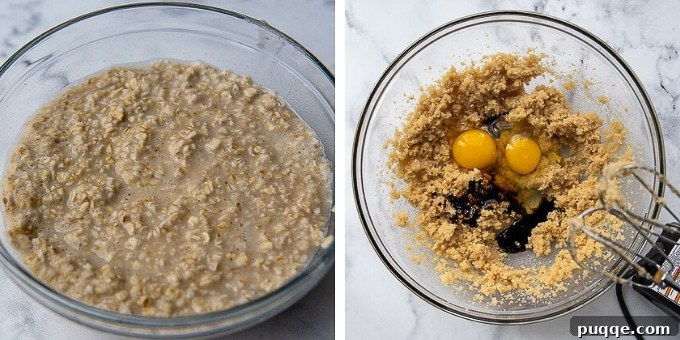
- Prepare the Oats: In a small bowl, combine the quick cooking oats with boiling water. Stir well and set aside to cool slightly for about 30 minutes. This step is key for softening the oats, which contributes to the cake’s tender texture.
- Cream Butter and Sugars: In a large mixing bowl or the bowl of a stand mixer fitted with a paddle attachment, beat together the softened unsalted butter with both granulated and brown sugars. Cream on medium-high speed for approximately 4 minutes, until the mixture is light, pale, and fluffy. This aeration is crucial for a tender cake.
- Add Wet Ingredients: Incorporate the room temperature eggs one at a time, mixing well after each addition. Then, stir in the dark molasses and vanilla extract until fully combined. Scrape down the sides of the bowl to ensure everything is evenly mixed.
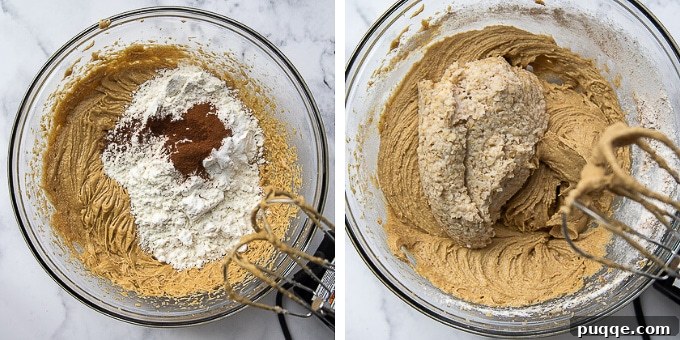
- Combine Dry Ingredients: In a separate medium bowl, whisk together the all-purpose flour (or gluten-free flour blend), baking soda, baking powder, salt, ground cinnamon, and ground cloves. This ensures the leavening agents and spices are evenly distributed throughout the batter.
- Mix Wet and Dry: Gradually add the dry ingredient mixture to the creamed butter mixture, mixing on low speed until just combined. Be careful not to overmix.
- Incorporate Oats: Finally, add the slightly cooled oatmeal mixture to the batter and beat until everything is well incorporated. The batter will be noticeably thick.
- Bake the Cake Layers: Preheat your oven to 350°F (175°C). Prepare two 9-inch cake pans by spraying them with cooking spray, lining the bottoms with parchment paper cut to size, and spraying again. Divide the thick batter evenly between the prepared pans. Use an offset spatula to smooth the tops.
- Baking Time: Bake for 20-24 minutes, or until a toothpick inserted into the center of the cake layers comes out clean.
- Cooling: Allow the cake layers to cool in their pans for about 10 minutes before running a knife around the edges to loosen them. Carefully invert the cakes onto wire racks to cool completely. Ensuring they are fully cool before filling is essential to prevent the creme from melting.
Crafting the Irresistible Oatmeal Cream Pie Filling
If you’re acquainted with other classic snack cakes like Ding Dong Cake or gluten-free whoopie pies, you know how particular I am about copycat recipes. My goal was to create an oatmeal creme pie filling that tasted *exactly* like the Little Debbie’s version – light, sweet, and airy, rather than heavy and gooey with cream cheese or marshmallow. When this perfectly replicated filling is generously spread between two soft, molasses-rich oatmeal cakes, it truly is Oatmeal Creme Pie Cake perfection. Pinky swear.
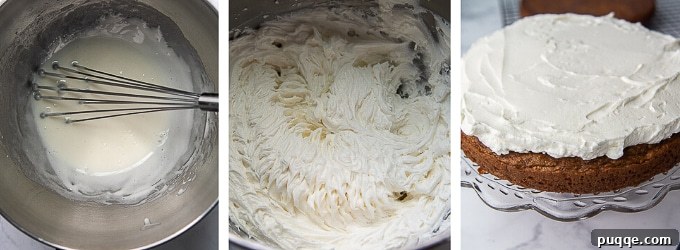
- Pasteurize Egg White: In a heatproof medium-sized bowl, whisk together the egg white with ½ cup of the powdered sugar. Place this bowl over a pot of gently simmering water, ensuring the bottom of the bowl does not directly touch the water. Whisk continuously for about 3 minutes, or until the mixture is hot to the touch (around 140°F if using an instant-read thermometer). This step safely pasteurizes the egg white.
- Cool Slightly: Remove the bowl from the heat and allow the mixture to cool slightly.
- Add Flavors: To the egg white mixture, add the vanilla extract, heavy cream, and the remaining powdered sugar. Beat until the mixture is smooth and well combined.
- Whip in Shortening: If using a stand mixer, switch to a paddle attachment. Add the shortening and beat on high speed for approximately 4 minutes, until the filling becomes incredibly light, airy, and fluffy. This whipping action is what gives the creme its signature texture.
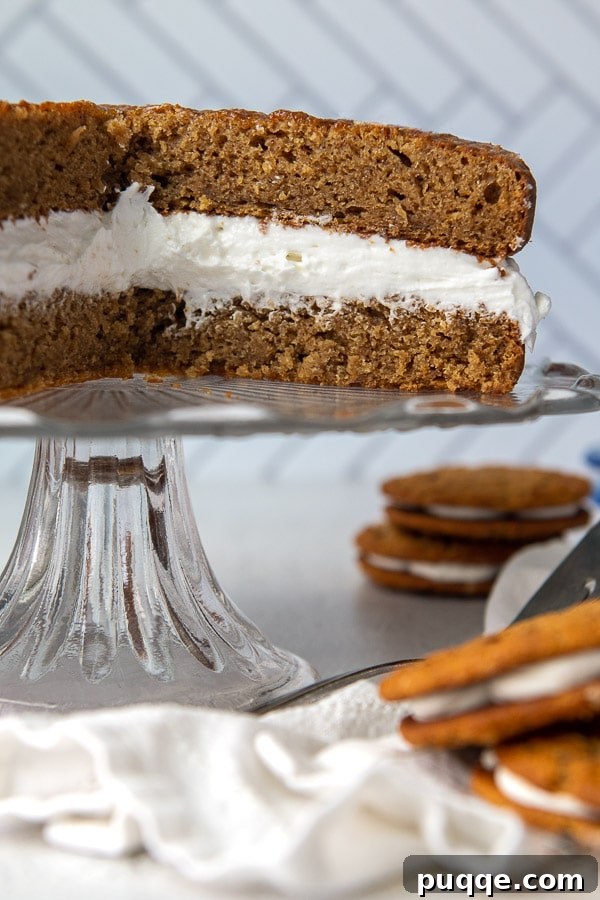
- Assemble the Cake: Once both cake layers are completely cooled, place one layer on your desired serving platter or cake stand. Use an offset spatula to evenly spread the entire creme filling over the first cake layer. Gently place the second cake layer on top. Slice with a serrated knife for clean cuts.
Creating Delicious Gluten-Free Oatmeal Creme Pies
It’s a common frustration that Little Debbie doesn’t offer a gluten-free version of their iconic snack cakes. Fortunately, this homemade recipe is completely gluten-free adaptable, ensuring everyone can enjoy this delightful treat!
When substituting gluten-free flour in this recipe, you might notice that the cake layers require a few extra minutes in the oven to bake through completely. Additionally, unlike traditional baking where overmixing can lead to tough results, gluten-free baked goods often *benefit* from more thorough mixing. This helps to relax and adequately hydrate the starches in the gluten-free flour blend, resulting in a more tender and cohesive cake structure. For best results, I highly recommend a high-quality, all-purpose gluten-free flour blend like Cup4Cup, which is known for its excellent texture in cakes and cookies.
Choosing the Right Oatmeal for Your Creme Pie Cake
The type of oatmeal you choose significantly impacts the final texture of your cake. While many baked goods, such as Oatmeal Raisin Cookies, typically call for old-fashioned rolled oats for a hearty and rustic chew, this particular recipe aims for a different outcome.
To faithfully replicate the delicate, soft texture of the original Little Debbie cookie, quick-cooking oats are essential. Their finer consistency blends seamlessly into the cake batter, creating a smoother, more uniform crumb that truly mimics the classic snack cake. If you’re preparing a gluten-free oatmeal cream pie, it is imperative to use certified gluten-free oats. These oats are processed on dedicated equipment to prevent cross-contamination with wheat ingredients, ensuring your dessert remains safe for those with gluten sensitivities.
Make Ahead, Freezing, and Storing Tips
This Oatmeal Creme Pie Cake is wonderfully versatile, offering both make-ahead and freezer-friendly options, making it ideal for entertaining or enjoying over several days. The cake layers and the fluffy filling can both be prepared in advance and stored separately. Alternatively, the assembled cake can be kept at room temperature for up to 3 days. When storing, always ensure cakes are securely wrapped individually or, if assembled, the entire cake is covered to maintain freshness and prevent drying out.
Important Note on Refrigeration: I highly advise against refrigerating this cake. The cold temperature tends to dry out the delicate cake layers and causes the signature fluffy filling to harden and solidify, altering its delightful texture. If you need to store the cake for longer than 3 days, freezing is the preferred method.
To Freeze Individual Components: Bake and cool the cake layers completely. Once cooled, wrap each layer tightly with plastic wrap, then place the wrapped layers into ziplock freezer bags for double protection against freezer burn. The creme filling can be stored in an airtight container in the freezer.
To Freeze an Assembled Cake: The entire assembled cake can be frozen for up to 3 months. To do so, wrap it securely first with plastic wrap, then with aluminum foil to protect it from ice crystals and odors. When ready to enjoy, thaw the cake at room temperature for several hours or overnight.
Maximizing Flavor: Best Tips for Making Oatmeal Creme Pie Cake
- Cooling is Key: Ensure the quick oats mixed with boiling water have enough time to cool slightly before incorporating them into the cake batter. This prevents them from cooking the other ingredients.
- Room Temperature Ingredients: Always use room temperature butter and eggs for the cake layers. This allows for better emulsification and a more uniform, tender crumb.
- Accurate Filling Temperature: When pasteurizing the egg white and powdered sugar mixture for the filling, use an instant-read or candy thermometer to ensure it reaches 140°F (60°C). This guarantees food safety and the correct consistency for the filling.
- Filling Consistency: While heavy cream is recommended for the fluffiest filling, half and half or milk can be substituted. However, be aware that these alternatives might result in a slightly less airy and rich texture.
- No Refrigeration for Assembled Cake: Store any leftovers at room temperature, securely wrapped. Refrigerating will dry out the cake and cause the filling to solidify, losing its characteristic fluffiness.
- Making Filling Ahead: If preparing the filling in advance, keep it covered or in an airtight container at room temperature. Give it a quick whip before assembly if it has settled.
- Variations: This versatile recipe can also be adapted to make giant cookie layers instead of cake layers (see the original cookie recipe below the main recipe card), or even whoopie pies or cupcakes, using the delightful creme as frosting.
Click here to see thestep-by-step visual web story for this recipe!
More Decadent Dessert Recipes You’ll Love
- Almond Joy Cake: A delightful cake inspired by the classic candy bar.
- Homemade Lemon Coconut Cake: A bright and zesty cake, perfect for spring and summer.
- Baked Alaska: An impressive dessert with layers of cake, ice cream, and meringue.
- Snickers Pie: Indulge in this rich and decadent pie featuring Snickers flavors.
- Peanut Butter Chocolate Cake: The ultimate combination for chocolate and peanut butter lovers.
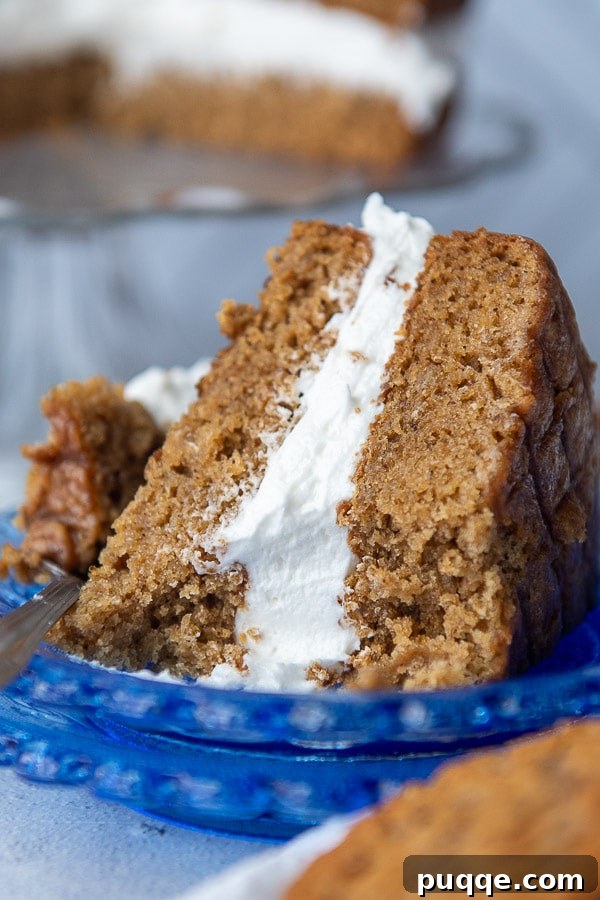
SAVE THIS Best Oatmeal Creme Pie Cake Recipe TO YOUR PINTEREST BOARD!
Let’s be friends on Pinterest! I’m always sharing great recipes and culinary inspiration!
BEST Homemade Oatmeal Creme Pie Cake

Melissa Erdelac
Pin
Rate
Video instructions for making this Oatmeal Creme Pie Cake are available.
Ingredients
Oatmeal Cake
- 1 cup quick cooking oats
- 1 cup boiling water
- ½ cup unsalted butter, softened
- ⅔ cup sugar
- ⅔ cup packed brown sugar
- 2 eggs, room temperature
- 1 tablespoon dark molasses
- 1 teaspoon vanilla extract
- 1 ⅓ cup all-purpose flour or gluten free flour (I recommend Cup 4 Cup gluten free flour)
- 1 teaspoon baking soda
- ½ teaspoon baking powder
- ¼ teaspoon salt
- ¾ teaspoon cinnamon
- ¼ teaspoon ground cloves
Creme Pie Filling
- 1 egg white
- ½ teaspoon vanilla extract
- 2 tablespoons heavy cream
- 2 cups powdered sugar, divided
- ¾ cup shortening
Equipment
- Stand Mixer
- 9 inch Cake Pans
- Offset Spatula
- Instant Read Thermometer (optional, but recommended for filling)
Instructions
Oatmeal Cake
- In a small bowl, place the quick oats and pour boiling water over them. Stir and set aside to cool slightly for about 30 minutes. This helps soften the oats for a tender cake texture.
- Preheat oven to 350ºF (175°C). Spray two 9-inch cake pans with cooking spray. Line the bottoms with cut-to-size parchment paper, then spray again. Set aside.
- In a large mixing bowl or stand mixer fitted with a paddle attachment, cream together softened butter, granulated sugar, and brown sugar at medium-high speed until pale, light, and creamy, which typically takes about 4 minutes. Add the eggs one at a time, mixing well after each addition. Then, mix in the vanilla extract and dark molasses until well combined.
- To the creamed butter mixture, add the flour (all-purpose or gluten-free), baking soda, baking powder, salt, cinnamon, and ground cloves. Mix on low speed until the dry ingredients are just incorporated. Then, add the slightly cooled oatmeal mixture and beat until thoroughly combined. The batter will be very thick.
- Divide the thick batter evenly into the two prepared cake pans. Use an offset spatula or the back of a spoon to smooth the batter evenly across the bottom of each pan. Bake for 20-24 minutes, or until a toothpick inserted into the middle of the cake comes out clean.
- Allow the cakes to cool in their pans for 10 minutes before carefully running a knife around the edges to loosen them. Invert the cake layers onto wire racks to cool completely. It is crucial for the cakes to be entirely cool before applying the filling to prevent melting.
Filling
- In a heatproof medium-sized bowl, whisk together the egg white with ½ cup of the powdered sugar. Place this bowl over a pot of barely simmering water, ensuring the bottom of the bowl does not touch the water directly, but sits a few inches above. Continuously whisk the egg white and powdered sugar mixture for about 3 minutes, until the egg whites are hot to the touch or register 140°F (60°C) on an instant-read thermometer. Remove the bowl from the heat and let it cool slightly.
- To the cooled egg white mixture, add the vanilla extract, heavy cream, and the remaining powdered sugar. Beat with an electric mixer until the mixture is smooth and well combined.
- If using a stand mixer, switch to a paddle attachment. Add the shortening to the mixing bowl and mix on high speed for 4 minutes, until the filling becomes very light, airy, and fluffy.
- To assemble, place one completely cooled cake layer on your chosen serving platter or cake stand. Use an offset spatula to evenly spread the entire creme filling over the first cake layer. Gently place the second cake layer on top. Slice the cake with a serrated knife for clean portions and store, covered, at room temperature for up to 3 days.
Notes
Best Tips for Making Oatmeal Creme Pie Cake
- Always allow enough time for the oats and boiling water mixture to cool before adding it to the cake ingredients. This prevents prematurely cooking the batter.
- For guaranteed food safety and optimal texture of the filling, use an instant-read or candy thermometer to ensure the egg white/powdered sugar mixture reaches 140°F.
- While heavy cream is ideal for the filling’s fluffiness, half and half or milk can be used as substitutes, though they may result in a slightly less airy consistency.
- Store any leftover cake at room temperature, securely wrapped. Refrigeration will dry out the cake and cause the delicate filling to solidify, impacting the overall experience.
- If you’re preparing the filling ahead of time, store it covered in an airtight container at room temperature. A quick re-whip might be necessary before assembly to restore its fluffiness.
- For a “giant cookie” version rather than a cake, refer to the original Little Debbie Oatmeal Cream Pie recipe below the main recipe card for adjusted instructions.
- Consider transforming this recipe into individual whoopie pies or cupcakes by using the delectable creme as a generous frosting.
Make Ahead / Freezing / Storing
Store any leftovers at room temperature, securely wrapped, rather than refrigerating. Refrigeration will dry out the cake and solidify the filling. The cake will stay good for up to three days at room temperature.
The cake layers and filling may be prepared ahead of time and stored separately or assembled at room temperature for up to 3 days. Ensure to securely wrap cakes individually or cover the entire assembled cake.
To freeze, bake and cool cake layers completely, then wrap each layer tightly with plastic wrap. Store wrapped layers in ziplock freezer bags for double protection. Freeze the filling in an airtight container.
Alternatively, the assembled cake may be frozen for up to 3 months. Be sure to wrap it securely with plastic wrap and then aluminum foil for protection against ice crystals forming.
Calories: 478kcal
,
Carbohydrates: 56g
,
Protein: 4g
,
Fat: 28g
,
Saturated Fat: 11g
,
Cholesterol: 61mg
,
Sodium: 271mg
,
Potassium: 95mg
,
Fiber: 2g
,
Sugar: 39g
,
Vitamin A: 375IU
,
Calcium: 38mg
,
Iron: 1mg
Did you make this recipe?
Please leave a star rating and review below. It helps others when searching for recipes and I LOVE feedback!
Original Giant Oatmeal Creme Cookie Recipe
For those who prefer a soft cookie texture reminiscent of the classic Little Debbie’s, this variation focuses on creating two giant cookie layers. The filling recipe remains exactly the same as above.
Ingredients:
- 1 1/4 cups (2 1/2 sticks) unsalted butter, softened
- 1 cup packed brown sugar
- 1/2 cup granulated sugar
- 1 large egg
- 2 teaspoons vanilla extract
- 1 tablespoon dark molasses
- 1 1/2 cups all-purpose flour or gluten-free flour blend (such as Cup4Cup)
- 1 teaspoon baking soda
- 1/2 teaspoon salt
- 3/4 teaspoon ground cinnamon
- 1/4 teaspoon ground cloves
- 3 cups quick-cooking oats
Instructions:
- Preheat your oven to 350ºF (175°C). Prepare two 9-inch cake pans by spraying them with cooking spray. Line the bottom of each pan with parchment paper cut to size, and then spray the parchment paper again. Set these prepared pans aside.
- In a large mixing bowl or the bowl of a stand mixer fitted with a paddle attachment, cream together the softened unsalted butter, packed brown sugar, and granulated sugar at medium-high speed. Continue beating for about 4 minutes until the mixture is pale, light, and creamy. Incorporate the large egg, vanilla extract, and dark molasses, mixing until well combined.
- In a separate medium bowl, whisk together the all-purpose flour (or gluten-free flour), baking soda, salt, cinnamon, and cloves until thoroughly mixed. Add the quick-cooking oats to this dry mixture and stir to combine.
- Gradually add the dry ingredients to the butter and sugar mixture, mixing on low speed until all ingredients are just incorporated. Be careful not to overmix. The resulting cookie dough will be very thick.
- Divide the dough into two equal portions and press each half evenly into the prepared 9-inch cake pans. Use your fingers to press the dough down firmly, then use an offset spatula to smooth the surface evenly.
- Bake the cookie layers for 22-24 minutes, or until the edges are golden brown and set, but the center still appears soft. The cookies will firm up as they cool.
- Allow the giant cookies to cool in their pans for about 30 minutes. To avoid cracking, gently run a knife around the edges of each cookie. Place a wire rack on top of each cake pan, hold everything together, and then carefully invert the pan to release the cookie onto the wire rack. Let them cool completely before spreading with the creme filling.
Adapted from Sally’s Baking Addiction
This post contains affiliate links. My opinions are always my own. If you purchase a product through an affiliate link, I make a small commission – at no cost to you. Read full disclosure policy here.